Honeywell RTH7460D1000/U Bedienungsanleitung
Honeywell
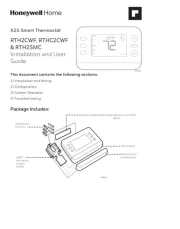
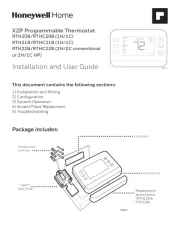
Thermostat
RTH7460D1000/U
Lies die bedienungsanleitung für Honeywell RTH7460D1000/U (40 Seiten) kostenlos online; sie gehört zur Kategorie Thermostat. Dieses Handbuch wurde von 94 Personen als hilfreich bewertet und erhielt im Schnitt 4.6 Sterne aus 47.5 Bewertungen. Hast du eine Frage zu Honeywell RTH7460D1000/U oder möchtest du andere Nutzer dieses Produkts befragen? Stelle eine Frage
Seite 1/40

RTH7400,
RTH7500 Series
Programmable Thermostat
Quick Installation Guide
Heat
Tools you will need Tools you may need
Wire stripper
Needle-nose pliers Drill and
drill bit
(See step 11)
Included in your box
Screws and
anchors
UWP™
Mounting
System
(UWP)
RTH7400/
RTH7500Thermostat
Quick Install Guide
Small flat head scr
ewdriver
Phillips scr
ewdriver
Pencil
Level

2
Quick Installation Guide
Removing your old thermostat
2 Check that your system is off.
Change the temperature on your
old thermostat. If you don’t hear the
system turn on within 5 minutes, the
power is off.
Note: If you have a digital
thermostat that has a blank display,
skip this step
1 Turn power OFF.
To protect yourself and your
equipment, Turn off the power at the
breaker box or switch that controls
your heating/cooling system.
3 Remove the old thermostat’s
faceplate.
On most thermostats, you can take
off the faceplate by grasping and
gently pulling. Some thermostats
may have screws, buttons, or clasps.
Do not remove any wires from your
thermostat at this time!
75
OFF
OFF
ON
Breaker box
Switch
4 Make sure there are no
120 V/240 V wires.
Do you have thick black wires with
wire nuts?
Is your thermostat 120 V or higher?
If you answered yes to either of
these questions, you have a line
voltage system and the thermostat
will not work.
If you are unsure visit:
resideo.com
Wire nut
Thick black wire
Read and save these instructions

3
RTH7400/RTH7500 Series
5 Take a picture of how your wiring
looks right now.
Be sure to include the letters
next to the terminals where the
wires are inserted. This will be a
helpful reference when wiring your
thermostat.
Tip: If the color of your wires has
faded or if 2 terminals have the
same wire color, use the wire labels
provided in the package to label
each wire.
6 Remove any jumpers
A jumper connects one terminal to
another terminal. It may look like
a small staple or even a colored
wire and must be removed before
continuing. Use a screwdriver to
release wires from terminals.
The RTH7400/RTH7500
thermostat does not need jumpers.
YR RC
Example of
a jumper
Terminals
7 Record if you have wires in the following terminals.
Do not include jumpers as a part of your count. The thermostat does not
need jumpers.
Terminal Wire Color
R
Rh
Rc
8 Write down the color of the wires.
Check mark the wires that are connected to terminals. Next to the check mark,
write down the color of the wire. Do not include jumpers as a part of your
count.
Check all that apply (Not all will apply):
Terminal Wire Color
Y
Y2
G
C
Terminal Wire Color
A or L/A
O/B
W2 or AUX
E
W
K
The RTH7400/RTH7500 thermostat does not support L/A, S, or U terminals.
If there are wires in terminals that are not listed, you will need additional
wiring support. Visit resideo.com to find out if the thermostat will work for you.
Produktspezifikationen
| Marke: | Honeywell |
| Kategorie: | Thermostat |
| Modell: | RTH7460D1000/U |
Brauchst du Hilfe?
Wenn Sie Hilfe mit Honeywell RTH7460D1000/U benötigen, stellen Sie unten eine Frage und andere Benutzer werden Ihnen antworten
Bedienungsanleitung Thermostat Honeywell
7 Juli 2025

7 Juli 2025

7 Juli 2025
25 Juni 2025

5 Oktober 2024

4 Oktober 2024

30 September 2024

27 September 2024

24 September 2024

15 September 2024
Bedienungsanleitung Thermostat
- Hager
- Arnold Rak
- Seitron
- Schneider
- Perel
- GENERAL Life
- SPC
- Lowes
- Bulex
- Jumo
- Sinustec
- ELKO
- Wachendorff
- Nobo
- Elro
Neueste Bedienungsanleitung für -Kategorien-
19 August 2025
18 August 2025
14 August 2025
13 August 2025

12 August 2025
12 August 2025

12 August 2025
9 August 2025
9 August 2025
8 August 2025