Klein Tools 89021 Bedienungsanleitung
Klein Tools Wellness 89021
Lies die bedienungsanleitung für Klein Tools 89021 (4 Seiten) kostenlos online; sie gehört zur Kategorie Wellness. Dieses Handbuch wurde von 16 Personen als hilfreich bewertet und erhielt im Schnitt 5.0 Sterne aus 4 Bewertungen. Hast du eine Frage zu Klein Tools 89021 oder möchtest du andere Nutzer dieses Produkts befragen? Stelle eine Frage
Seite 1/4
89021
•Flares3/16",1/4",5/16",3/8",7/16",1/2"and5/8"O.D.tubing.
•Forsofttubingonly–copper,aluminum,brassandsteel.
•Ruggedforgedsteelslip-onyokeandhardenedaringbar.
•Positiveclampingactionofbarpreventstubeslippage.
•Selfcenteringyokewithswivel-type,hardenedsteel,chrome-nish
aringconeformsbetterareswithlesseffort.
•Designofyokepermitsaringwherethereislittlespacebetweennut
andtubeend.
1. Before flaring, be sure that the tubing is cut off squarely, and cut-off
burrs are completely removed.
2. Slip a flare nut onto the tubing. (Flare nut is not supplied with kit.)
3. Loosen the wing nuts, which will permit the separation of the two
halves of the bar.
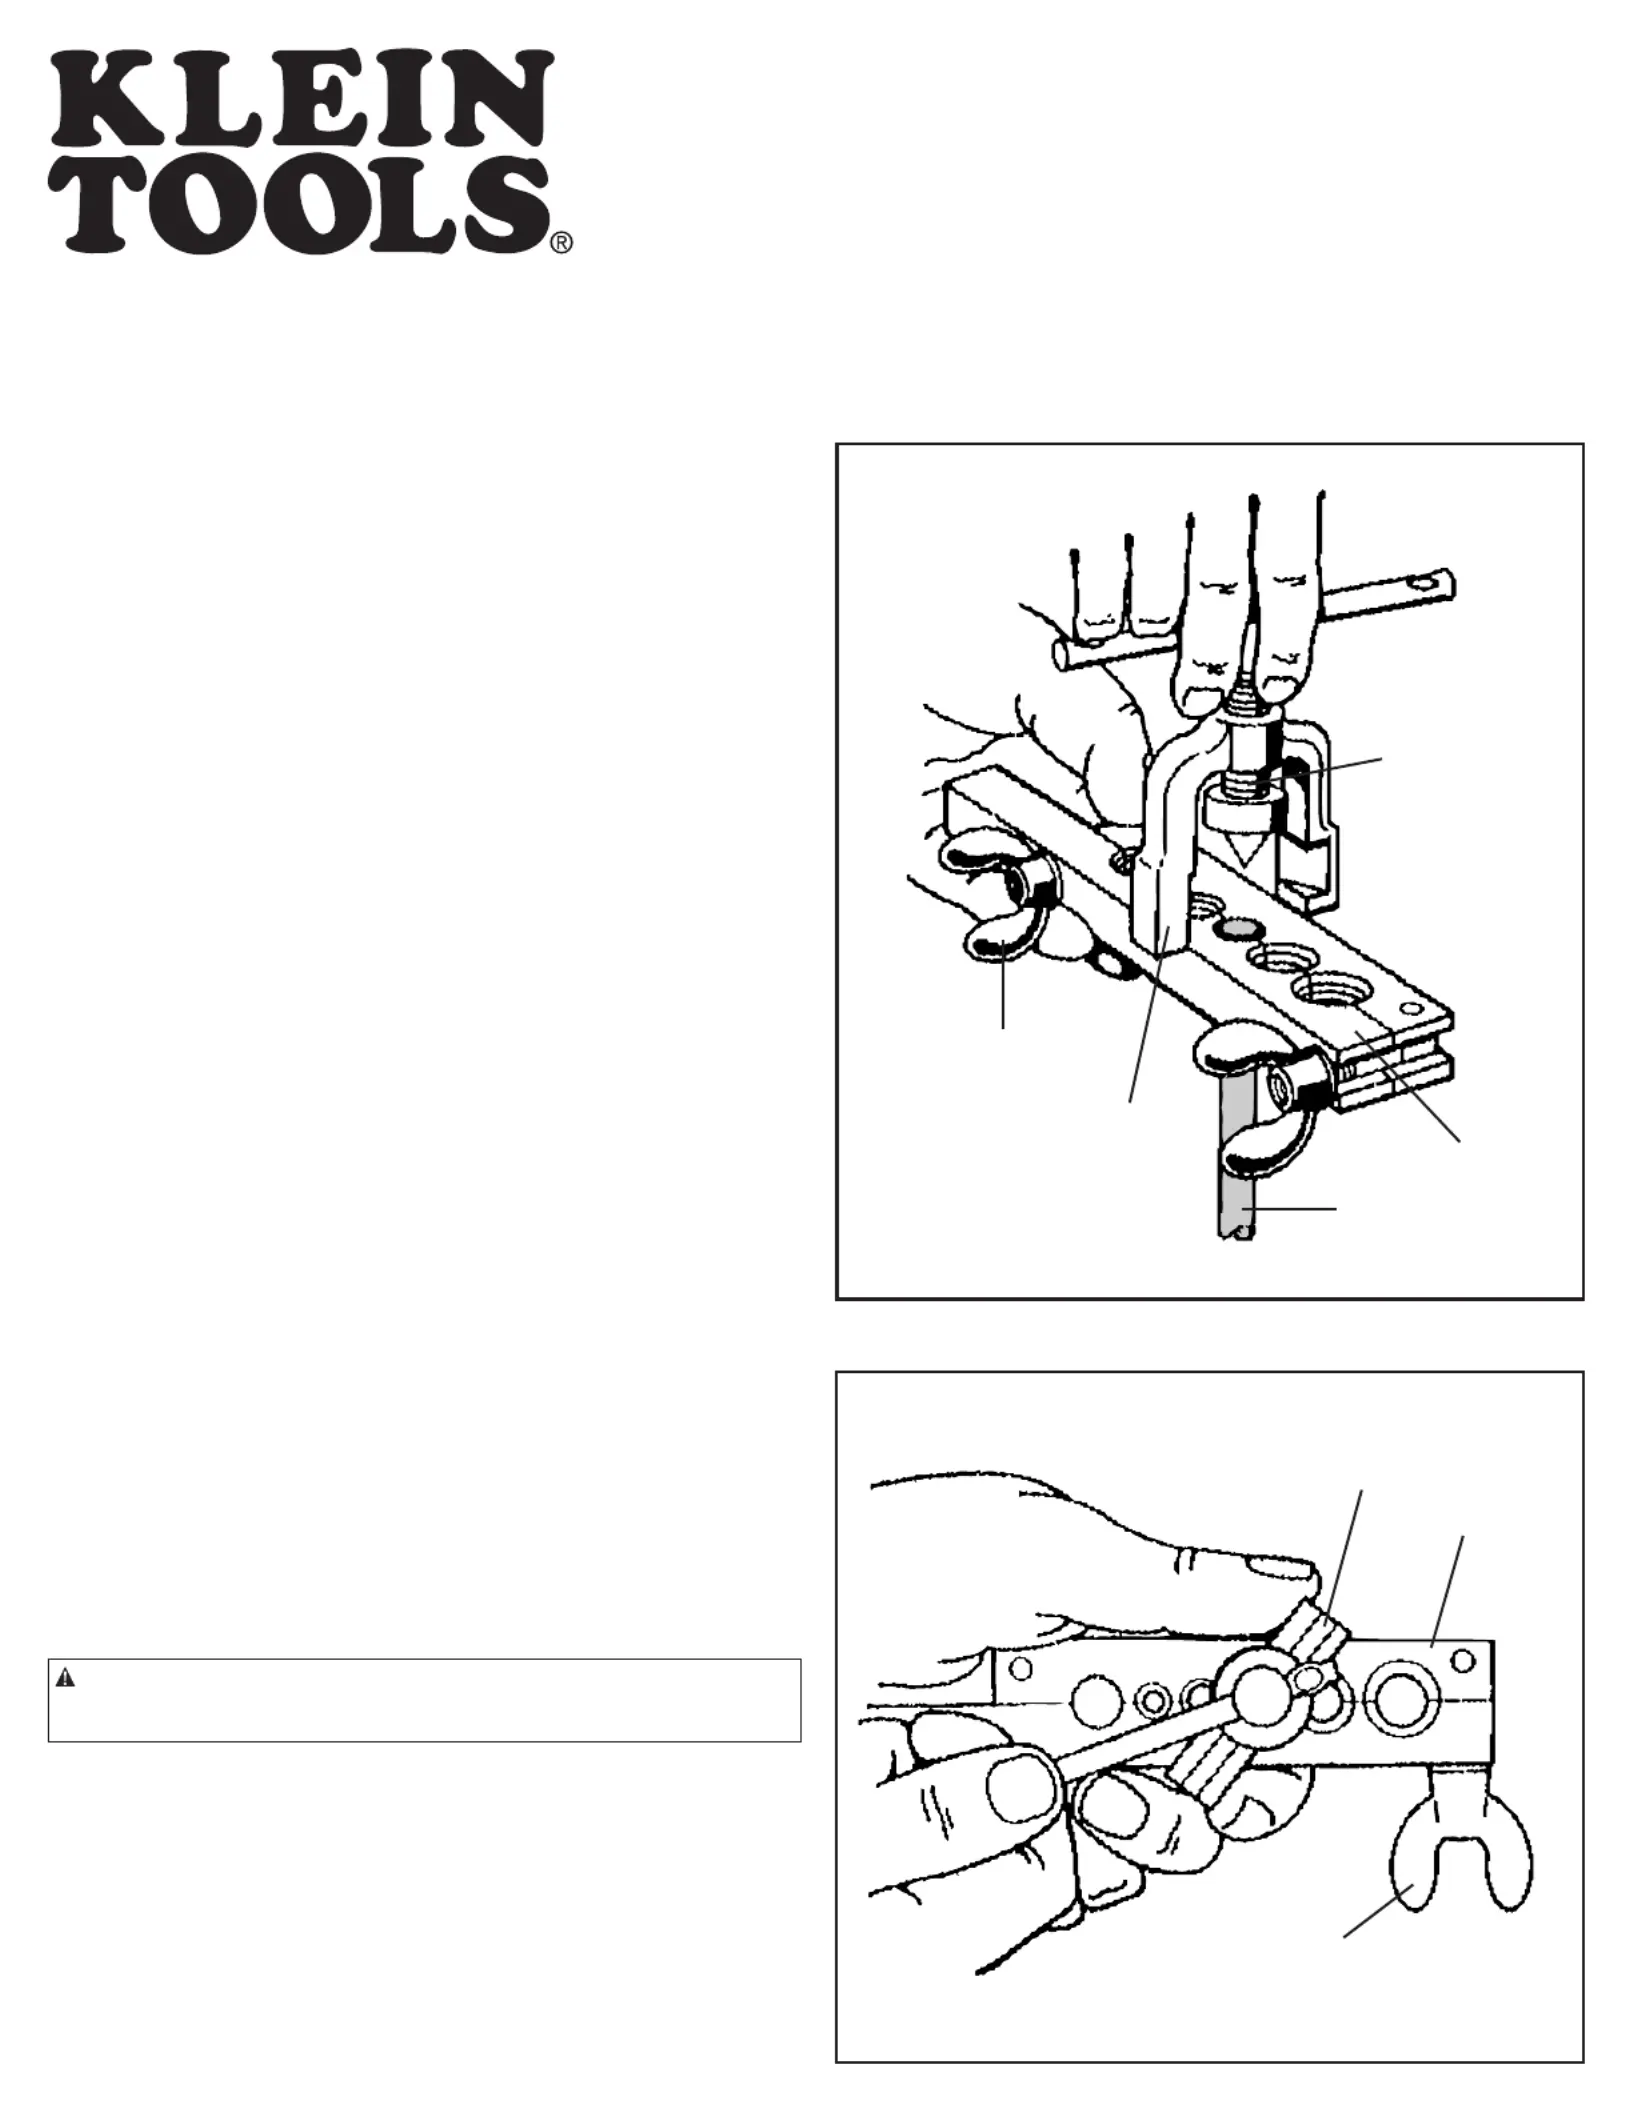
4. Insert the tubing into the bar hole of the corresponding size allowing
tubing to protrude above the face of the tool approximately 1/8" more
than the diameter of the tube you are flaring (i.e. on 1/2" O.D. tubing,
tubing should protrude 5/8" above the face of the bar.). (See Fig.1).
5. Tighten the wing nuts. It is a good practice to tighten the wing nut
nearest to the tube first. The wings on the nuts are of a special shape
that permits using the rod of the yoke as a lever in tightening. Nuts
must be securely tightened so there is no chance of the tube slipping.
6. Place the yoke over the bar of the tool so that the cone is over the
tubing. Note that the yoke of this tool is the slip-on type that can be
slipped directly over the bar without twisting or turning. (See Fig.1).
The inside edges of the yoke are slotted so that once in position, a
slight turn clockwise holds it in place. Yoke should be held in position
by the thumb and forefinger. (See Fig. 2).
7. Turn the feed screw down firmly. The result will be an accurate
45° flare.
NOTE: Oil feed screw and all moving parts with petroleum lubricating
grease or equivalent, to prolong life, reduce operation effort, and as-
sure reliable results. Keep flaring bar hole grooves free of dirt and oil.
Warranty
This Klein product, manufactured and sold for commercial or industrial uses, is
warranted to be free from defects in materials and workmanship for the normal life of the
product. THERE ARE NO IMPLIED WARRANTIES OF MERCHANTABILITY OR FITNESS. At
its option, Klein will repair or replace, or refund the purchase price of, any product which
fails to conform with this warranty under normal use and service. InnoeventshallKlein
beliableforincidentalorconsequentialdamage.
WARNINGS:
Always wear approved eye protection.•
Never use on or near live electrical circuits. •
INSTRUCTIONS FOR BAR-TYPE FLARING TOOLS WITH SLIP-ON YOKE
FIG.1
FIG.2
Wingnut
Feedscrew
Slip-onyoke
Wingnuts
Bar
Yoke
Bar
Tube
Produktspezifikationen
| Marke: | Klein Tools |
| Kategorie: | Wellness |
| Modell: | 89021 |
Brauchst du Hilfe?
Wenn Sie Hilfe mit Klein Tools 89021 benötigen, stellen Sie unten eine Frage und andere Benutzer werden Ihnen antworten
Bedienungsanleitung Wellness Klein Tools

23 September 2025
22 September 2025
8 September 2025
1 September 2025
1 September 2025
31 August 2025
31 August 2025
31 August 2025
31 August 2025
31 August 2025
Bedienungsanleitung Wellness
Neueste Bedienungsanleitung für -Kategorien-
29 März 2026
19 November 2025
18 November 2025
17 November 2025
5 November 2025
12 Oktober 2025
10 Oktober 2025
8 Oktober 2025
6 Oktober 2025
27 September 2025