Saris Cycle-On Pro Bedienungsanleitung
Saris Fahrradträger Cycle-On Pro
Lies die bedienungsanleitung für Saris Cycle-On Pro (4 Seiten) kostenlos online; sie gehört zur Kategorie Fahrradträger. Dieses Handbuch wurde von 33 Personen als hilfreich bewertet und erhielt im Schnitt 4.5 Sterne aus 6 Bewertungen. Hast du eine Frage zu Saris Cycle-On Pro oder möchtest du andere Nutzer dieses Produkts befragen? Stelle eine Frage
Seite 1/4
20" wheel
tray mount
Standard wheel
tray mount
USER MANUAL
C
C
C
C
Cy
y
y
y
yc
c
c
c
cl
l
l
l
le
e
e
e
e-
-
-
-
-O
O
O
O
On
n
n
n
n
P
P
P
P
Pr
r
r
r
ro
o
o
o
o
Please READ and FOLLOW all instructions carefully.
4017 (1 1/4” RECEIVER) OR 4018 (2” RECEIVER)
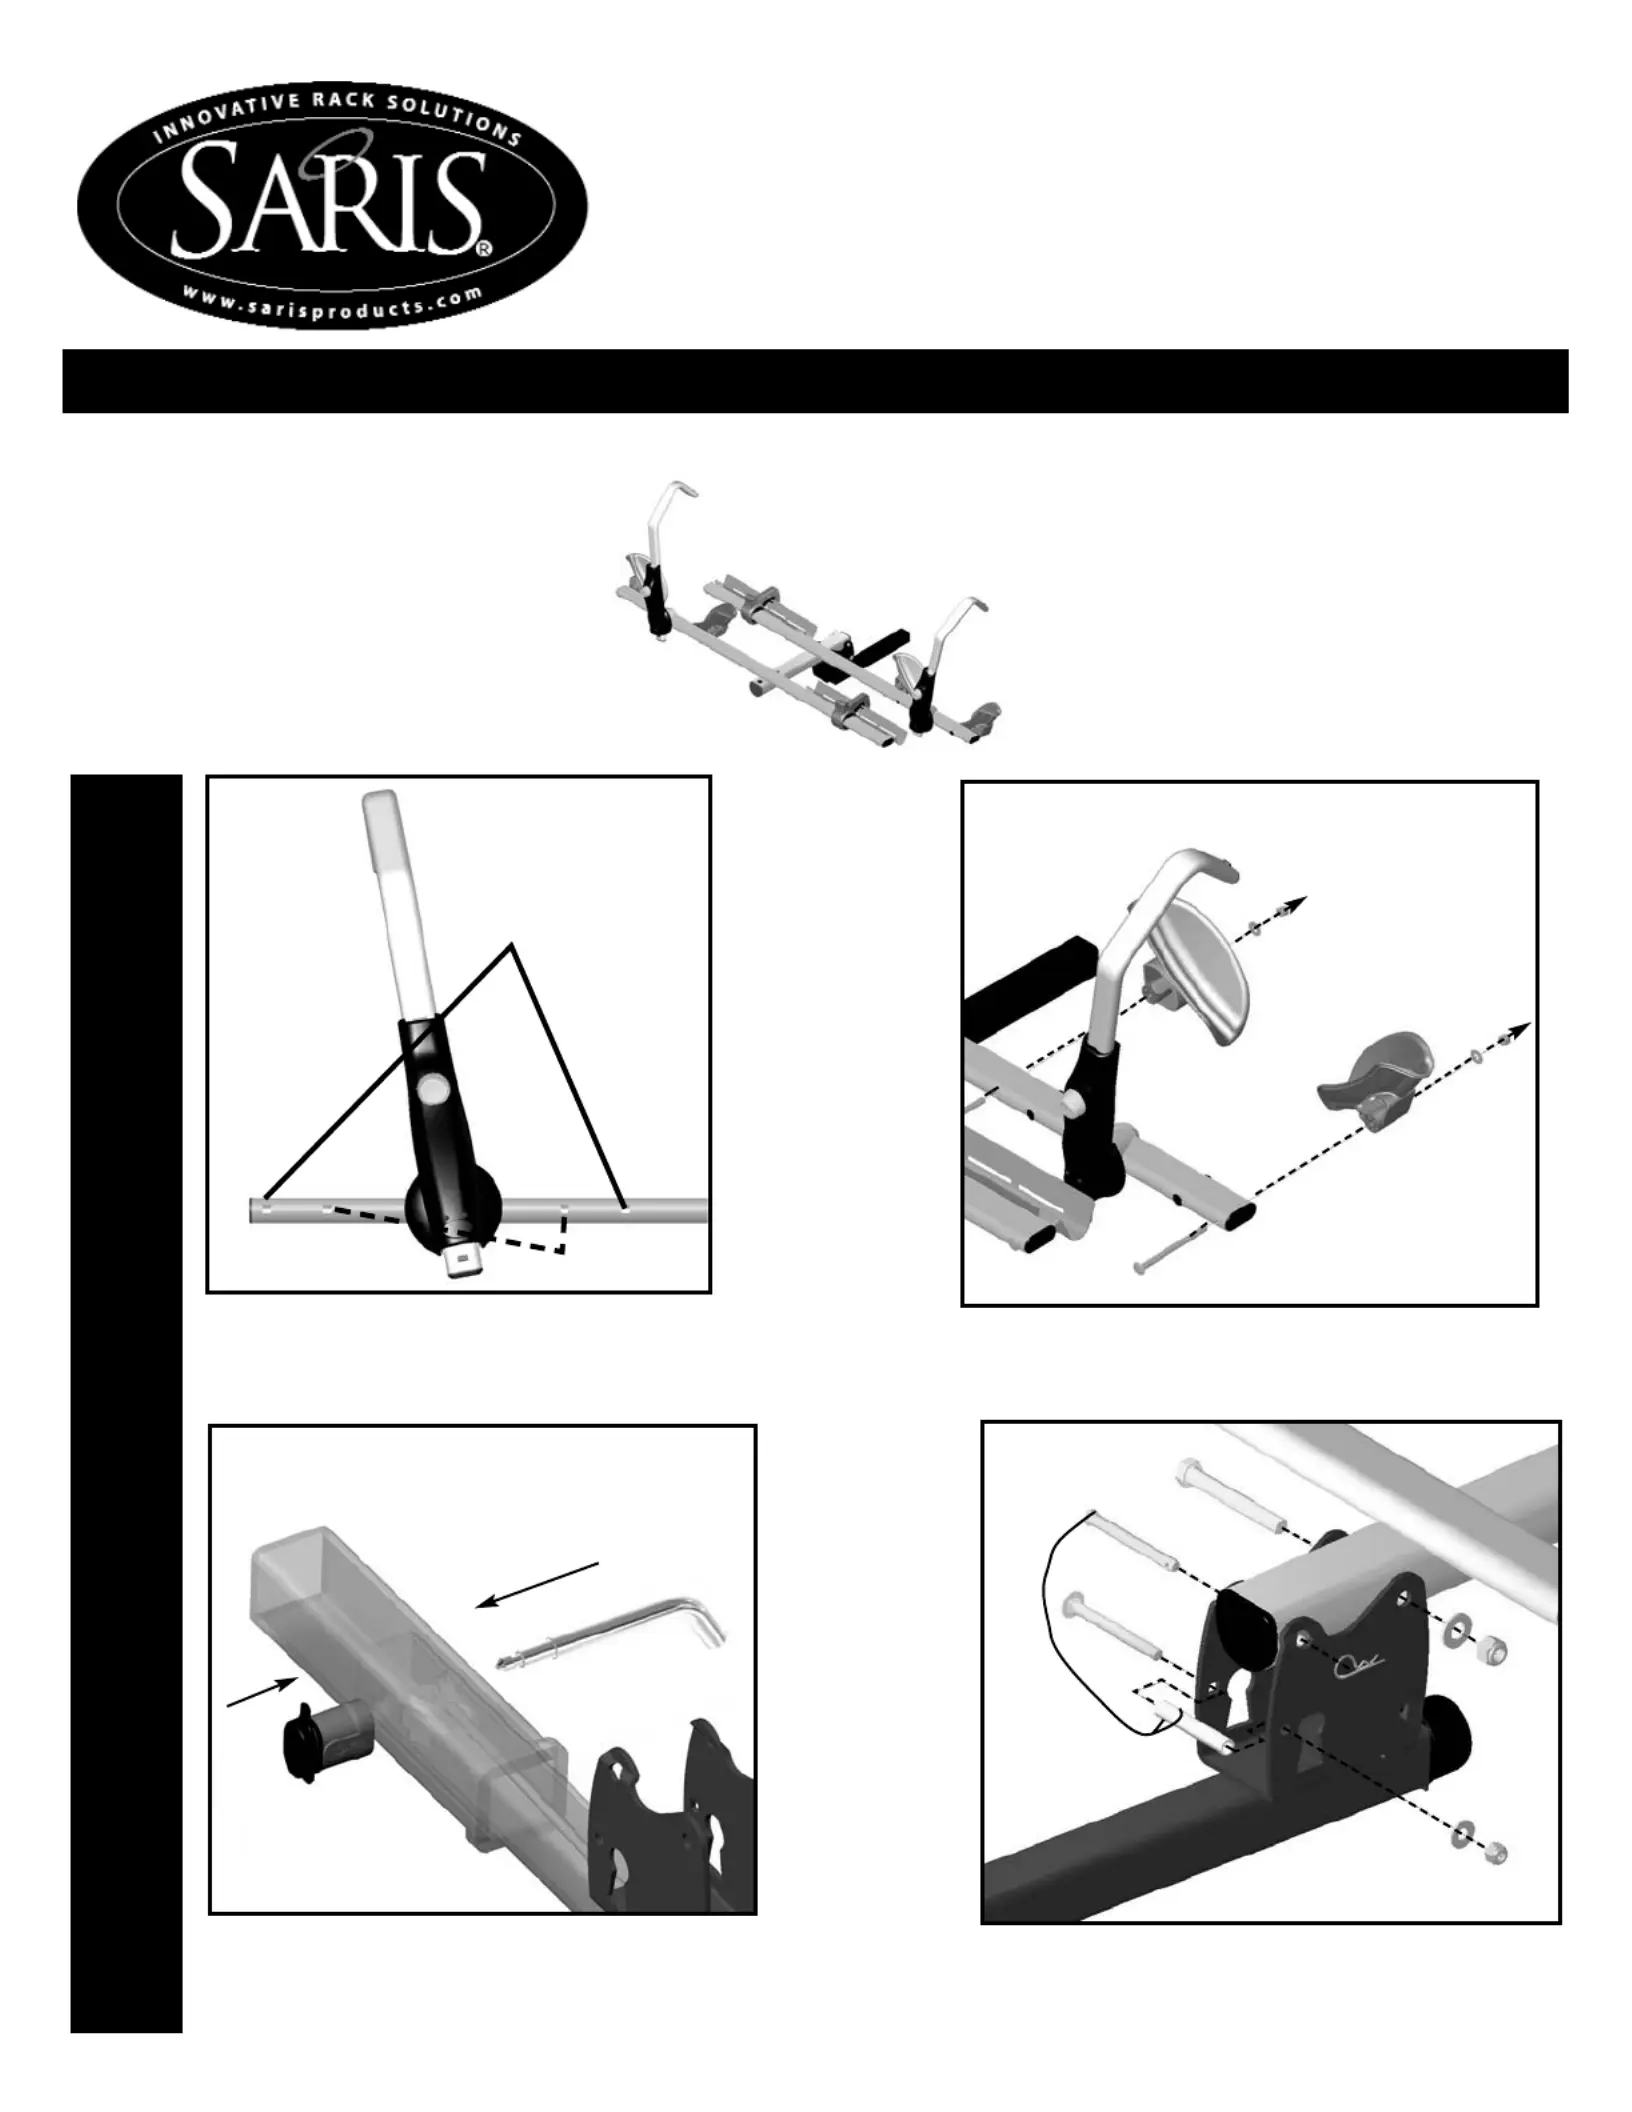
ASSEMBLE FRONT WHEELTRAYS - Determine which holes you
will use to mount the front wheel trays (Fig. 1A). For 20” tires inner-
most holes must be used(20” tire bikes cannot be mounted on the
#4012 add on kit).
Tube
Bolt
Front Wheel
Tray
Washer
Nut
Insert bolt through tube, slide wheel tray on, fasten with washer
and nut (Fig. 1B). Tighten nut until it is snug, where wheel tray
pivots freely. Repeat for each of the 2 front wheel trays.
Next attach the rack to the tilt bracket. Assemble in stepped
order (step 1, 2, 3) as shown above. Tighten knob at end of
bracket until bracket is tight in receiver.
1
2
3
Insert plugs into
unused holes.
1A
1B
2B
MUST use 2 wheel trays per wheel.
See Picture 4B.
Front Wheel
Tray
Washer
Nut
Bolt
Tube
Insert hitch pin and lock into place as shown above. (Note:
Do not stick locking cable through hole, only hitch pin.)
Steel Pin
Pin with
Lanyard
Knob
1
2
Produktspezifikationen
| Marke: | Saris |
| Kategorie: | Fahrradträger |
| Modell: | Cycle-On Pro |
Brauchst du Hilfe?
Wenn Sie Hilfe mit Saris Cycle-On Pro benötigen, stellen Sie unten eine Frage und andere Benutzer werden Ihnen antworten
Bedienungsanleitung Fahrradträger Saris

5 Juli 2025
28 Juni 2025
7 Oktober 2024
10 August 2024
4 August 2024
2 August 2024
2 August 2024
2 August 2024
2 August 2024
1 August 2024
Bedienungsanleitung Fahrradträger
Neueste Bedienungsanleitung für -Kategorien-
14 März 2026
21 Januar 2026
16 Dezember 2025
25 November 2025
25 November 2025
24 November 2025
23 November 2025
23 November 2025
22 November 2025
21 November 2025