StarTech.com KEYBOARD-TRAY-CLAMP1 Bedienungsanleitung
StarTech.com Nicht kategorisiert KEYBOARD-TRAY-CLAMP1
Lies die bedienungsanleitung für StarTech.com KEYBOARD-TRAY-CLAMP1 (2 Seiten) kostenlos online; sie gehört zur Kategorie Nicht kategorisiert. Dieses Handbuch wurde von 21 Personen als hilfreich bewertet und erhielt im Schnitt 4.5 Sterne aus 9 Bewertungen. Hast du eine Frage zu StarTech.com KEYBOARD-TRAY-CLAMP1 oder möchtest du andere Nutzer dieses Produkts befragen? Stelle eine Frage
Seite 1/2
Quick-Start Guide
To view manuals, FAQs, videos, drivers, downloads, technical drawings, and more, visit www.startech.com/support
Manual Revision: January 28, 2022 3:27 PM
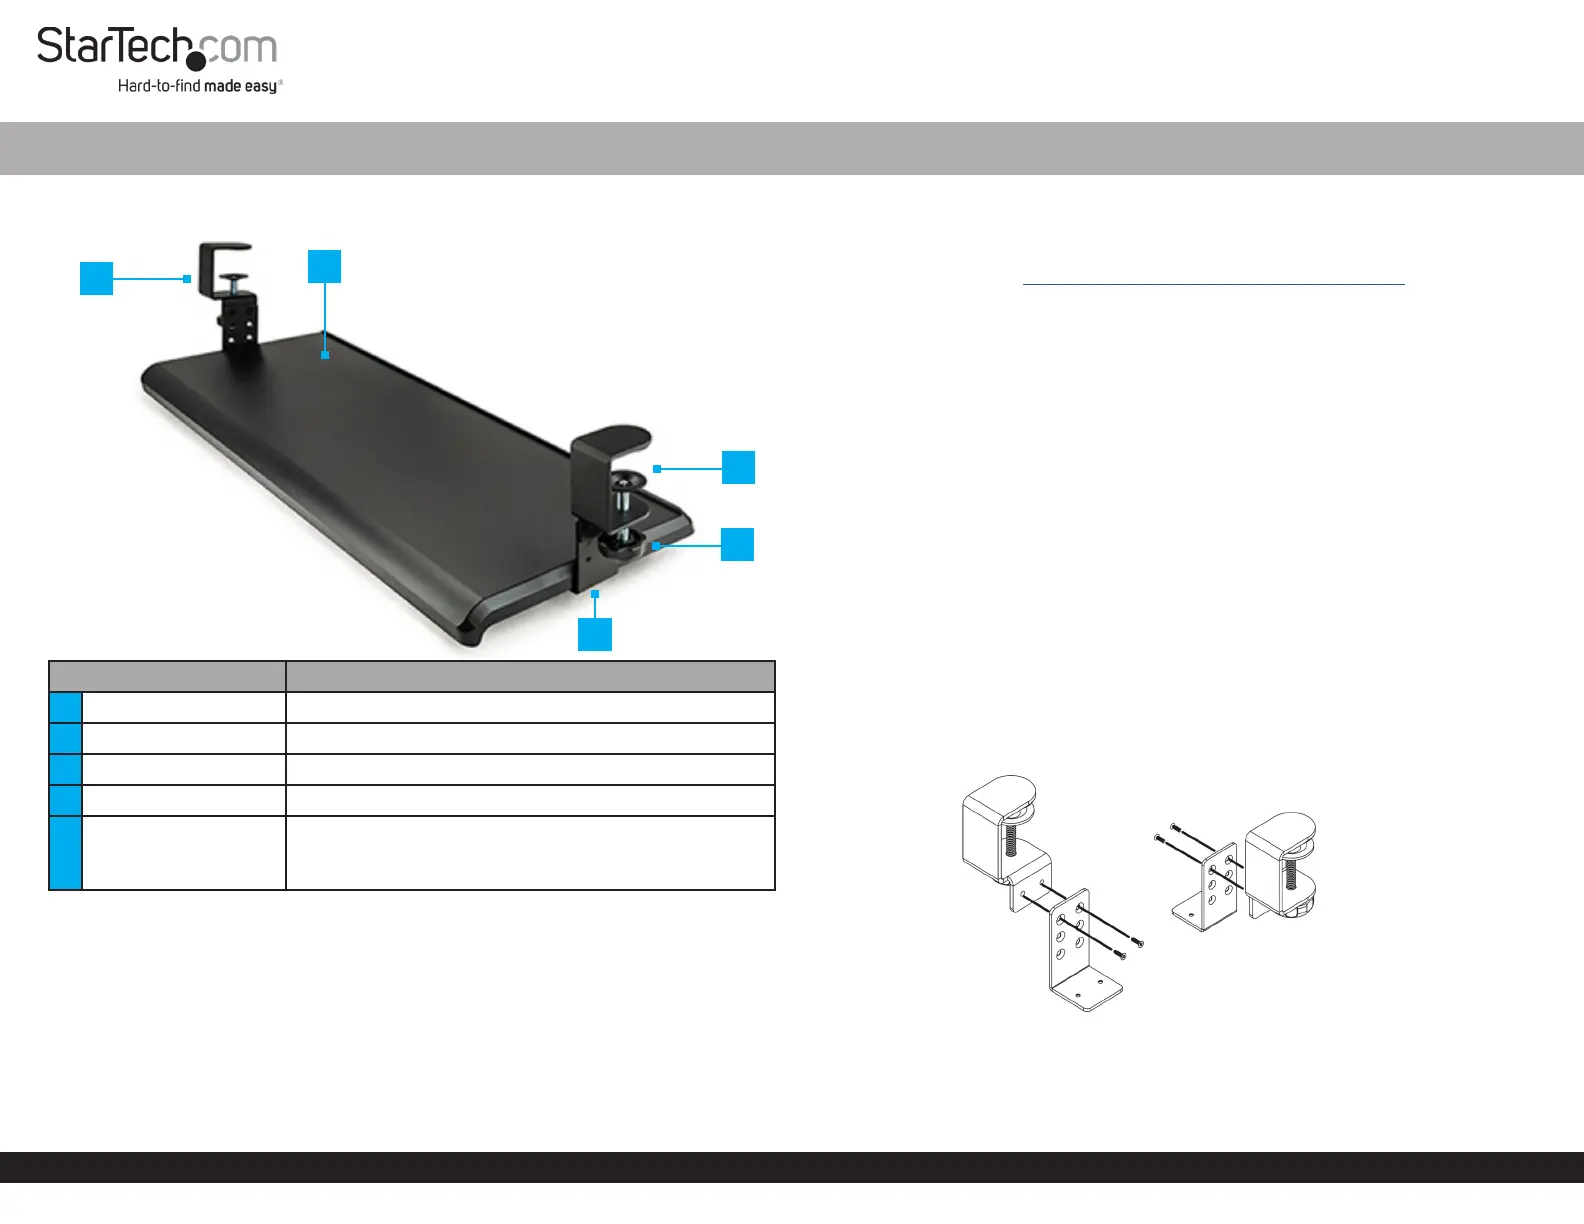
Product Diagram (KEYBOARD-TRAY-CLAMP1)
ComponentFunction
1Desk Clamp, Left• Attach the Keyboard Tray to the Desk
2Keyboard Tray• Place a keyboard and a mouse on the Keyboard Tray
3Desk Clamp, Right• Attach the Keyboard Tray to the Desk
4Clamp Knob• Turn by hand to secure the Clamp to the Desk
5
Height Adjustment L
Bracket
• Adjust the height between the Desk and the
Keyboard Tray
• Attach the Keyboard Tray to the Desk Clamp
Package Contents
• Keyboard Tray x 1
• Height Adjustment Screws x 5
• Tray Mounting Screws x 5
• Height Adjustments L Brackets x 2
• Desk Clamp Left x 1
• Desk Clamp Right x 1
• Quick-star Guide x1
Desk Clamp Keyboard Tray
Requirements
For the latest manuals, product information, technical specications, and declarations of
conformance, please visit: www.startech.com/KEYBOARD-TRAY-CLAMP1
• Phillips Head Screwdriver
Installation
WARNING!
Do not exceed the weight capacity of this product. Overloading this product might
result in injury or property damage. This product can support the following weight: up
to 11.8 kg (26 lbs).
Ensurethe mounted Keyboard Tray is properly secured to the Desk before use.
Attach the Desk Clamp to the Height Adjustment L
Brackets
1. Determine the desired height between the Desk and the Keyboard Tray: 100,
120, or 140 mm (3.9, 4.7, or 5.5 in). Each row of holes on the Height Adjustment
L Bracket are spaced 20 mm apart. The row of holes, located closest to the bend
of the Height Adjustment L Brackets, provides the minimum height adjustment
setting of 100 mm (3.9 in).
2. Secure the Height Adjustment L Bracket to the Desk Clamps using the Height
Adjustment Screws (x2 shorter screws) and tighten using a Phillips Head
Screwdriver to complete the rst Desk Clamp Assembly (Figure 1).
3. Repeat steps 2 and 3 to install the second Desk Clamp Assembly
Attach the Desk Clamp Assemblies to the Keyboard Tray
1. Flip the Keyboard Tray upside down and align the mounting holes located on
3
1
2
5
4
Figure 1
Produktspezifikationen
| Marke: | StarTech.com |
| Kategorie: | Nicht kategorisiert |
| Modell: | KEYBOARD-TRAY-CLAMP1 |
Brauchst du Hilfe?
Wenn Sie Hilfe mit StarTech.com KEYBOARD-TRAY-CLAMP1 benötigen, stellen Sie unten eine Frage und andere Benutzer werden Ihnen antworten
Bedienungsanleitung Nicht kategorisiert StarTech.com

28 März 2026
24 März 2026
15 März 2026
13 März 2026
11 März 2026
11 März 2026
4 März 2026
3 März 2026
3 März 2026
3 März 2026
Bedienungsanleitung Nicht kategorisiert
Neueste Bedienungsanleitung für -Kategorien-
3 April 2026
3 April 2026
3 April 2026
3 April 2026
3 April 2026
3 April 2026
3 April 2026
3 April 2026
3 April 2026
3 April 2026