StarTech.com LTSTND Bedienungsanleitung
Lies die bedienungsanleitung für StarTech.com LTSTND (2 Seiten) kostenlos online; sie gehört zur Kategorie Flachbildschirmunterstützung. Dieses Handbuch wurde von 26 Personen als hilfreich bewertet und erhielt im Schnitt 4.8 Sterne aus 5 Bewertungen. Hast du eine Frage zu StarTech.com LTSTND oder möchtest du andere Nutzer dieses Produkts befragen? Stelle eine Frage
Seite 1/2
Quick-Start Guide
To view manuals, FAQs, videos, drivers, downloads, technical drawings, and more, visit www.startech.com/support.
Manual Revision: July 4, 2019
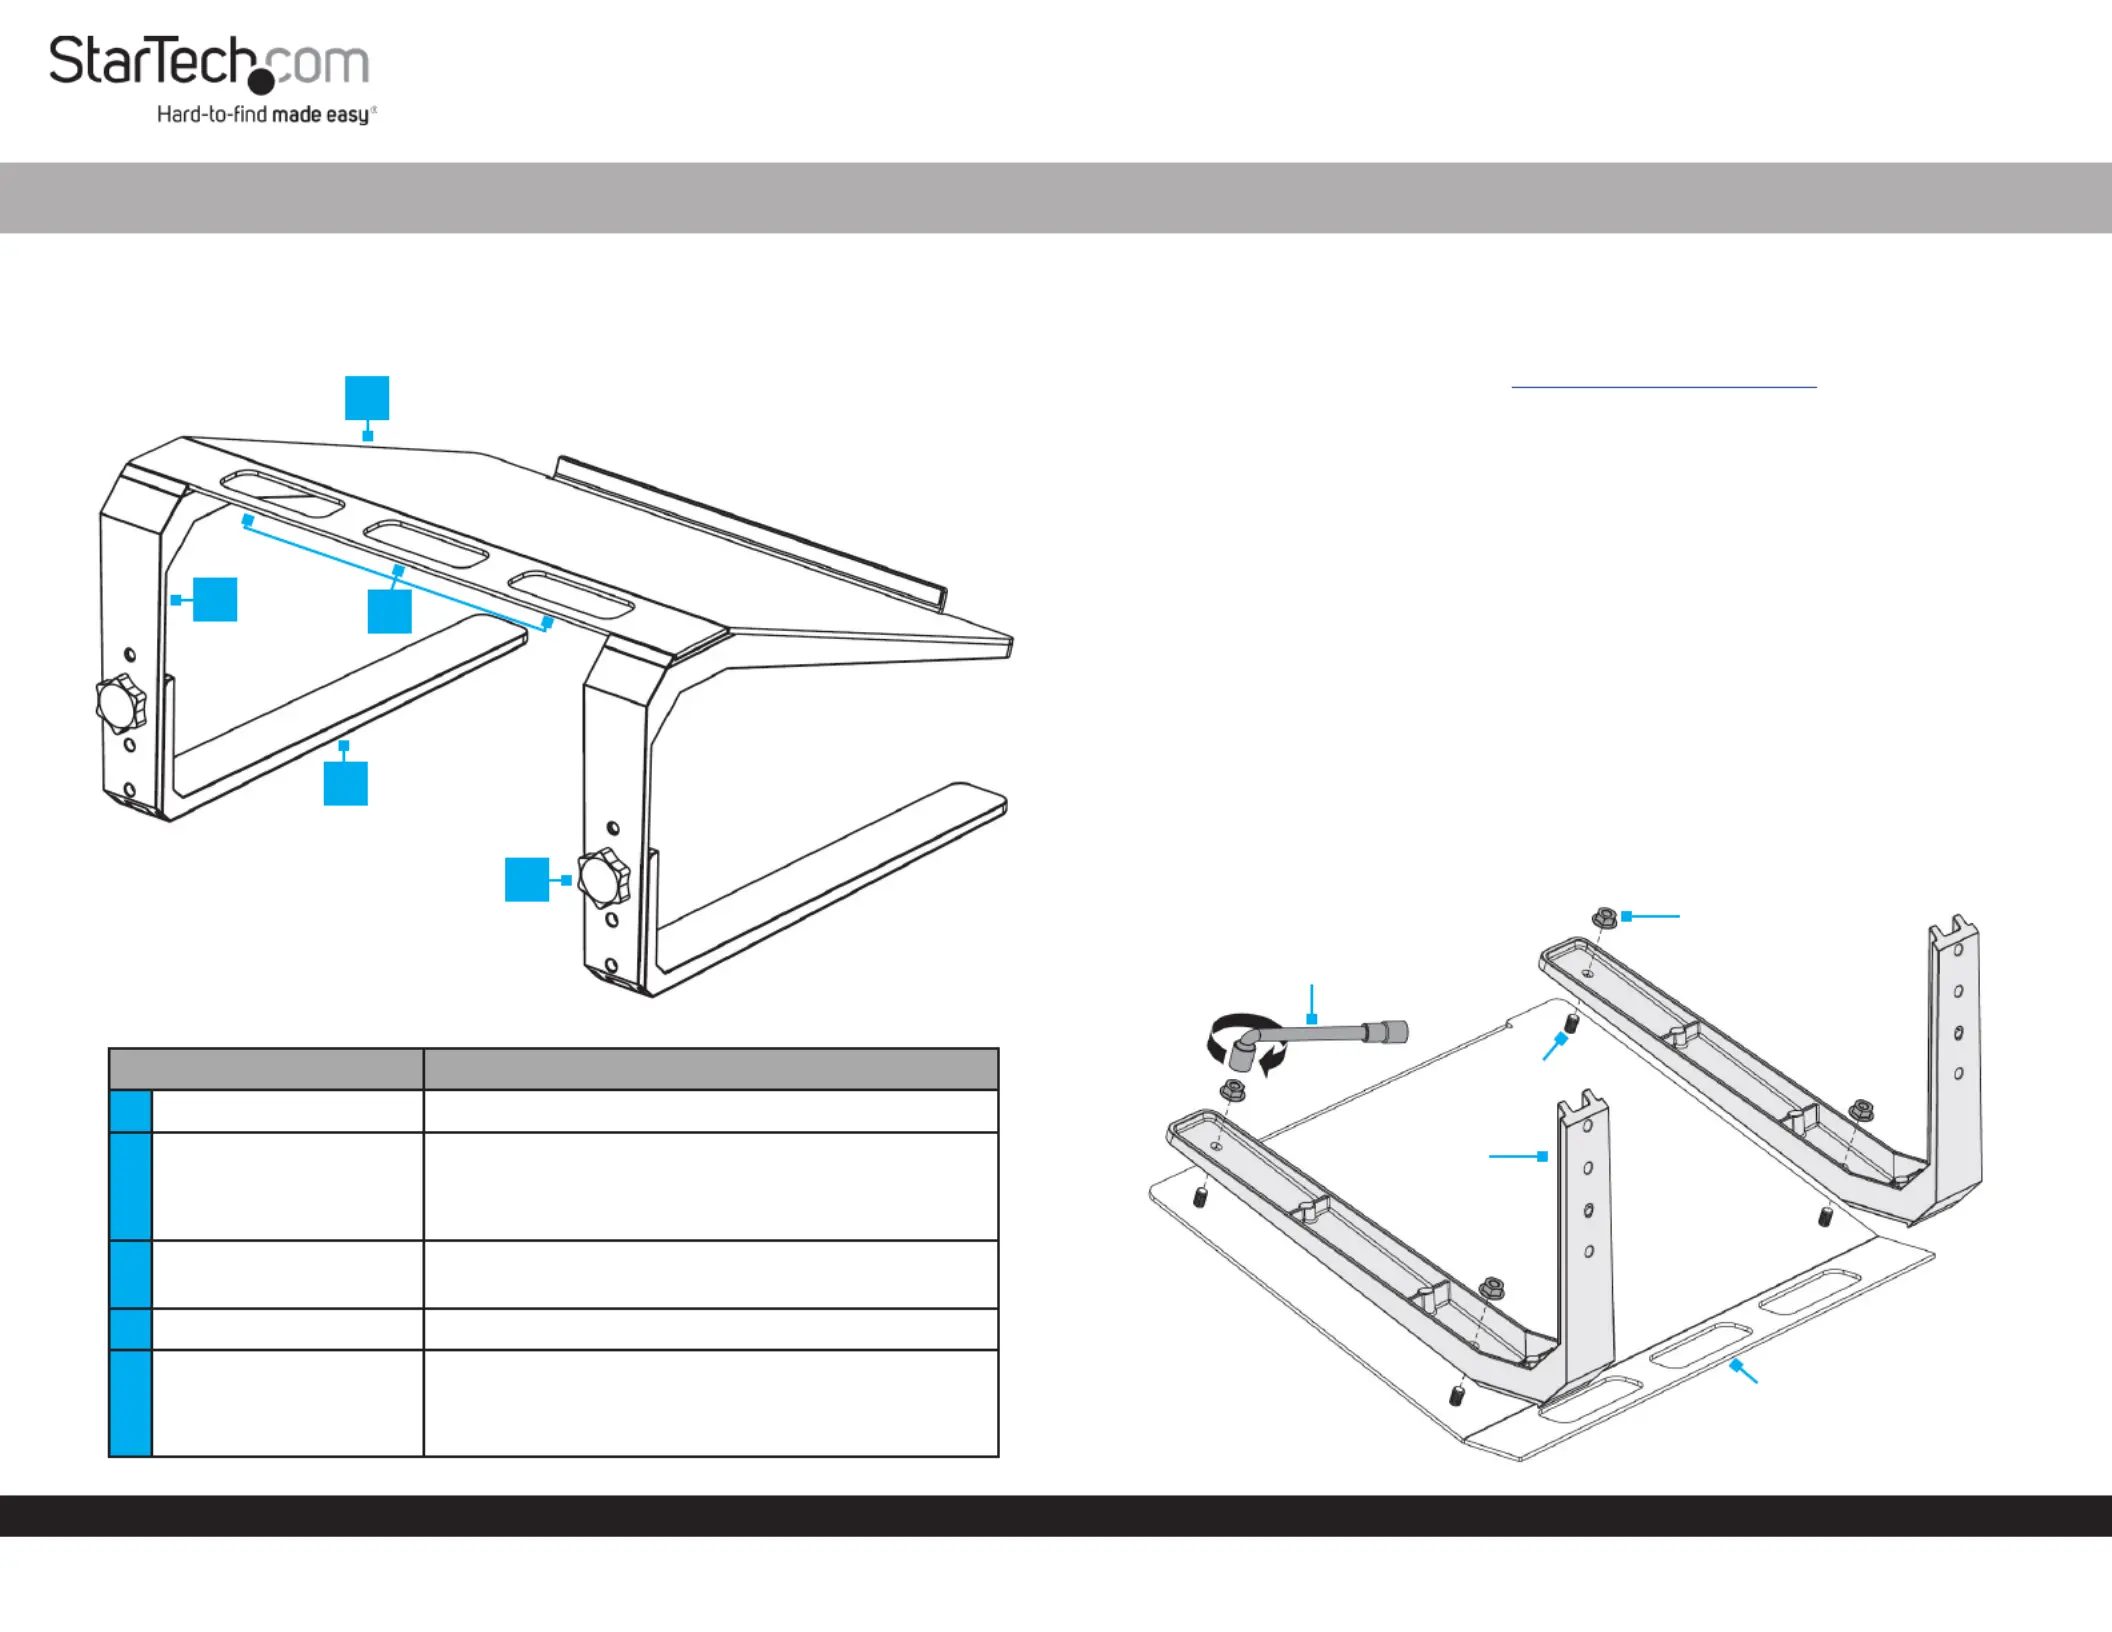
Product Diagram (LTSTND)
Angled View
PartFunction
1Top Plate• A platform for a Laptop
2Upper Leg
• Attaches to the Top Plate
• Congurable with three height-adjustment
settings
3
Cable-Management
Slots
• Organize and route Cables
4Lower Leg• Attaches to the Upper Leg
5
Height-Adjustment
Knob
• Secure the and Upper LegsLower Legs
together
• Can be removed to adjust height settings
Laptop Stand - Height Adjustable
Requirements
• Clean, Flat, and Stable Surface x 1
For the latest requirements please visit: . www.startech.com/LTSTND
Installation
Assembly
1. Place the , top side down, onto a .Top PlateClean, Flat, and Stable Surface
Note: The lip on the can overhang o the edge of the for a level Top PlateSurface
installation.
2. Place the onto the . Ensure the in the Upper LegsTop PlateHolesUpper Legs
are aligned with the on the . The slanted portion of the Threaded PostsTop Plate
Upper LegsTop Plate should be aligned with the slanted portion of the .
3. Secure the to the using two for each side. Fasten the Upper LegsTop Plate,Nuts
NutsWrench using the . (Figure 1)
Note: Align the outside edges of the with the outside edges of the Upper LegsTop
PlateNuts before tightening the .
1
4
2
5
3
Figure 1
Wrench
Nut
Upper Leg
Top Plate
Threaded
Post
Produktspezifikationen
| Marke: | StarTech.com |
| Kategorie: | Flachbildschirmunterstützung |
| Modell: | LTSTND |
| Breite: | 357 mm |
| Tiefe: | 318 mm |
| Gewicht: | 2750 g |
| Produkttyp: | Laptop-Ständer |
| Produktfarbe: | Schwarz, Silber |
| Höhe: | 185 mm |
| Material: | Aluminium, Steel |
| Höhenverstellung: | Ja |
| Höchstgewichtskapazität: | 20 kg |
| Verpackungsbreite: | 337 mm |
| Verpackungstiefe: | 420 mm |
| Verpackungshöhe: | 95 mm |
| Paketgewicht: | 3200 g |
| Zertifizierung: | REACH, CE, RoHS |
| Warentarifnummer (HS): | 84733080 |
| Höhenanpassungsrate: | 185 - 235 mm |
| Anpassbar: | Ja |
| Maximale Notebook-Bildschirm-Größenkompatibilität: | 17 " |
Brauchst du Hilfe?
Wenn Sie Hilfe mit StarTech.com LTSTND benötigen, stellen Sie unten eine Frage und andere Benutzer werden Ihnen antworten
Bedienungsanleitung Flachbildschirmunterstützung StarTech.com

13 November 2025
27 Juli 2025
27 Juli 2025
26 Juli 2025
26 Juli 2025
26 Juli 2025
26 Juli 2025
26 Juli 2025
26 Juli 2025
26 Juli 2025
Bedienungsanleitung Flachbildschirmunterstützung
Neueste Bedienungsanleitung für -Kategorien-
3 April 2026
2 April 2026
2 April 2026
2 April 2026
2 April 2026
2 April 2026
1 April 2026
1 April 2026
1 April 2026
1 April 2026