Wilbur Curtis TLP Bedienungsanleitung
Lies die bedienungsanleitung für Wilbur Curtis TLP (8 Seiten) kostenlos online; sie gehört zur Kategorie Kaffeemaschine. Dieses Handbuch wurde von 37 Personen als hilfreich bewertet und erhielt im Schnitt 4.3 Sterne aus 3 Bewertungen. Hast du eine Frage zu Wilbur Curtis TLP oder möchtest du andere Nutzer dieses Produkts befragen? Stelle eine Frage
Seite 1/8
IMPORTANT: The
brewcycle is adjusted
at the factory to ll a
standard 2.5 liter airpot with 2.2
liters of brewed coffee. The dura-
tion of the brewcycle is set from 3
to 4 minutes.
System Requirements
• Water Source: 20 ‑ 100 PSI. Must have a Minimum Flow Rate of 1/2 GPM (preferred ow rate is 1 gpm).
• Electrical: See attached schematic for your model.
Setup Steps
1. The unit should be level (left to right ‑ front to back), on a secure surface.
2. Connect the water line to the water inlet tting on the rear of the unit. Water volume ow to the machine should be
consistent. Use tubing sized sufciently to provide a minimum ow rate of one gallon per minute.
MODEL
• TLP
1
W C CilbururtisompanynC, i.
CAUTION: Please use
this setup procedure
before attempting to use
this brewer. Failure to
follow the instructions can result
in injury or the voiding of the
warranty.
Service Manual – TLP Brewer
3. Connect the unit to electrical outlet with appropriate amperage rating (see serial tag on machine). Once power has been
supplied to the unit, ip the toggle switch to the ‘ON’ position (located on the rear of the unit), the water tank will begin to
ll. When the water level in the tank reaches the probe, the heating element will turn on.
4. Turn on the control panel by pressing the ON/OFF button.
5. The heating tank will require 20 to 30 minutes to reach operating temperature (200°F). The READY‑TO‑BREW light will
come on.
6. Prior to brewing, dispense 12 ounces of hot water through the hot water faucet.
7. Run brew cycle of at least 16 ounces to purge the water line of any air trapped in the lines after lling.
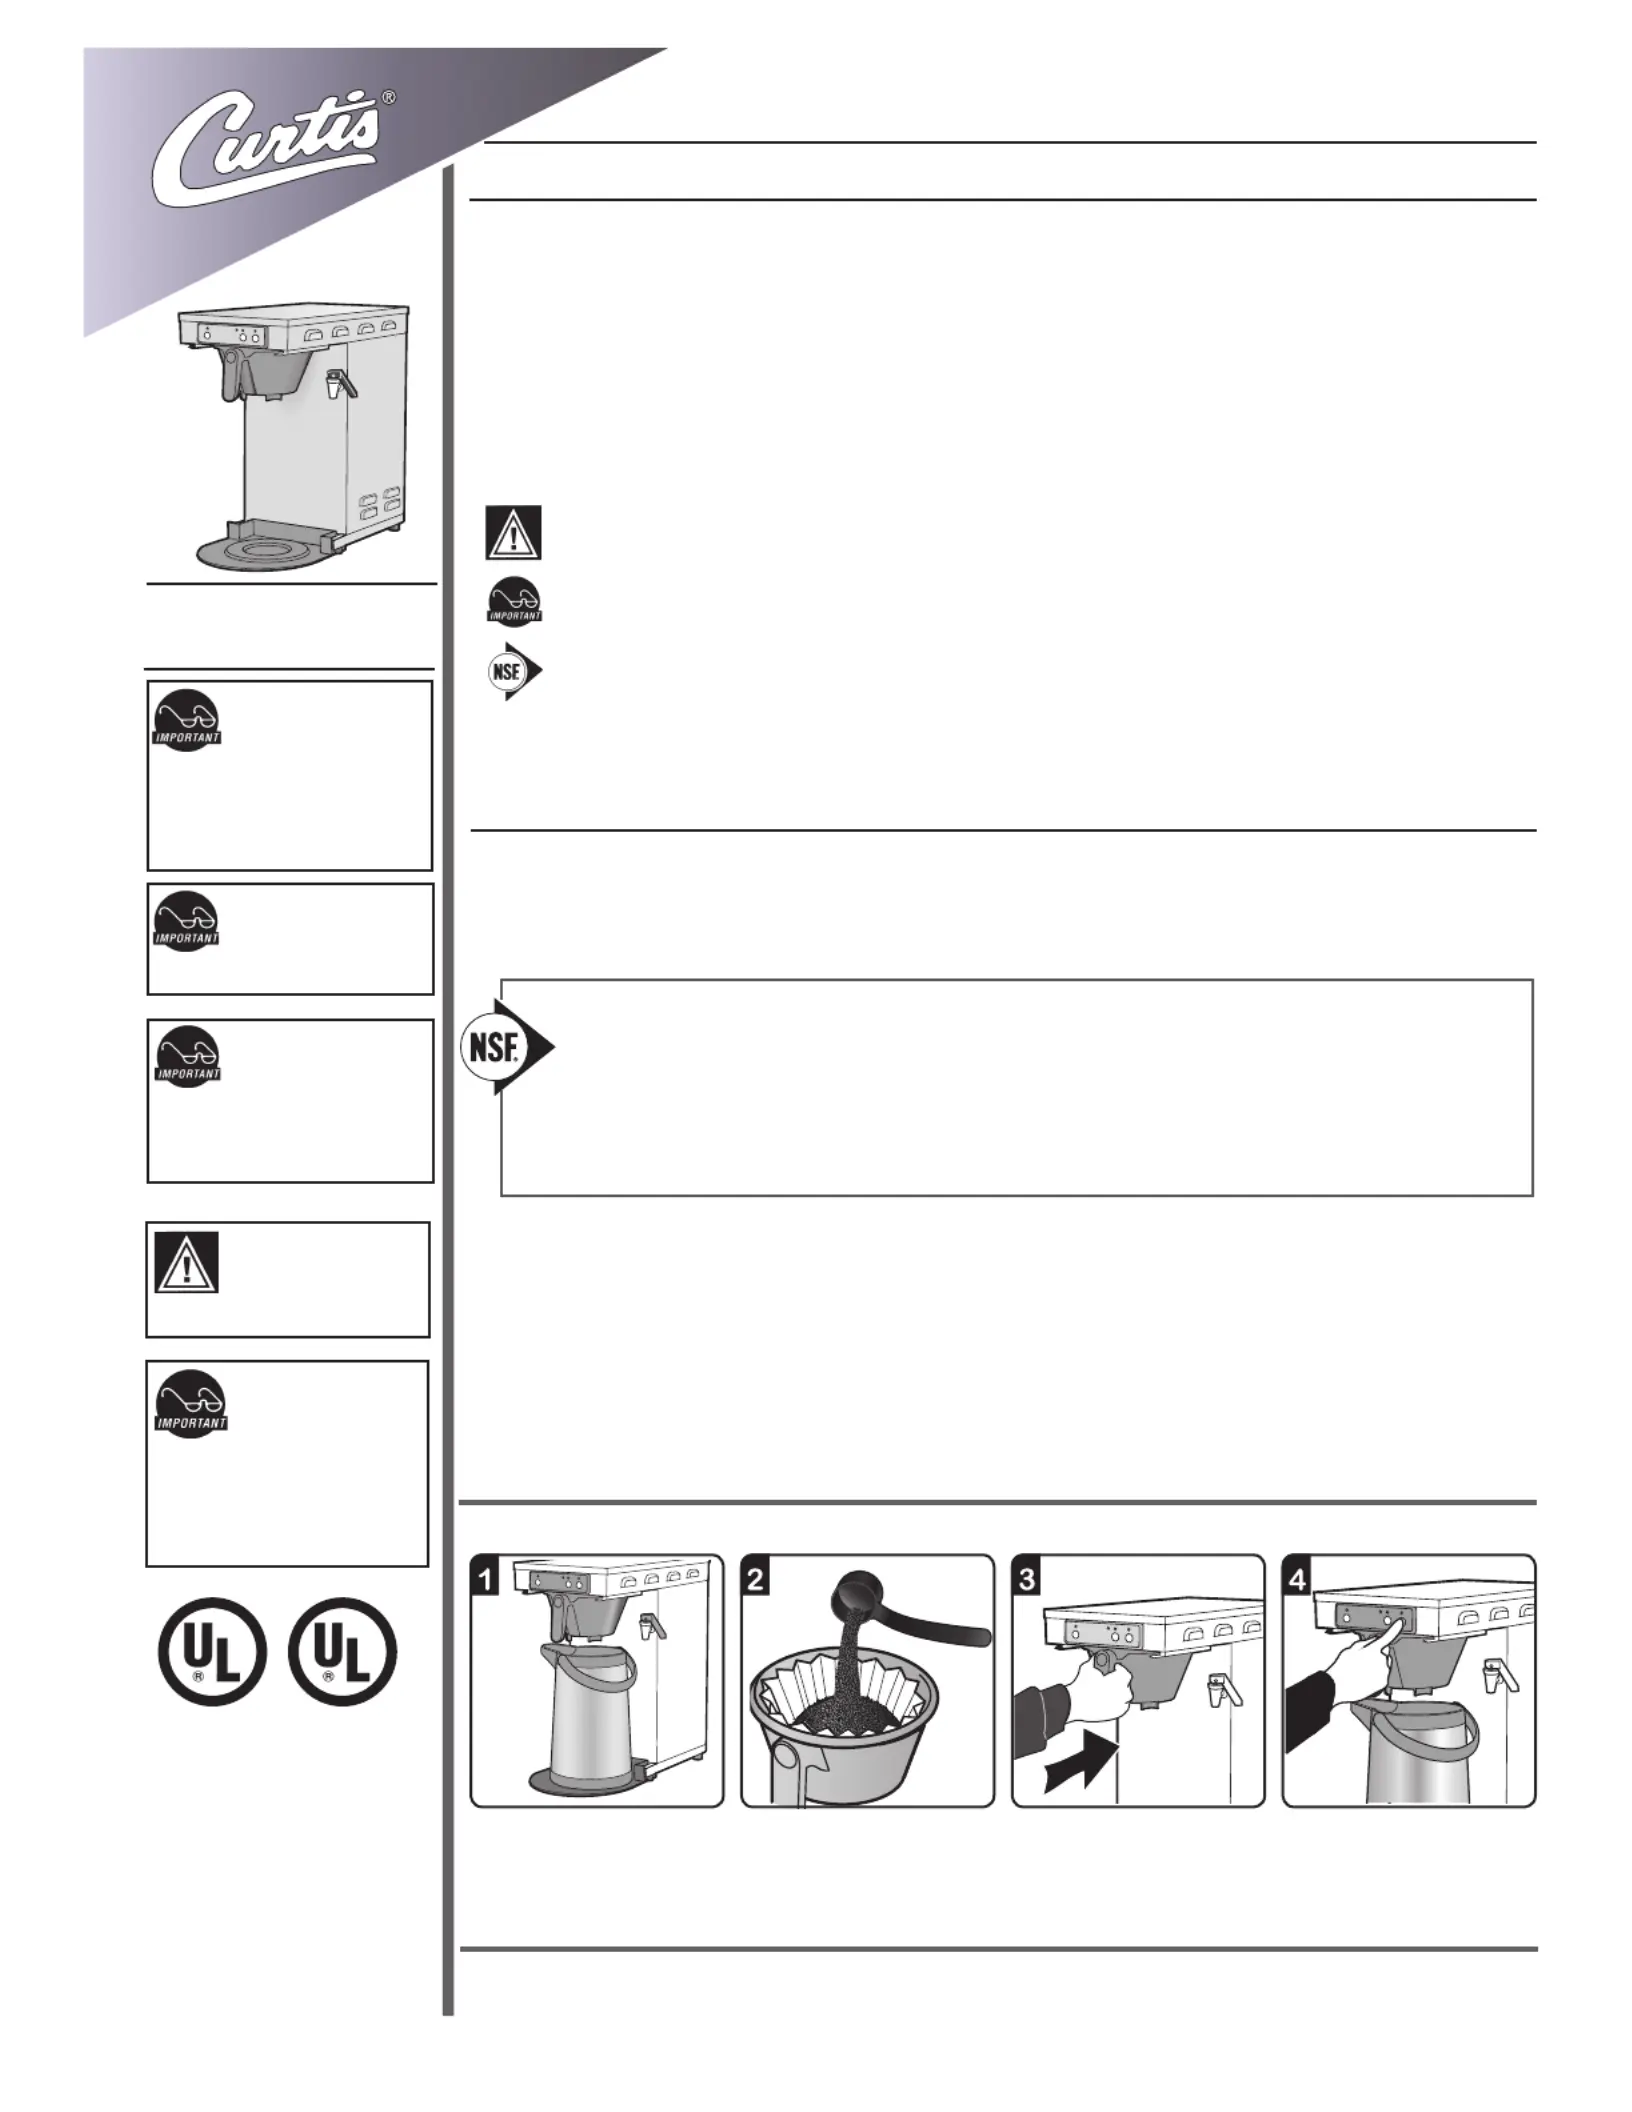
1. Place a clean, empty air-
pot in position, centered
under the brew cone.
2. Place a new lter into
the brewcone. Pour the
proper amount of ground
coffee into the lter.
3. Slide the brewcone into
position on brew rails.
4. Press the BREW button.
The indicator light above
the selected brew button
will ash during the brew-
cycle.
C
WARNING: To avoid
scalding, do NOT remove
brew cone while brew
indicator light is ashing.
CAUTION: DO NOT
connect this brewer to hot
water. The inlet valve is
not rated for hot water.
IMPORTANT: This equip-
ment is to be installed
to comply with the
applicable federal, state,
or local plumbing and electrical
codes having jurisdiction.
Important Safeguards/Symbols
This equipment is designed for commercial use. Any servicing other than cleaning and routine maintenance should be
performed by an authorized Wilbur Curtis Company Service Technician.
• DO NOT immerse the unit in water or any other liquid
• To reduce the risk of re or electric shock, DO NOT open service panels. There are no user serviceable parts
inside.
• Keep hands and other items away from hot areas of the unit during operation.
• Never clean with scouring powders or harsh chemicals.
Symbols
WARNINGS – To help avoid personal injury
Important Notes/Cautions – from the factory
Sanitation Requirements
Brewing Coffee
ISO 9001:2008 REGISTERED
WILBUR CURTIS CO., INC.
6913 West Acco Street
Montebello, CA 90640-5403
For the latest information go to
www.wilburcurtis.com
Tel: 800-421-6150
Fax: 323-837-2410
For the latest specications and information go to www.wilburcurtis.com
NSF International requires the following water connection:
1. A quick disconnect or additional coiled tubing (at least 2x the depth of the unit) is required so that the unit
can be moved for cleaning.
2. This unit must be installed with adequate backow protection to comply with applicable federal, state and
local codes.
3. Water pipe connections and xtures directly connected to a potable water supply shall be sized, installed
and maintained in accordance with federal, state, and local codes.
Produktspezifikationen
| Marke: | Wilbur Curtis |
| Kategorie: | Kaffeemaschine |
| Modell: | TLP |
Brauchst du Hilfe?
Wenn Sie Hilfe mit Wilbur Curtis TLP benötigen, stellen Sie unten eine Frage und andere Benutzer werden Ihnen antworten
Bedienungsanleitung Kaffeemaschine Wilbur Curtis

21 August 2025
21 August 2025
21 August 2025
21 August 2025
21 August 2025
21 August 2025
21 August 2025
21 August 2025
21 August 2025
20 August 2025
Bedienungsanleitung Kaffeemaschine
Neueste Bedienungsanleitung für -Kategorien-
3 April 2026
3 April 2026
3 April 2026
2 April 2026
2 April 2026
30 März 2026
29 März 2026
28 März 2026
28 März 2026