Wireless Solution WiFi upgrade for G6 Bedienungsanleitung
Wireless Solution TV-Antenne WiFi upgrade for G6
Lies die bedienungsanleitung für Wireless Solution WiFi upgrade for G6 (5 Seiten) kostenlos online; sie gehört zur Kategorie TV-Antenne. Dieses Handbuch wurde von 42 Personen als hilfreich bewertet und erhielt im Schnitt 4.1 Sterne aus 2 Bewertungen. Hast du eine Frage zu Wireless Solution WiFi upgrade for G6 oder möchtest du andere Nutzer dieses Produkts befragen? Stelle eine Frage
Seite 1/5
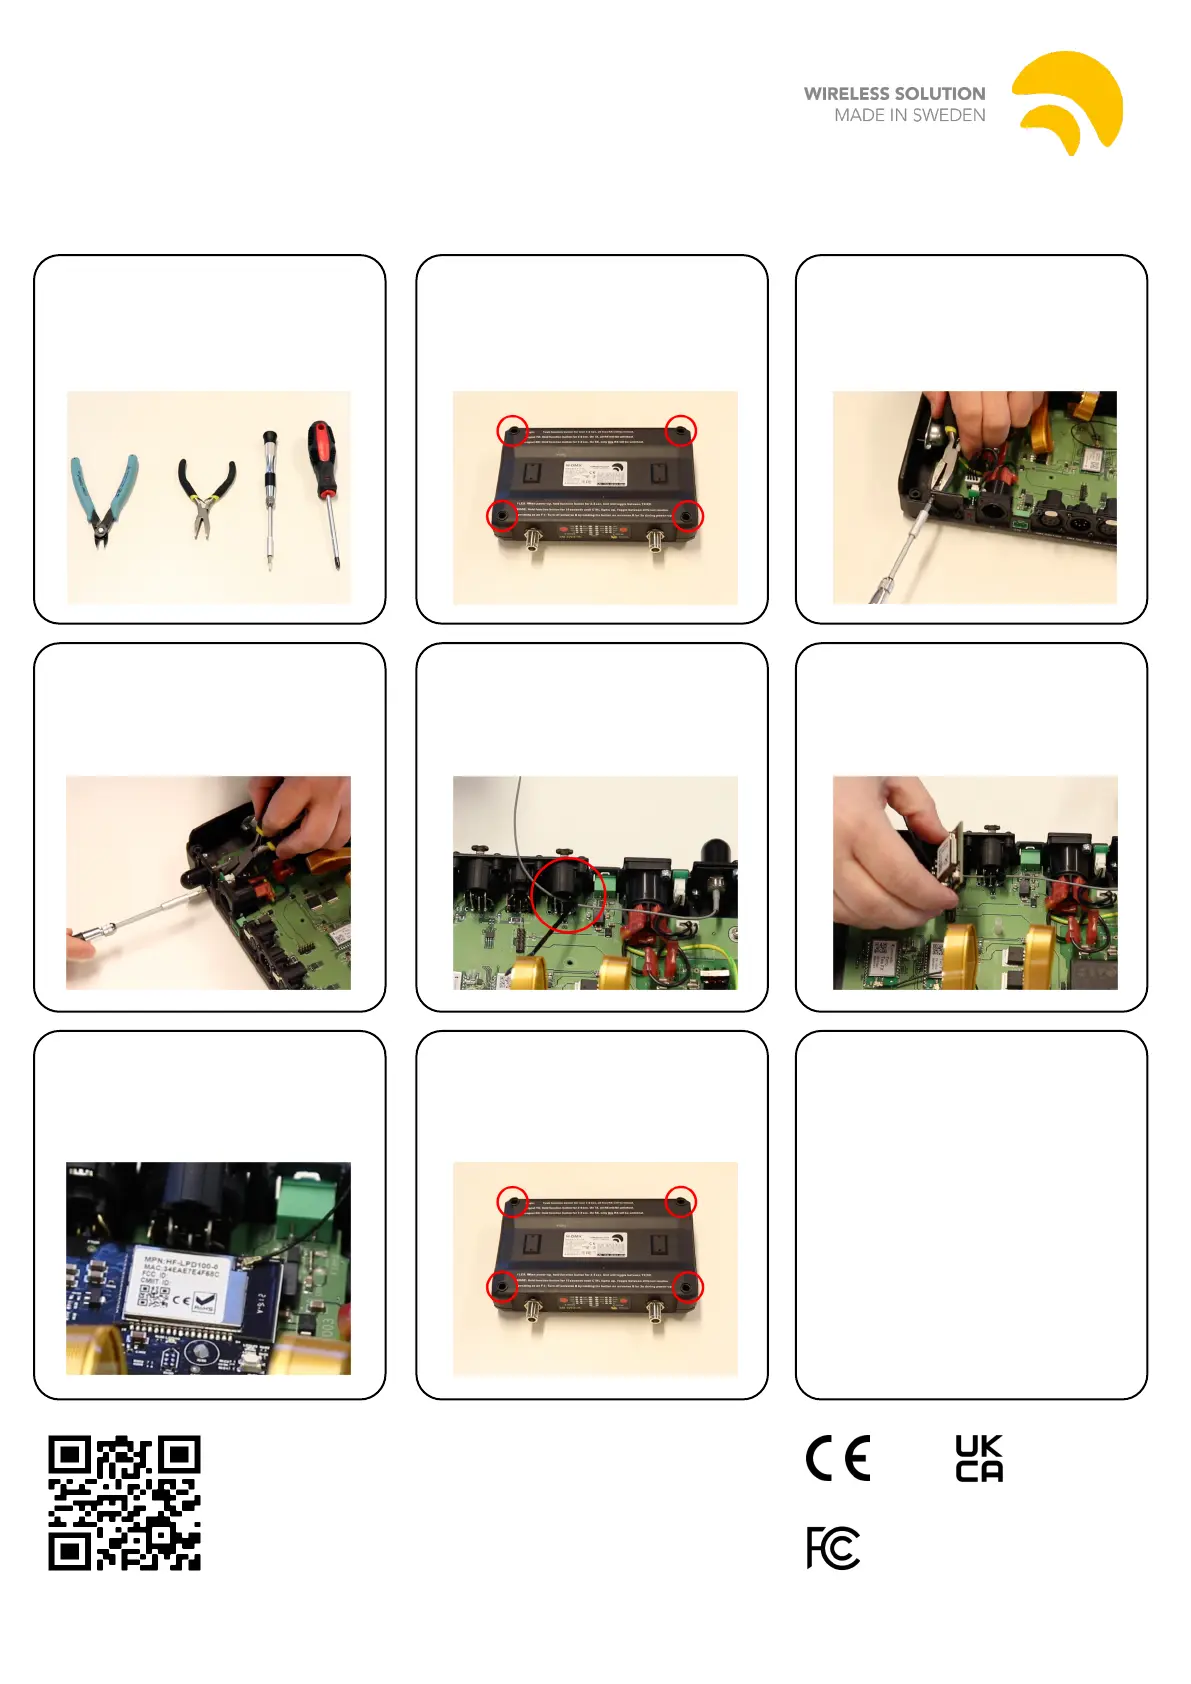
WiFiinstallationinstructions
1.Neededtools:side-cutter,
plier,TorxT10screwdriver,
Philipsscrewdriver.
4.Placetheantennafromthe
insideandfastenitwiththe
screwsandnuts.Usetheplier
andT10screwdrivertotighten.
5.Usethecable-tietofasten
theantennacabletotheXLRto
avoidtheantennatouchingthe
high-voltageparts.
6.Pushthenylonstandoffinto
themountinghole.
MounttheWiFimoduleand
makesureitsnapsintoplace.
2.Unscrewallfourscrews.
Warning:Neveropentheunit
withpowerpluggedin.
3.Removethecoverplate
usingtheT10screwdriverand
theplier.Savethescrewsand
nuts.
7.Connecttheantennacable
totheWiFimodule.
8.Putthetopbackonand
fastenallfourscrews.
ScantheQRcodeforan
installationvideoguide.
FCCID:2ACSVHF-LPD100
WirelessSolutionSwedenAB,Majorebergsvägen2
45175Uddevalla,Swedem
9.Powertheunitupandstart
theW-DMXConguratorapp.
Makesureyourappisof
version1.2.0orlater.
Connecttothedeviceand
chosetoupdatermware.
Iftheapptellsyouthereisno
newrmware,choosetoinstall
anyway.
Aftertheupdateisnished,
yourdeviceisreadytouse.
Produktspezifikationen
| Marke: | Wireless Solution |
| Kategorie: | TV-Antenne |
| Modell: | WiFi upgrade for G6 |
Brauchst du Hilfe?
Wenn Sie Hilfe mit Wireless Solution WiFi upgrade for G6 benötigen, stellen Sie unten eine Frage und andere Benutzer werden Ihnen antworten
Bedienungsanleitung TV-Antenne Wireless Solution

20 August 2024
Bedienungsanleitung TV-Antenne
Neueste Bedienungsanleitung für -Kategorien-
7 Februar 2026
6 Januar 2026
30 September 2025
27 September 2025
27 September 2025
26 September 2025
16 September 2025
16 September 2025
16 September 2025
14 September 2025