Canarm Gilda LFM112A13BN Bedienungsanleitung
Canarm
Beleuchtung
Gilda LFM112A13BN
Lies die bedienungsanleitung für Canarm Gilda LFM112A13BN (1 Seiten) kostenlos online; sie gehört zur Kategorie Beleuchtung. Dieses Handbuch wurde von 11 Personen als hilfreich bewertet und erhielt im Schnitt 4.7 Sterne aus 6 Bewertungen. Hast du eine Frage zu Canarm Gilda LFM112A13BN oder möchtest du andere Nutzer dieses Produkts befragen? Stelle eine Frage
Seite 1/1
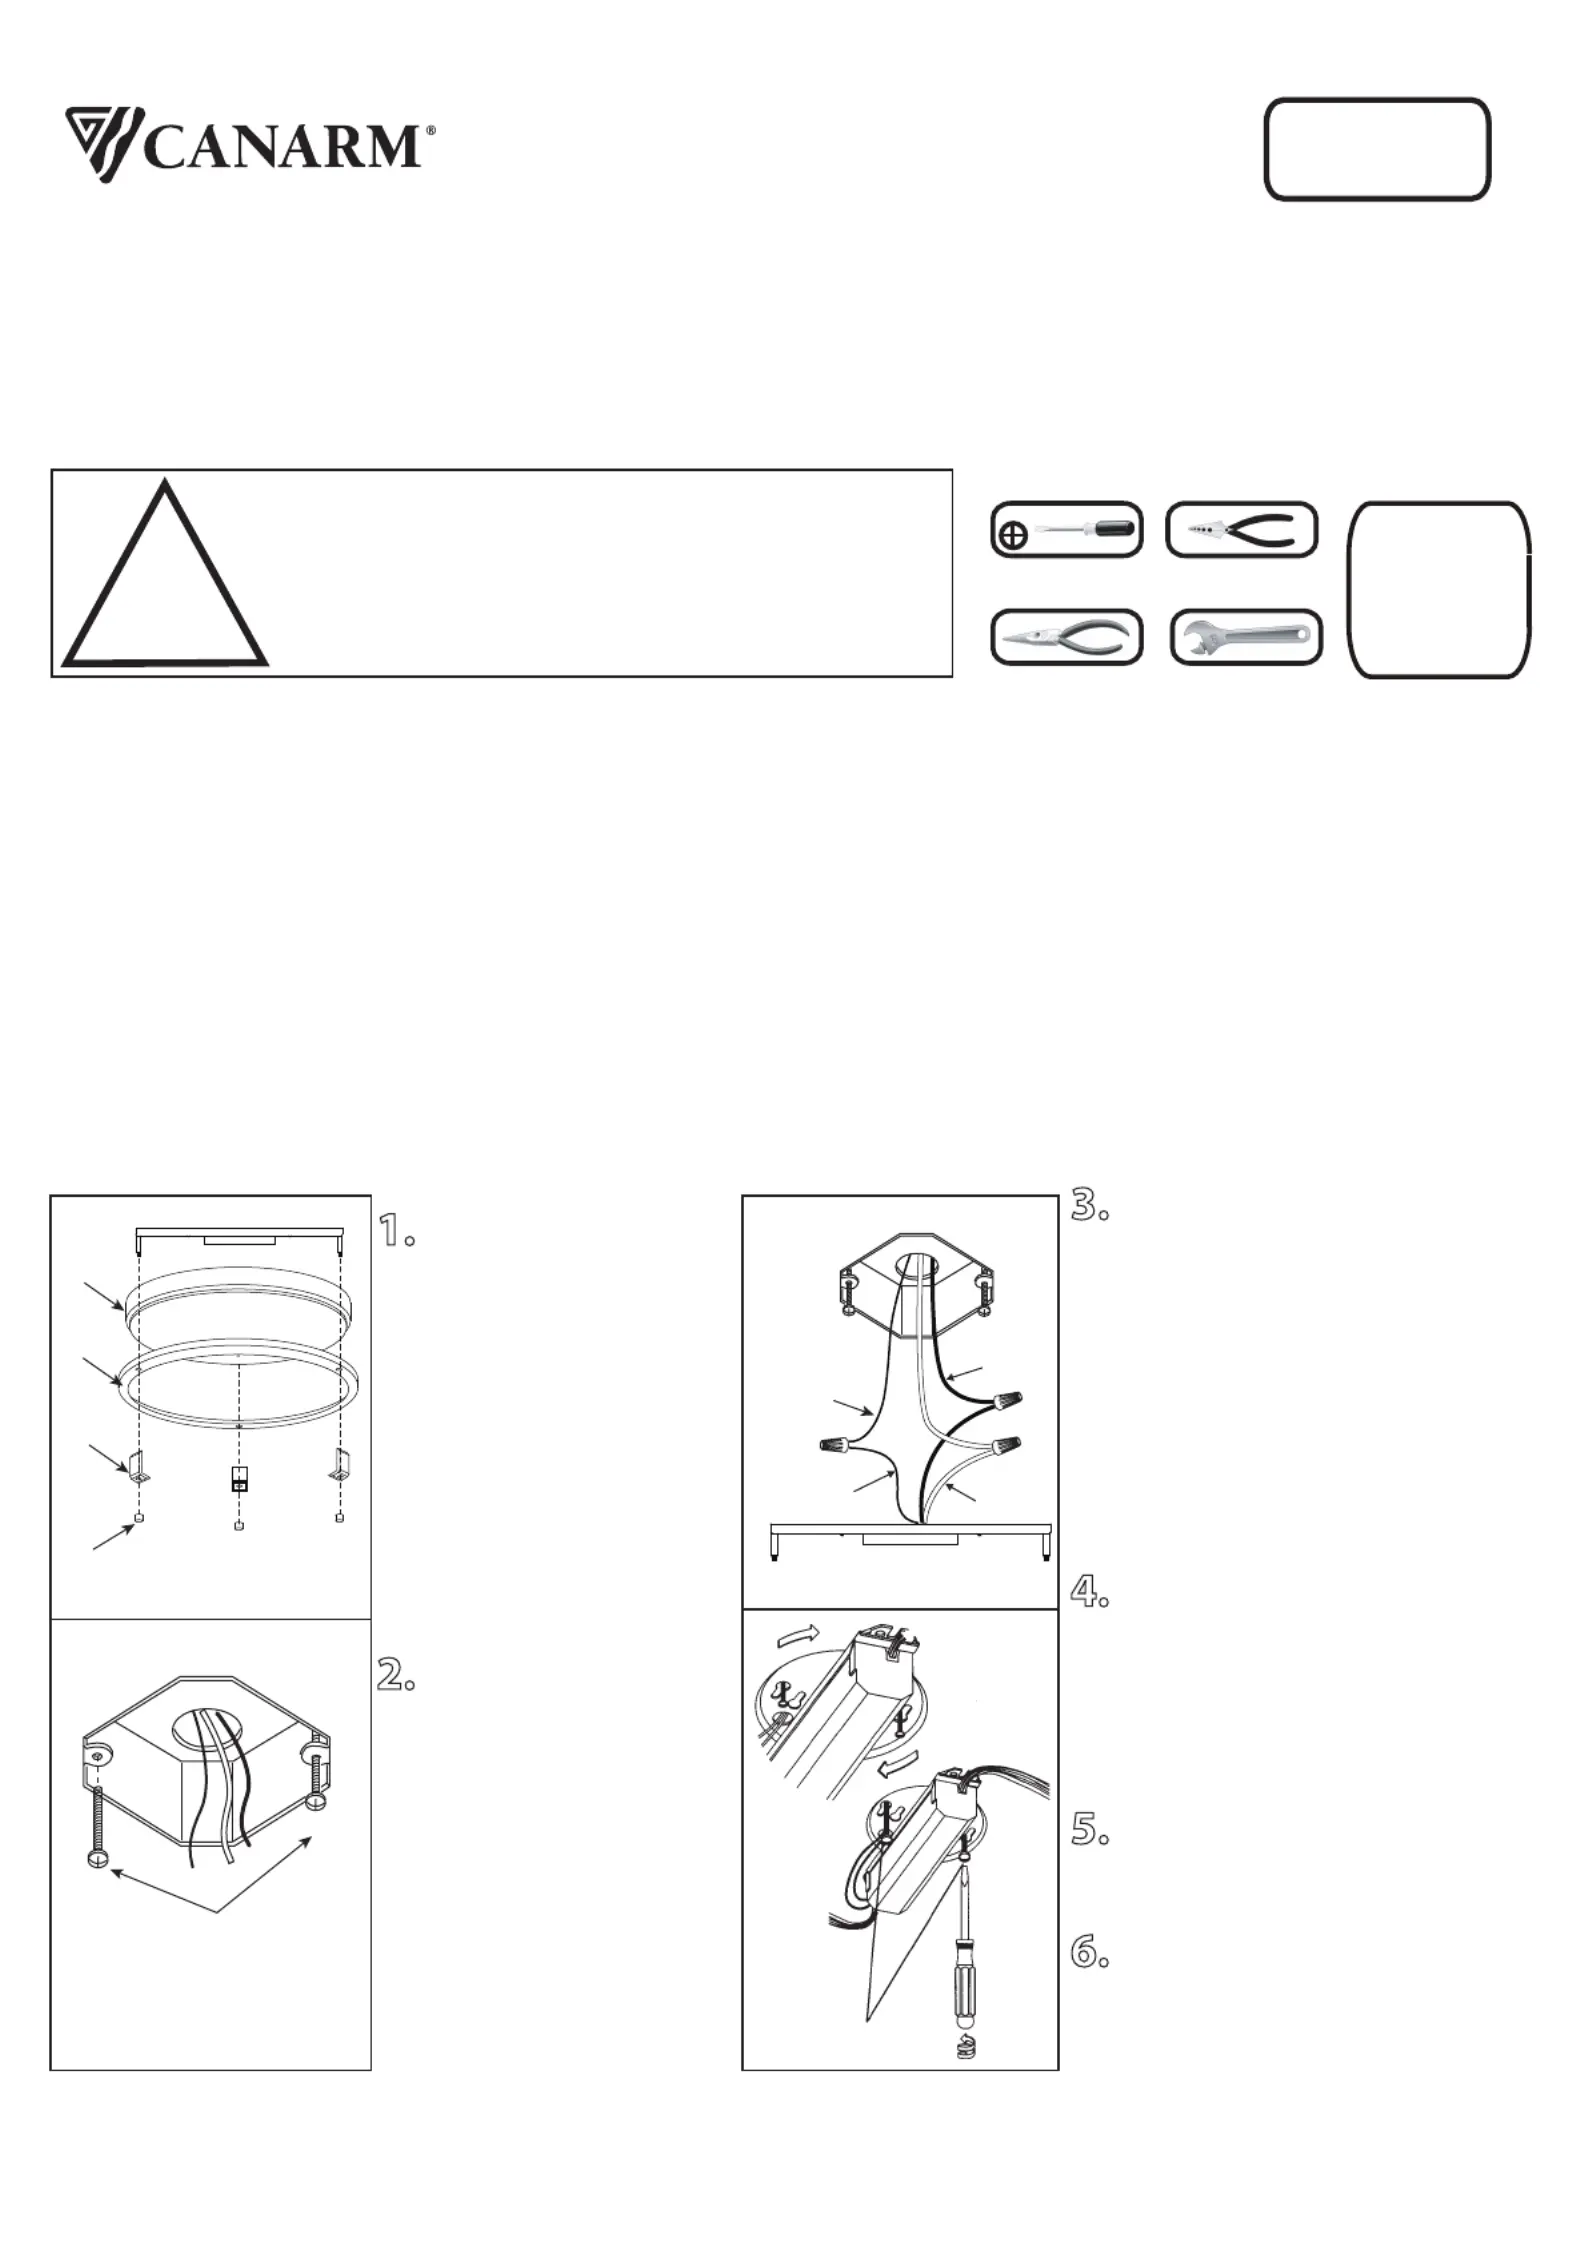
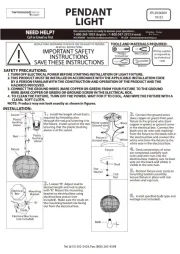
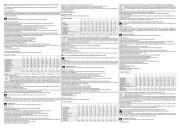
SAFETY PRECAUTIONS:
LFM112A
05/16
TOOLS AND MATERIALS REQUIRED:
Phillips
Screwdriver
Wire Cutters
Pliers Wrench
!
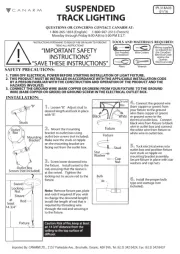
INSTRUCTIONS PERTAINING TO RISK OF FIRE OR INJURY TO PERSONS
READ ALL INSTRUCTIONS
IMPORTANT SAFETY
INSTRUCTIONS
SAVE THESE INSTRUCTIONS
INSTALLATION:
NOTE: Product may not look exactly as shown in figures.
Wiring supplies
as required by
local electrical
code
LED
FLUSH MOUNT
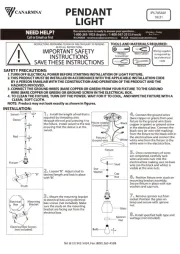
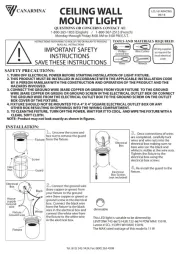
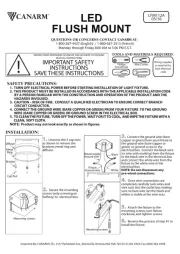
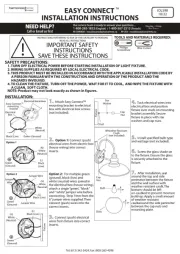
1. TURN OFF ELECTRICAL POWER BEFORE STARTING INSTALLATION OF LIGHT FIXTURE.
2. THIS PRODUCT MUST BE INSTALLED IN ACCORDANCE WITH THE APPLICABLE INSTALLATION CODE
BY A PERSON FAMILIAR WITH THE CONSTRUCTION AND OPERATION OF THE PRODUCT AND THE
HAZARDS INVOLVED.
3. CAUTION – RISK OF FIRE. CONSULT A QUALIFIED ELECTRICIAN TO ENSURE CORRECT BRANCH
CIRCUIT CONDUCTOR.
4. CONNECT THE GROUND WIRE (BARE COPPER OR GREEN) FROM YOUR FIXTURE TO THE GROUND
WIRE (BARE COPPER OR GREEN) OR GROUND SCREW IN THE ELECTRICAL BOX.
5. TO CLEAN THE FIXTURE, TURN OFF THE POWER, WAIT FOR IT TO COOL, AND WIPE THE FIXTURE WITH A
CLEAN, SOFT CLOTH.
Bracket
3. Connect the ground wire (bare
copper or green) from your fixture to
the ground wire (bare copper or
green) or ground screw in the
electrical box. Connect the black wire
(or wire with marking) from the fixture
to the black wire in the electrical box
and connect the white wire from the
fixture to the white wire in the
electrical box.
NOTE: Do not disconnect any
pre-wired connections.
4. Once wire connections are
completed, carefully tuck wires and
wire nuts into the outlet box making
sure no bare wire (on the black and
white) is visible at the wire nuts.
5. Attach the fixture to the
mounting screws, turn fixture
clockwise, and tighten screws.
6. Reverse the process of step #1 to
install the fixture.
1. Unscrew the 3 cap nuts
as shown to remove the
brackets, metal ring and
diffuser.
2. Secure the mounting
screws (only screwing on
halfway) to electrical box.
House supply
Ground wire
Fixture
Ground wire
White
Black
Cap Nut
Metal
Ring
Diffuser
Mounting screws
Mounting screws
Imported By: CANARM LTD., 2157 Parkedale Ave., Brockville, Ontario, K6V 5V6, Tel: (613) 342-5424, Fax: (800) 263-4598
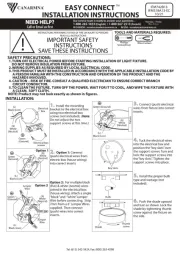
QUESTIONS OR CONCERNS CONTACT CANARM AT:
1-800-267-4427 (English) / 1-800-567-2513 (French)
Monday through Friday 8:00 AM to 5:00 PM E.S.T.
Produktspezifikationen
| Marke: | Canarm |
| Kategorie: | Beleuchtung |
| Modell: | Gilda LFM112A13BN |
Brauchst du Hilfe?
Wenn Sie Hilfe mit Canarm Gilda LFM112A13BN benötigen, stellen Sie unten eine Frage und andere Benutzer werden Ihnen antworten
Bedienungsanleitung Beleuchtung Canarm
21 August 2025
21 August 2025
20 Juli 2025

26 Juni 2025
11 Juni 2025
11 Juni 2025
31 Mai 2025
31 Mai 2025
31 Mai 2025

31 Mai 2025
Bedienungsanleitung Beleuchtung
- Temde
- Yorkville
- Lumie
- Dedra
- Kichler
- Swisson
- Worx
- Anslut
- Schneider
- Omnilux
- Bigben
- Blizzard
- DCW
- JBL
- Paulmann
Neueste Bedienungsanleitung für -Kategorien-

8 September 2025

8 September 2025

8 September 2025

8 September 2025
8 September 2025
8 September 2025
8 September 2025
8 September 2025

7 September 2025
7 September 2025