Coleman Hampton Bedienungsanleitung
Coleman Tidsskifte Hampton
Lies die bedienungsanleitung für Coleman Hampton (4 Seiten) kostenlos online; sie gehört zur Kategorie Tidsskifte. Dieses Handbuch wurde von 18 Personen als hilfreich bewertet und erhielt im Schnitt 4.0 Sterne aus 2 Bewertungen. Hast du eine Frage zu Coleman Hampton oder möchtest du andere Nutzer dieses Produkts befragen? Stelle eine Frage
Seite 1/4
STITCH LINE
Fig. 5
2
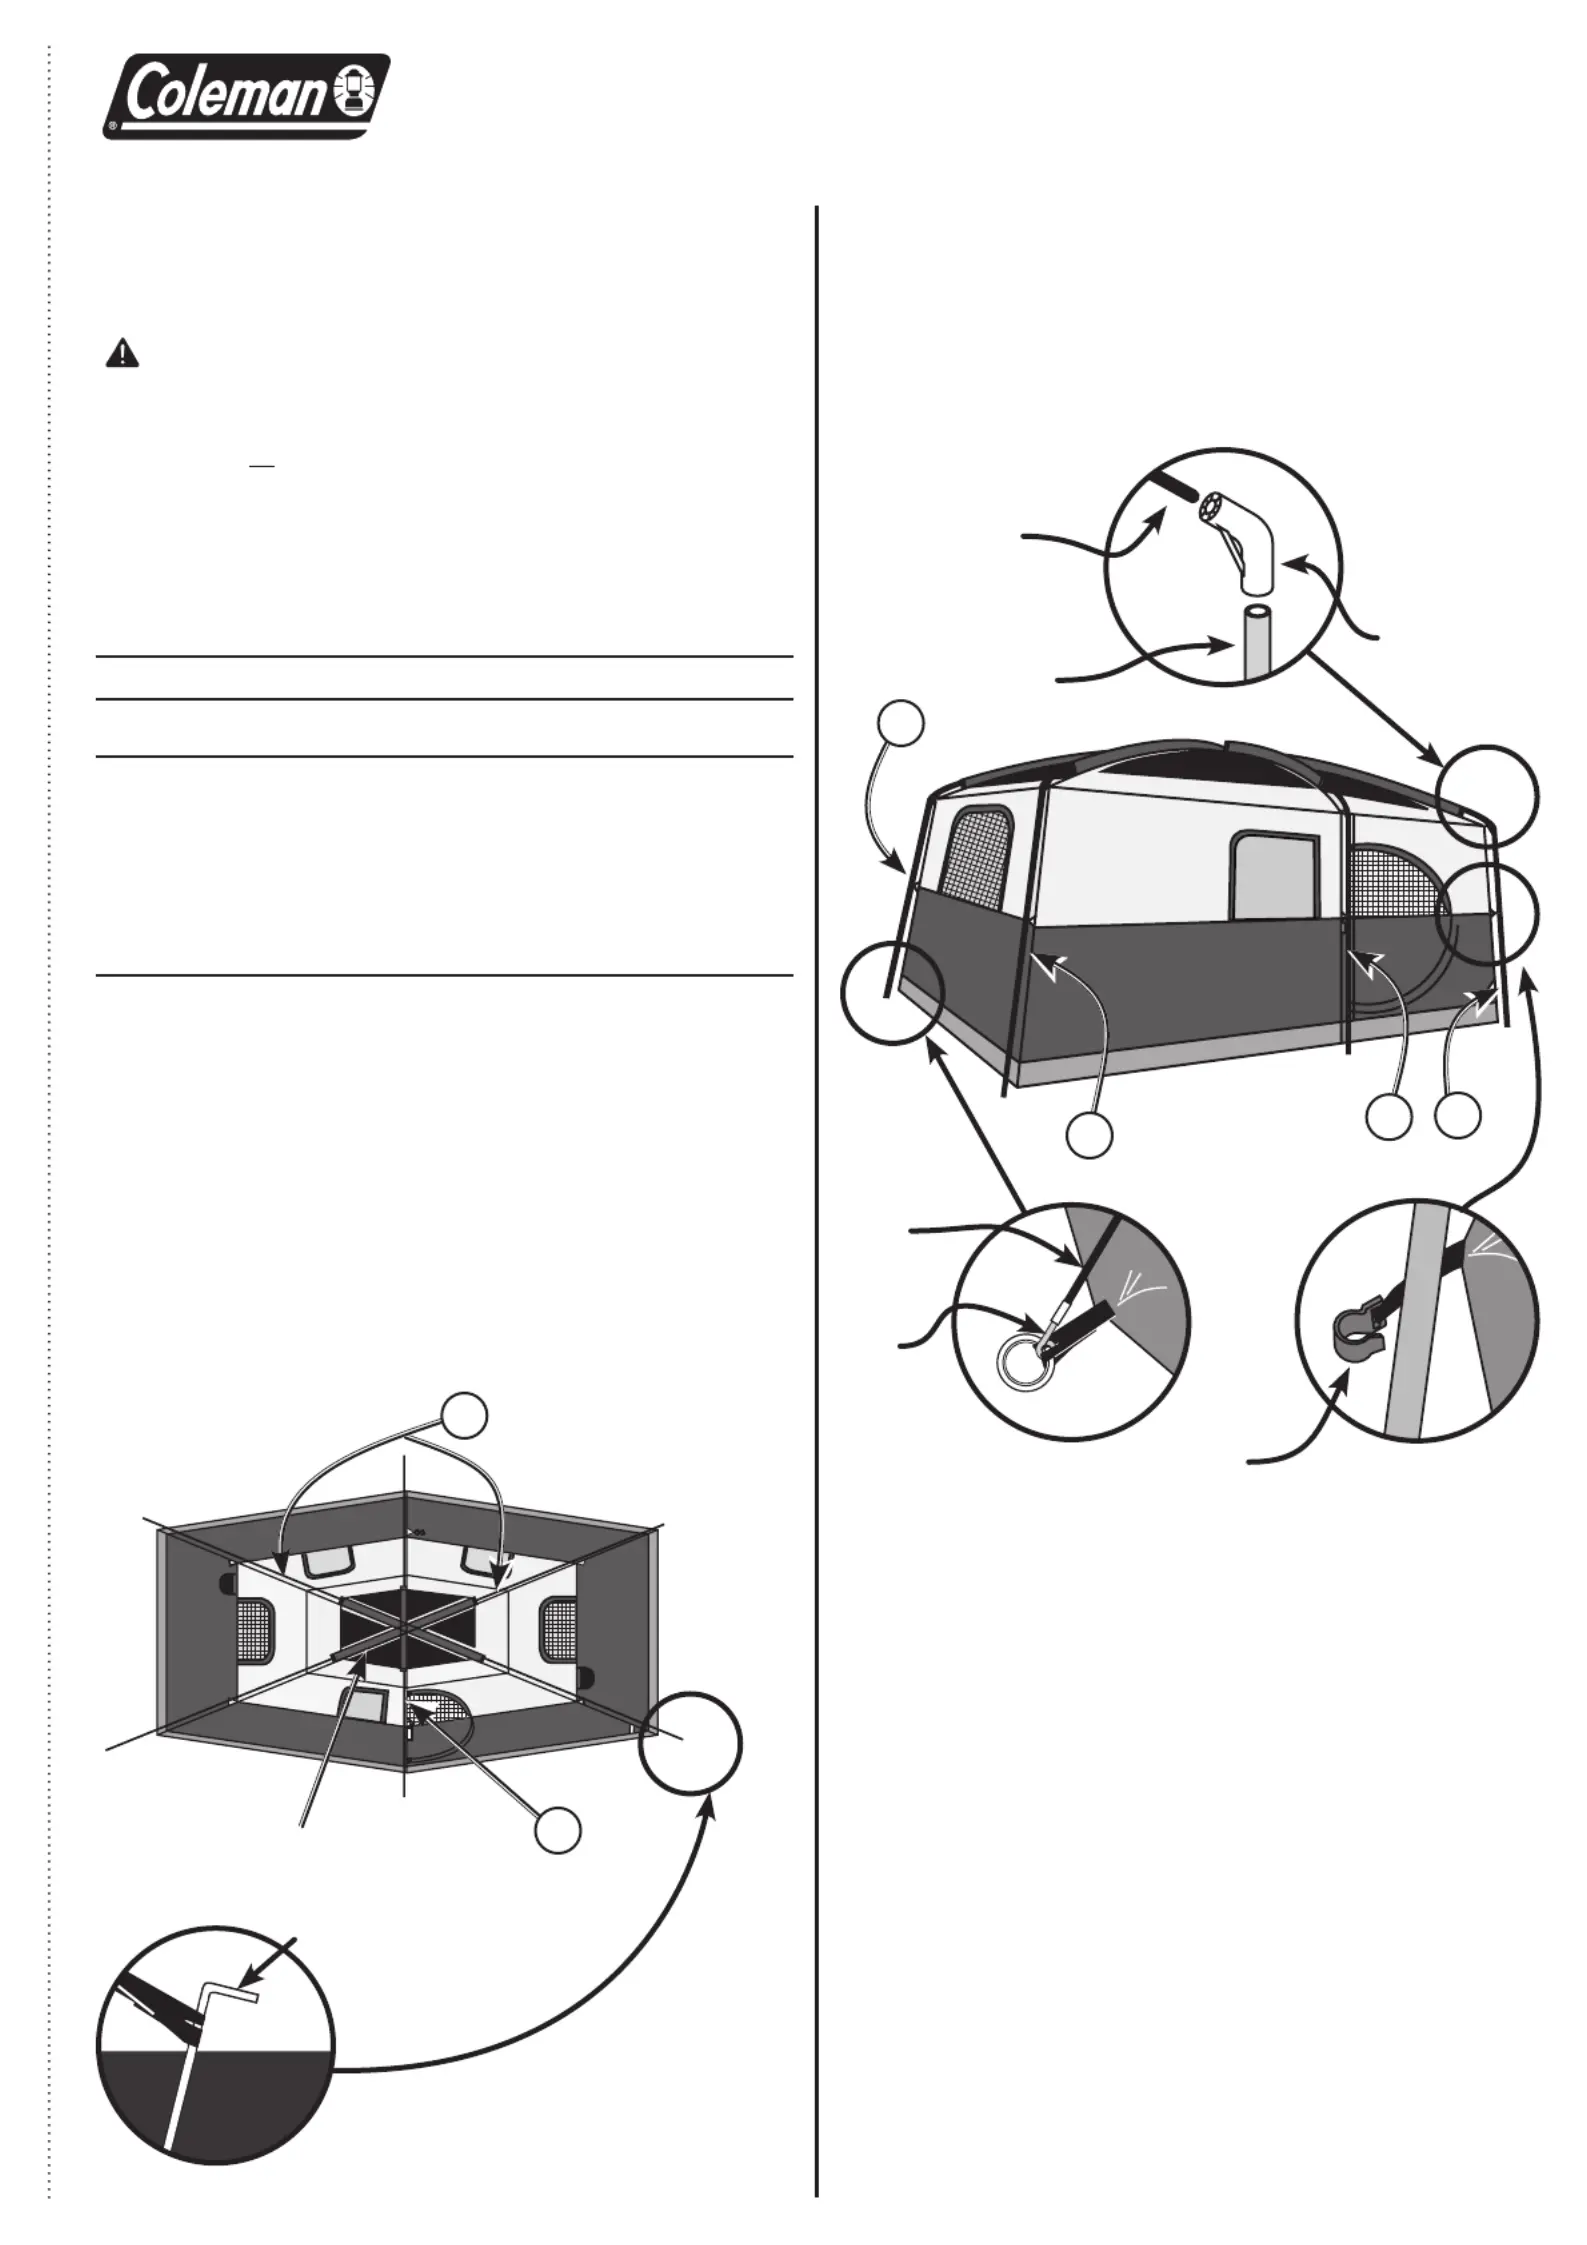
Connect Leg Poles
• Insert top poles and leg poles into pole connectors.
(Fig. 3 and 4)
• Insert one pin into each leg pole. (Fig. 5)
3
Attach Tent to Leg Poles
Using Clips
• Attach clips along the edges of tent to leg poles. (Fig. 6)
• Make any adjustments to the tent stakes, if needed.
4
Attach Rainfly
• Drape rainfly over tent. (Fig. 7 and 8)
• Connect the elastic loops with”S” hooks, (found at the rainfly corners
and sides ) to the rings found at the tent corners and sides. (Fig. 9)
• Secure rainfly with straps located on the underside of rainfly. (Fig. 10)
• Attach and stake out guylines. (Fig. 8)
HINT: During setup, keep door zipped to keep proper tension on fabric.
Leg
Pole
Pole
Connector
Top
Pole
Fig. 3
Fig. 4
Pin
Leg
Pole
Clip
Fig. 6
(continued on other side)
Before you begin
Read all instructions before set up.
• Select a level site clear of rocks, branches, and other hard
or sharp objects, to install your tent.
WARNING: Keep clear of overhead power lines.
• Do not set up your tent under trees because of potential
lightning strikes or falling tree limbs in inclement weather.
• Secure with stakes and guylines provided to prevent all
property damage or personal injury.
• For best results in windy conditions, position narrow end
of tent into the wind.
• Enlist the help of at least one other person to assist you
when it is time to assemble the tent.
1
Layout & Positioning
of Tent and Poles
• Layout and position the tent with door facing desired direction. (Fig. 1)
• Stake down tent corners first through the s. (Fig. 2)loop
• Keep the floor taut.
• Stake down the remainder of the loops.
• Assemble all poles by unfolding and interlocking the shock-corded
pole sections.
• Insert the top poles into the pole sleeves.
Fig. 1
Pole
Sleeve
Fig. 2
Tent Stake
Pole Descriptions
DescriptionQty.Pole
Repair Kit
Pole
Replacement Kit
Center Leg Pole
w/ red mark
Side Leg Pole
Side Top Pole, grey
Center Top Pole, red
Long Door Pole, black
Short Door Pole, black
2
4
2
1
1
1
N/A
N/A
5010000538
5010000538
5010000543
5010000543
5010000751
5010000752
5010000550
5010000550
5010000545
5010000545
TENT SETUP INSTRUCTIONS
1
2
3
4
5
6
No.
1
2
2
2
4
HAMPTON 9P
(The product may look different from yours. It is for illustration purpose only.)
3
Produktspezifikationen
| Marke: | Coleman |
| Kategorie: | Tidsskifte |
| Modell: | Hampton |
Brauchst du Hilfe?
Wenn Sie Hilfe mit Coleman Hampton benötigen, stellen Sie unten eine Frage und andere Benutzer werden Ihnen antworten
Bedienungsanleitung Tidsskifte Coleman

30 August 2025
29 August 2025
29 August 2025
29 August 2025
29 August 2025
17 August 2024
16 August 2024
16 August 2024
15 August 2024
15 August 2024
Bedienungsanleitung Tidsskifte
Neueste Bedienungsanleitung für -Kategorien-
2 April 2026
21 März 2026
21 März 2026
20 März 2026
20 März 2026
19 März 2026
18 März 2026
17 März 2026
8 März 2026
1 März 2026