CRUX DKGM-51 Bedienungsanleitung


Lies die bedienungsanleitung für CRUX DKGM-51 (4 Seiten) kostenlos online; sie gehört zur Kategorie Nicht kategorisiert. Dieses Handbuch wurde von 5 Personen als hilfreich bewertet und erhielt im Schnitt 4.3 Sterne aus 3 Bewertungen. Hast du eine Frage zu CRUX DKGM-51 oder möchtest du andere Nutzer dieses Produkts befragen? Stelle eine Frage

Seite 1/4
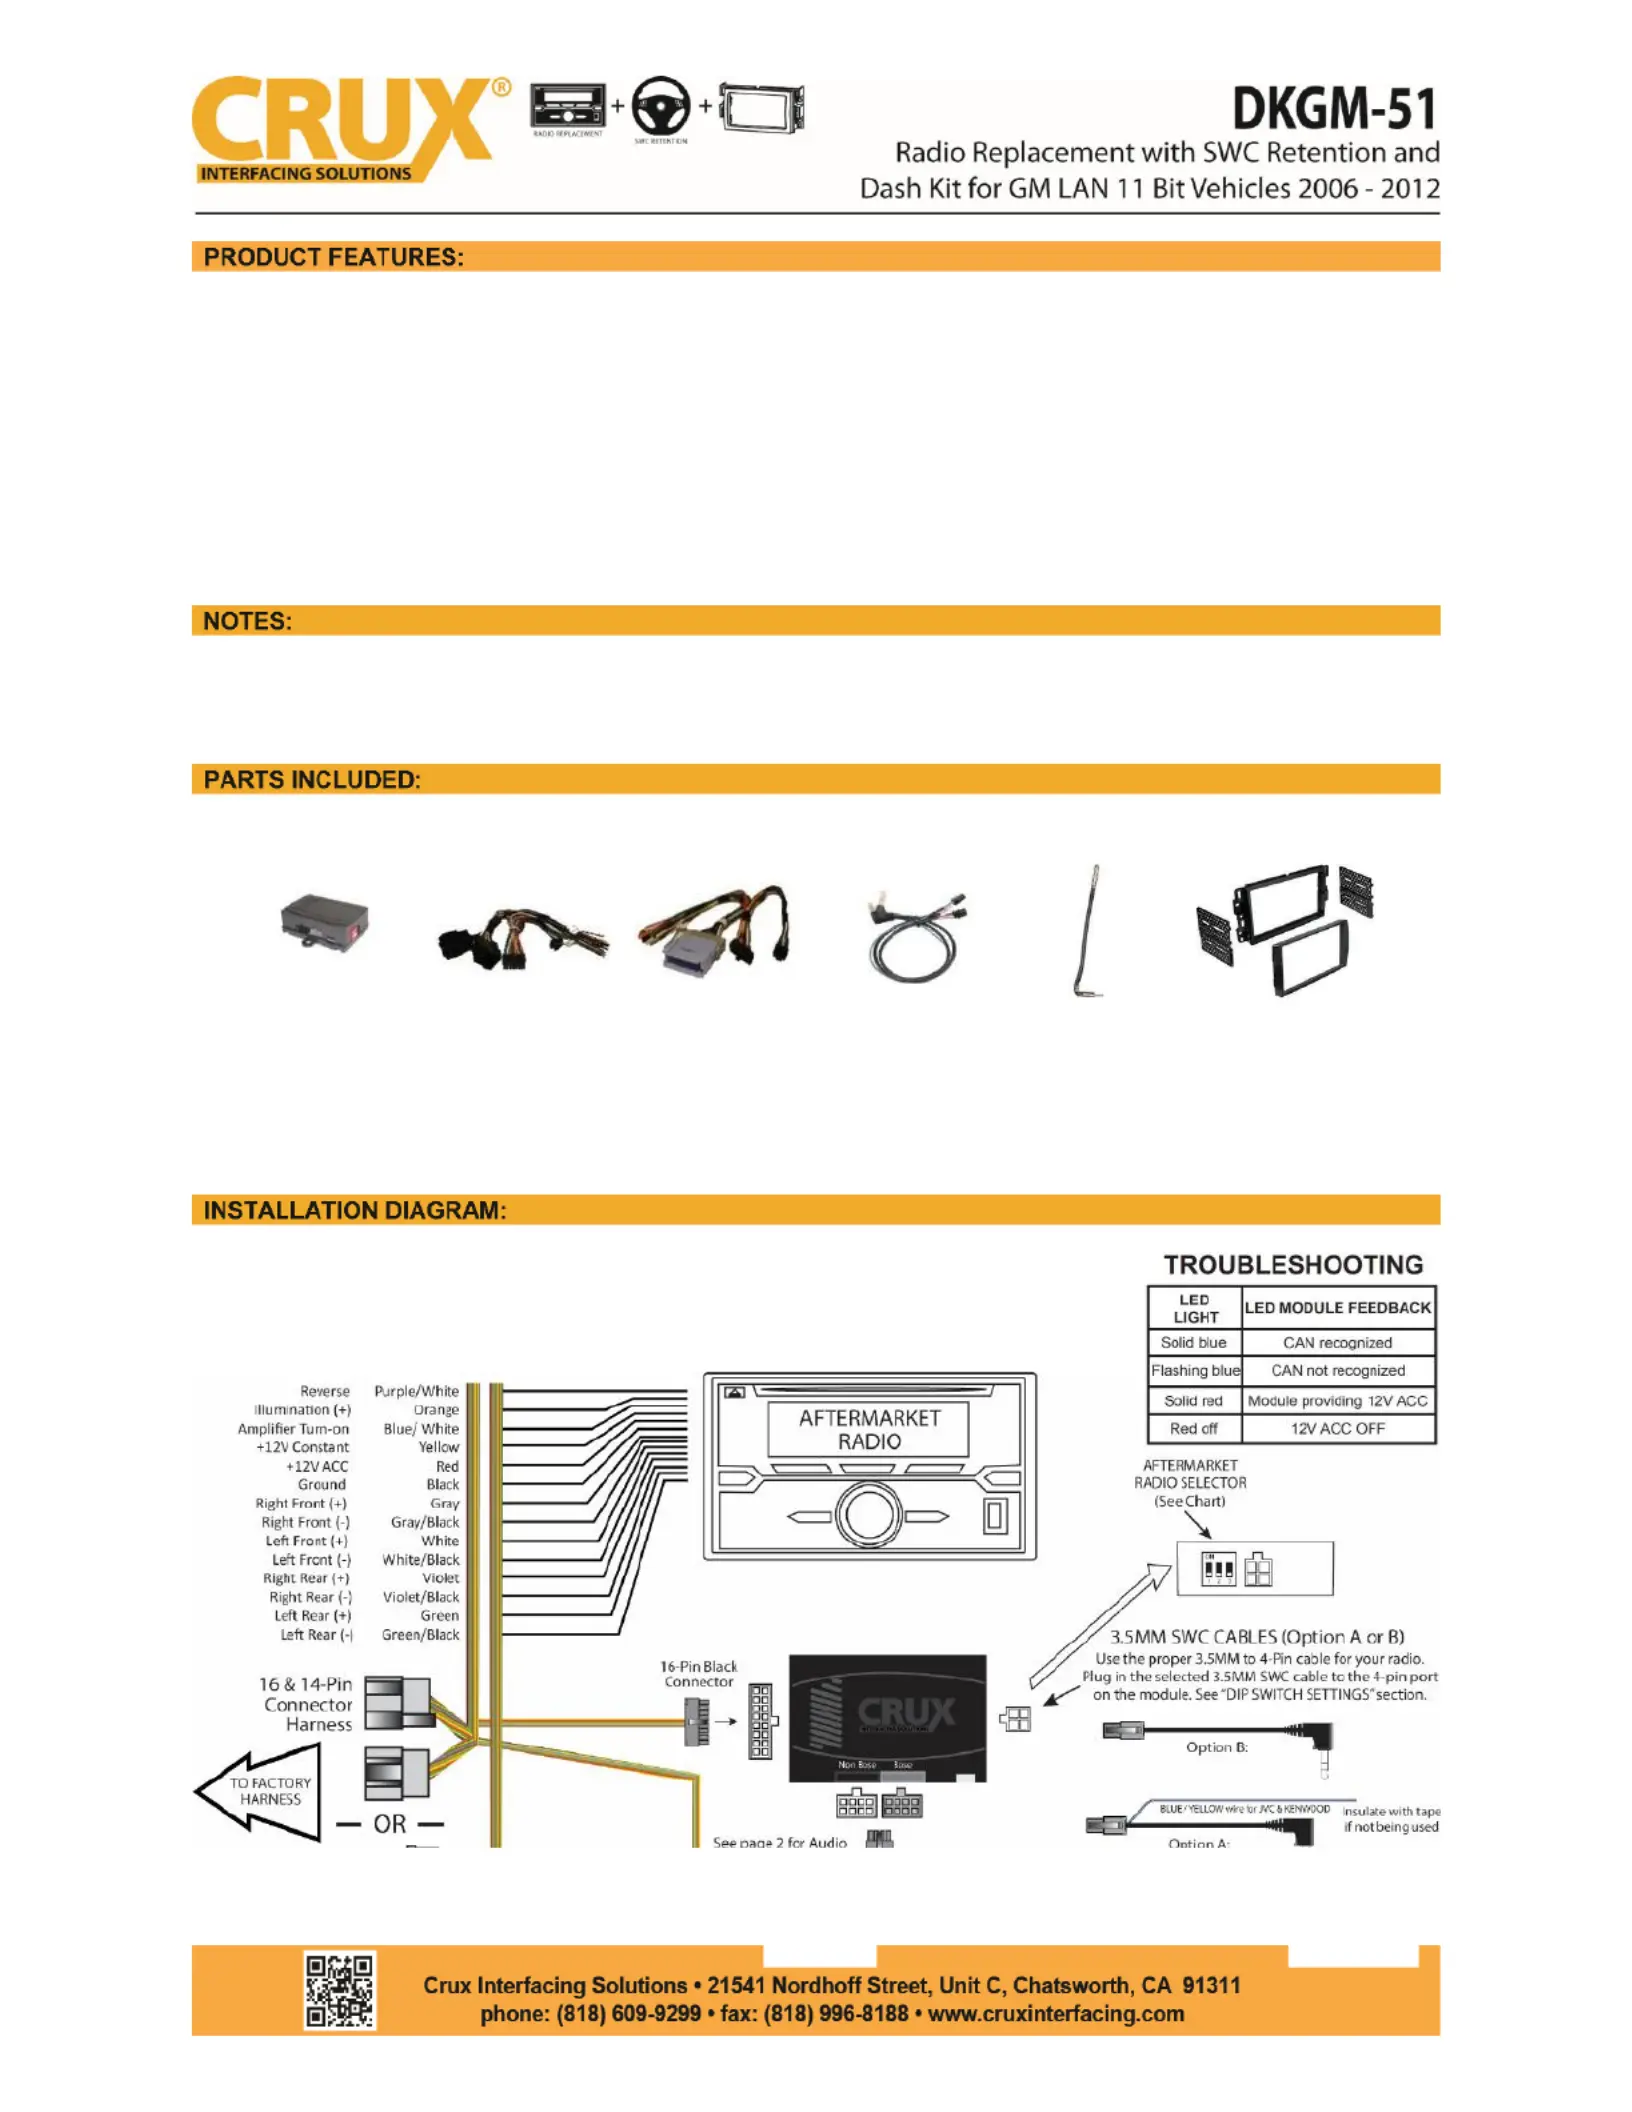
- Retains factory features in select GM LAN 11 Bit vehicles while f c oning with an un
a ermarket radio.
- Pre-programmed to retain factory Steering Wheel Controls.
- Supports Bose, non-Bose and Y-91 audio systems.
- Retains chime func ons.
- Retains front and rear arking sensors. p
- EIA color coded wiring for easy installa n. o
1. DOES NOT support ONSTAR.
GM-51
Mo le du
GM-2A
Harness
GM-2B
Harness
SWC Cables
Antenna
Adaptor
Dash Kit
Rev.031120
1 / 4
SETTING THE AFTERMARKET RADIO BRAND
With the key in the o osi on, set the DIP switches to the correspo ing radio listed below. ff p nd
3.5 SWC CABLE MM
Use the proper 3.5 to 4 pin SWC cable for the aermarket radio being used:
OPTION A is used for ALPINE, CLARION, (JVC and KENWOOD units will use the Blue/Yellow wire).
OPTION B is used for ATOTO, BOSS, DUAL, FAHRENHEIT, JENSEN, POWER ACOUSTIK, PIONEER,
SONY, SOUND STREAM and most OFF-BRAND head its. un
NOTE: C or insulate the 3.5mm plug or Blue/Yellow wire if not being used. ap
If the vehicle is equipped with a Bose system, the GM-51 has a built-in Bose adaptor that allows the proper
audio in t gain from the rmarket radio tpu ae
o the Bose ampli . To use this feature, plug in the male fier
8-pin co ector on the harness to the GRAY female 8-pin co ector on the GM-51 mo le. The mo le nn nn du du
is also labeled “Bose” and “Non Bose” to a id confusion. (see picture below) vo
If the vehicle is NOT equipped with a Bose system, pl in the male 8-pin co ector to the BLACK female ug nn
8-pin on the GM-51 le. modu
BOSE
Co ec on nn
Non-BOSE
Co ec on nn
Rev.031120
2 / 4
The GM-51 le has a poten ometer to adjust the chime vol e. It is set at half way by default. To modu um
adjust the vol e, simply use a suitable screw driver and turn the poten ometer clockwise to increase um
the volume and co ter-clockwise to decrease the volume. un
A do le DIN radio replacement ash kit is included in the kit to make the i talla n quick and easy. You have the ub d ns o
op on of i talling a D le DIN or two Single DIN radios. The DKGM-51 kit includes: ns oub
Before insta a on: ll
1. Loc
ate the main t m ring. ri
2. Locate the le nd right moun ng brackets.  a
3. S de the a ropriate mo ng bracket into the trim ring, aligning the hol in the t m ring to the c ps on the bracket. li pp unes ri li
(S Diagram A on page 4) ee
4.For t Single DIN radio installa on, s de the stack ISO DIN unit into the t m ring bracket assembly and secure the it to wo li ed ri un
the kit using the screws supp ed with the radio. (S Diagram B on page 4) li ee
Chime
Vol e um
Adjustment
Rev.031120
3 / 4


Produktspezifikationen

Marke: CRUX
Kategorie: Nicht kategorisiert
Modell: DKGM-51

Brauchst du Hilfe?

Wenn Sie Hilfe mit CRUX DKGM-51 benötigen, stellen Sie unten eine Frage und andere Benutzer werden Ihnen antworten