CRUX PCM-3F Bedienungsanleitung
CRUX Nicht kategorisiert PCM-3F
Lies die bedienungsanleitung für CRUX PCM-3F (6 Seiten) kostenlos online; sie gehört zur Kategorie Nicht kategorisiert. Dieses Handbuch wurde von 100 Personen als hilfreich bewertet und erhielt im Schnitt 4.1 Sterne aus 9 Bewertungen. Hast du eine Frage zu CRUX PCM-3F oder möchtest du andere Nutzer dieses Produkts befragen? Stelle eine Frage
Seite 1/6
PCM-3F
Rear & Front View Integration Interface
for Porsche Vehicles with PCM 3 & 3.1 Navigation Systems
R
INTERFACING SOLUTIONS
Sightline
Multi View Integration
Crux Interfacing Solutions • Chatsworth, CA 91311
phone: (818) 609-9299 • fax: (818) 996-8188 • www.cruxinterfacing.com
rev.021122
1 of 6
• Rear & Front View Camera Inputs
• Oponal coding of ParkAssist to retrot factory PDC
• Automacally switches screen to Rear-view when Reverse gear is engaged and to Front camera view when gear is
engaged to drive. (compable in vehicle with automac transmission only)
• Manual acvaon of the front camera using the steering wheel control buon
• Plug & Play Installaon
• Video in Moon funcon
PRODUCT FEATURES:
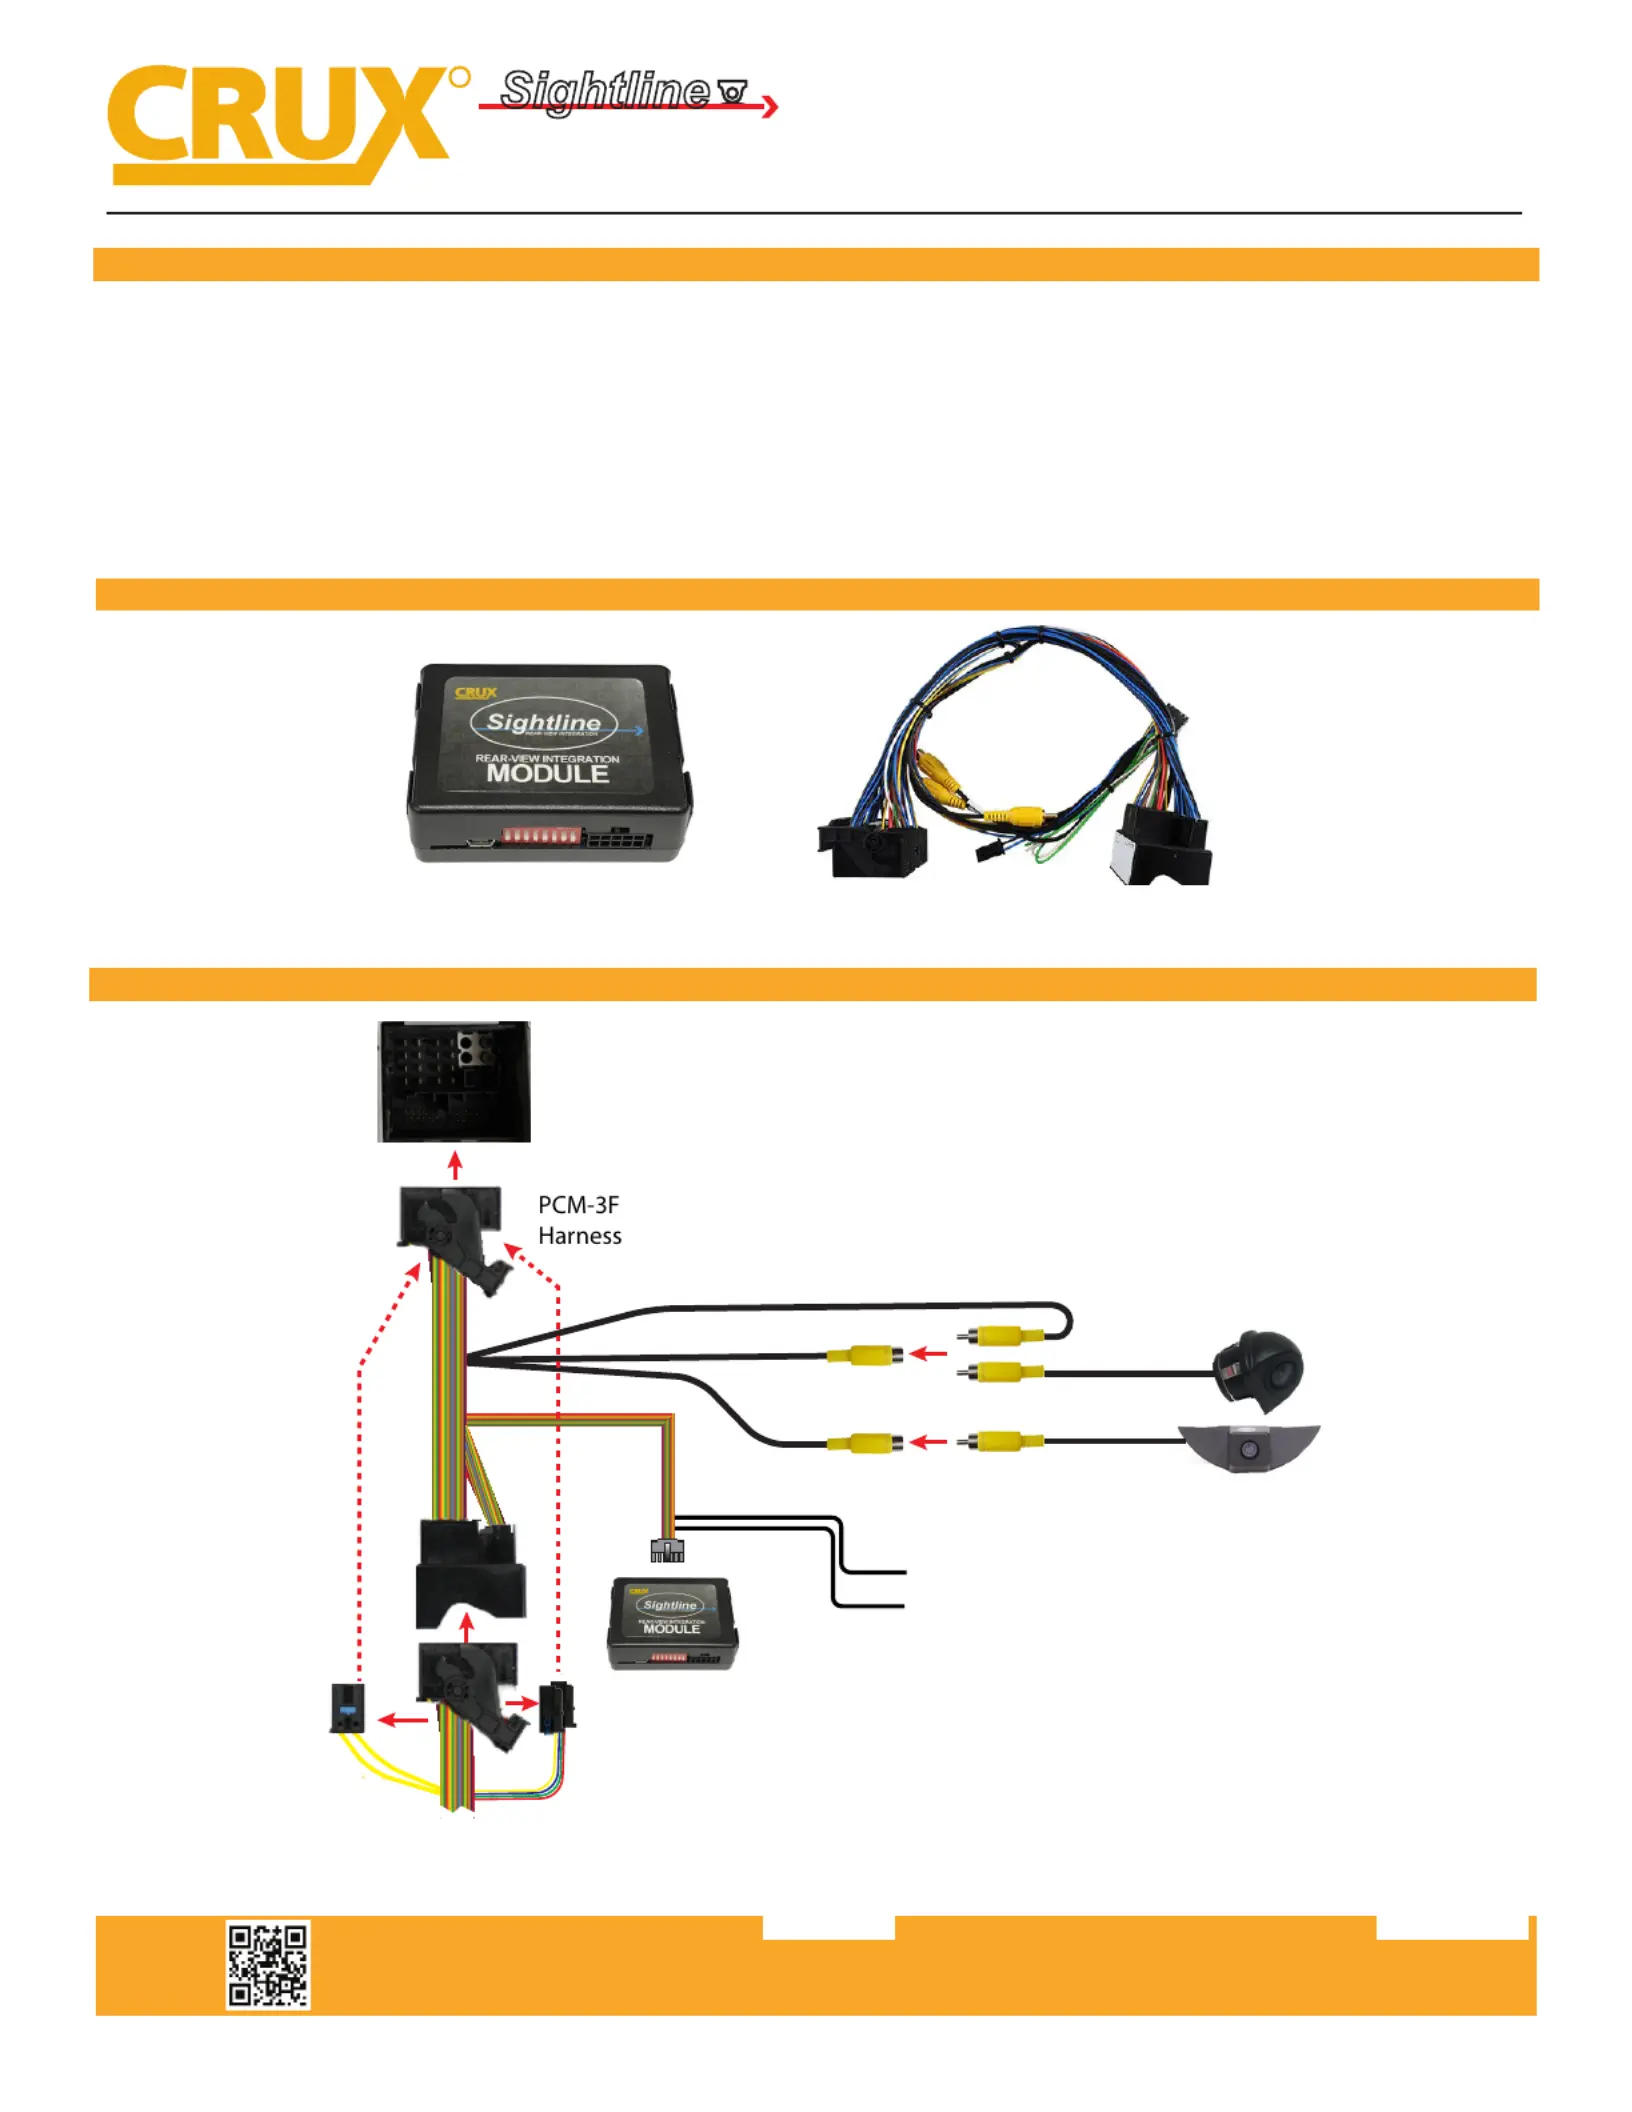
PARTS INCLUDED:
PCM-3F ModulePCM-3F Harness
INSTALLATION DIAGRAM:
Female Quadlock
Vehicle Harness
Rear-View
Camera Input
OEM Rear-View Camera
Front-View
Camera Input
Aftermarket
Rear-Vew Camera
(not Included)
Aftermarket
Front-View Camera
(not Included)
Rear Camera Output 12V (GREEN)
Front Camera Output 12V (WHITE)
Male Quadlock
Connector behind the
headunit
OR
Produktspezifikationen
| Marke: | CRUX |
| Kategorie: | Nicht kategorisiert |
| Modell: | PCM-3F |
Brauchst du Hilfe?
Wenn Sie Hilfe mit CRUX PCM-3F benötigen, stellen Sie unten eine Frage und andere Benutzer werden Ihnen antworten
Bedienungsanleitung Nicht kategorisiert CRUX

17 Januar 2026
16 Januar 2026
14 Januar 2026
8 Oktober 2025
19 September 2025
14 September 2025
8 August 2025
8 August 2025
8 August 2025
8 August 2025
Bedienungsanleitung Nicht kategorisiert
Neueste Bedienungsanleitung für -Kategorien-
3 April 2026
3 April 2026
3 April 2026
3 April 2026
3 April 2026
3 April 2026
3 April 2026
3 April 2026
3 April 2026
3 April 2026