CRUX SOCGM-18L Bedienungsanleitung
CRUX Nicht kategorisiert SOCGM-18L
Lies die bedienungsanleitung für CRUX SOCGM-18L (23 Seiten) kostenlos online; sie gehört zur Kategorie Nicht kategorisiert. Dieses Handbuch wurde von 36 Personen als hilfreich bewertet und erhielt im Schnitt 4.6 Sterne aus 5 Bewertungen. Hast du eine Frage zu CRUX SOCGM-18L oder möchtest du andere Nutzer dieses Produkts befragen? Stelle eine Frage
Seite 1/23
Crux Interfacing Solutions • 21541 Nordhoff St., Unit C, Chatsworth, CA 91311
phone: (818) 609-9299 • fax: (818) 996-8188 • www.cruxinterfacing.com
rev.071720
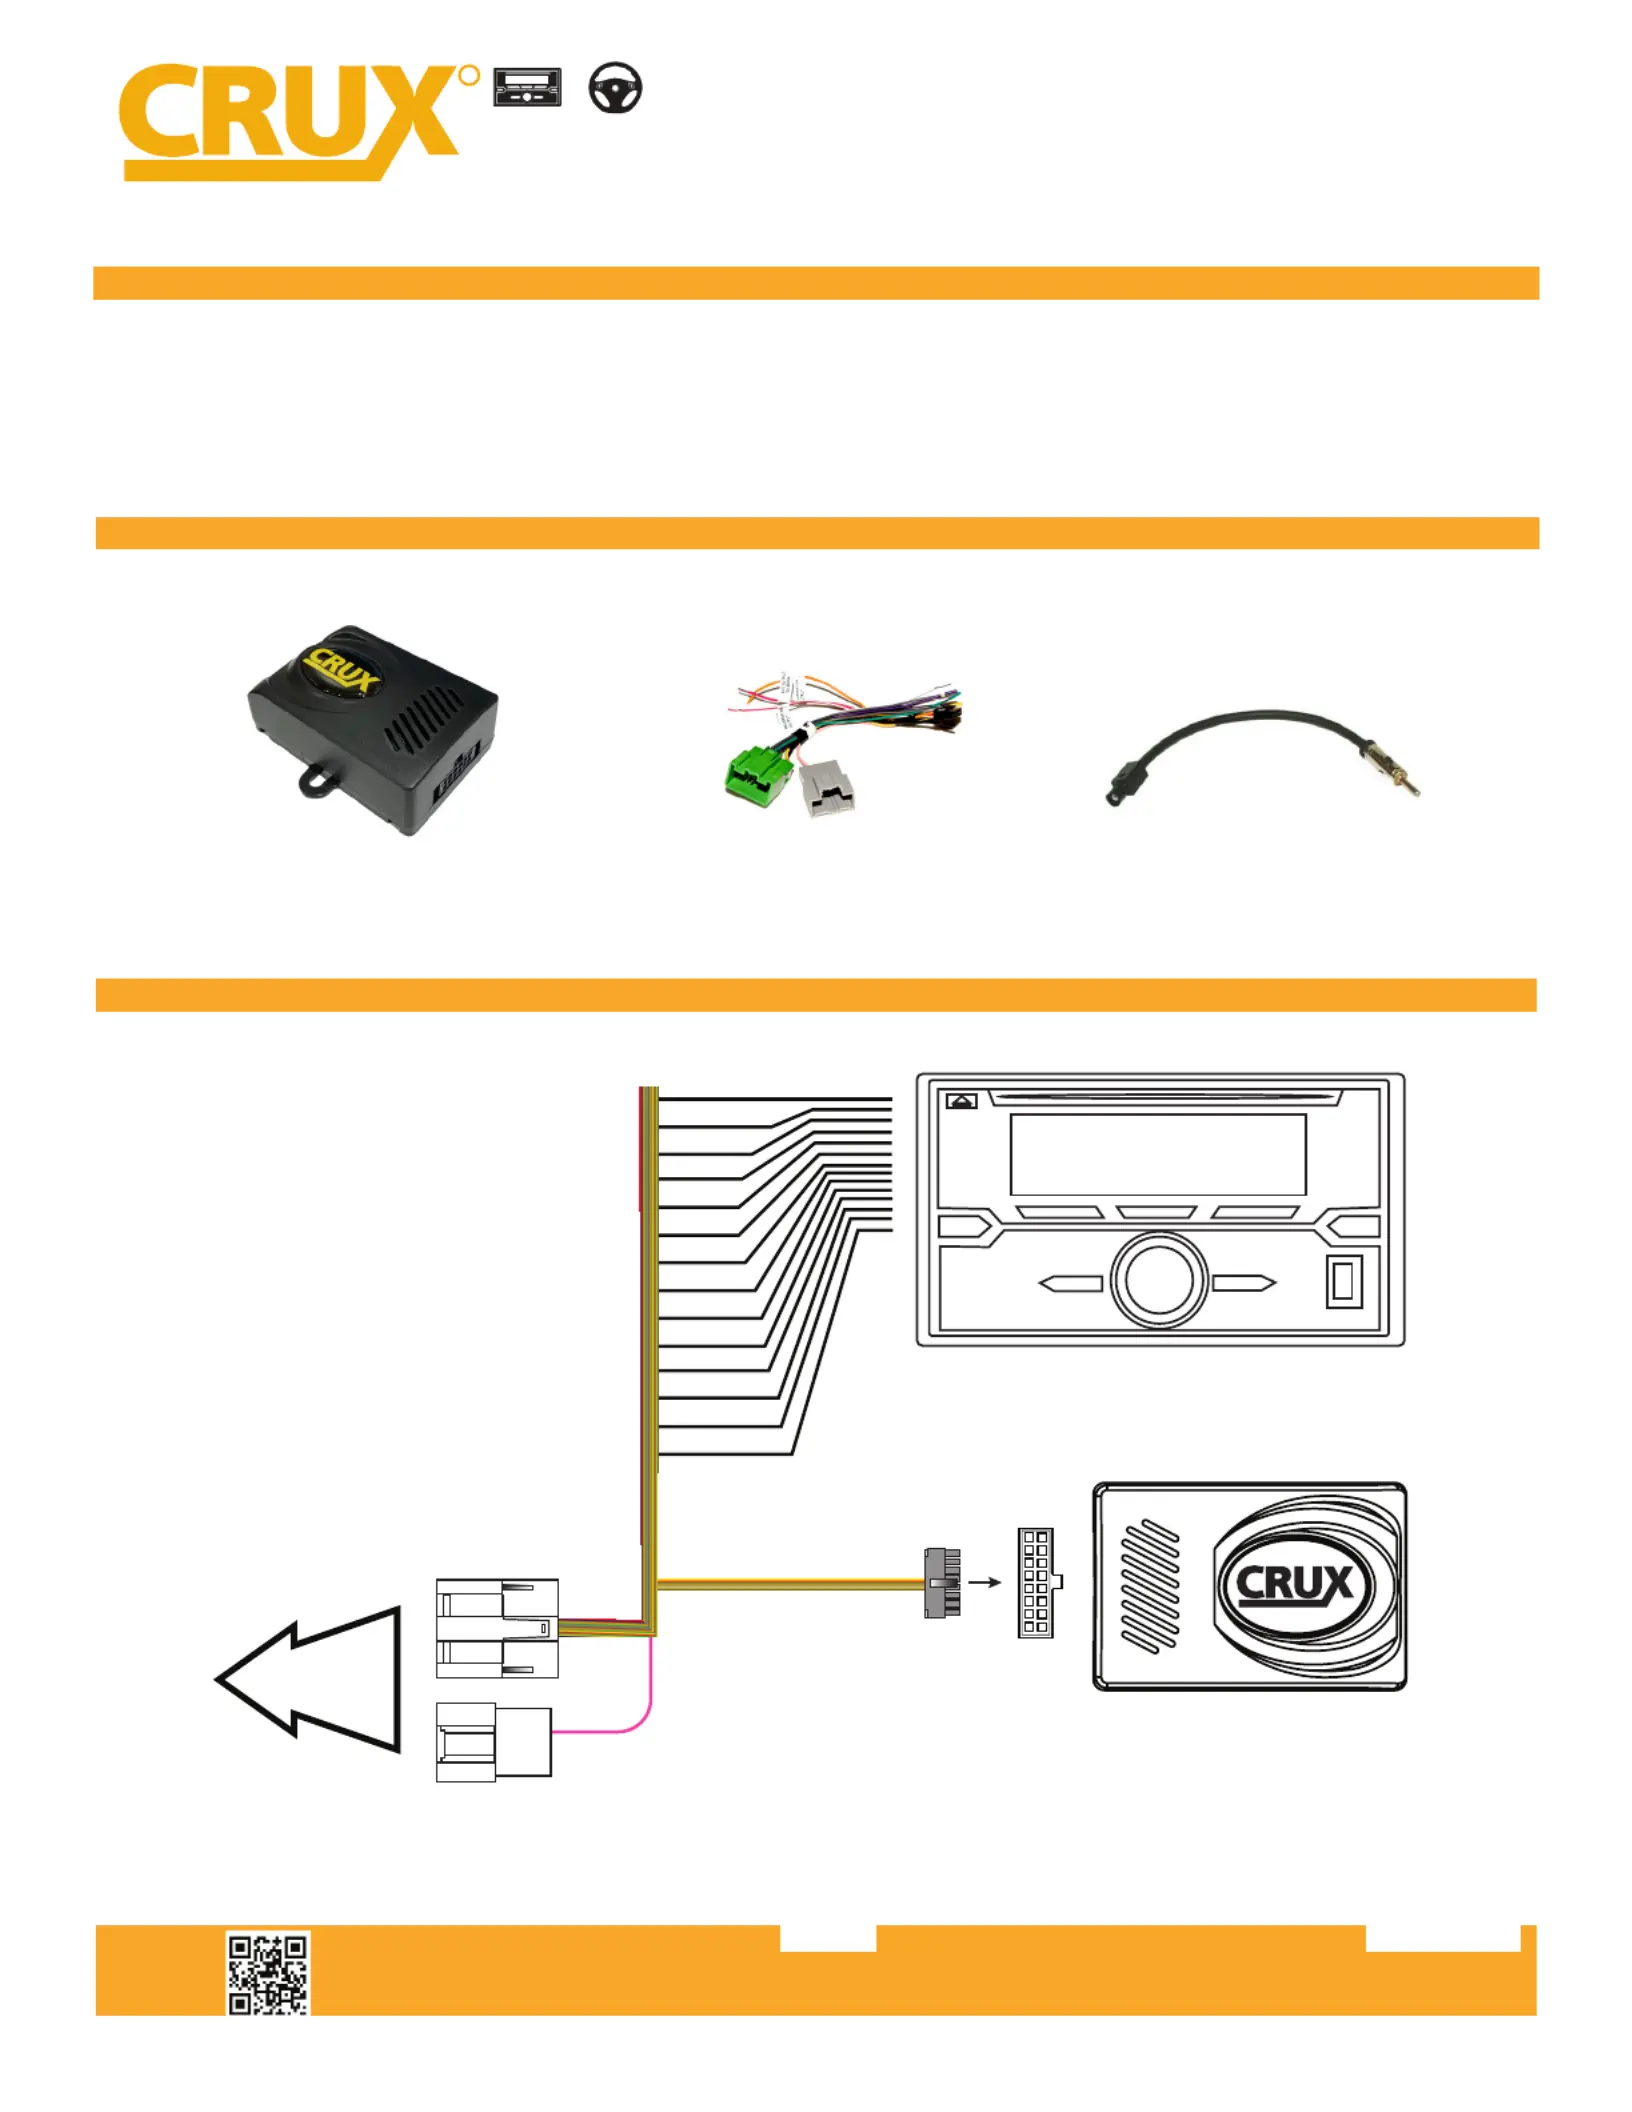
SOCGM-18L
Radio Replacement Interface for
GM LAN v2 (LIN) Bus Vehicles
1 of 2
RADIO REPLACEMENT
SWC RETENTION
+
R
INTERFACING SOLUTIONS
- Retains factory features in select GM LAN V2 (LIN) Bus vehicles while functioning with an aftermarket radio.
- Supports non-amplied Systems only.
- Retains chime functions.
- Retains RAP (Retained Accessory Power).
PRODUCT FEATURES:
PARTS INCLUDED:
SOCGM-18L ModuleSOCGM-18L HarnessAntenna Adapter
INSTALLATION DIAGRAM:
AFTERMARKET
RADIO
Reverse Red/White
TO FACTORY
HARNESS
16-Pin Black
Connector
16-Pin Green
Connector
20-Pin Gray
Connector
INTERFACING SOLUTIONS
Produktspezifikationen
| Marke: | CRUX |
| Kategorie: | Nicht kategorisiert |
| Modell: | SOCGM-18L |
Brauchst du Hilfe?
Wenn Sie Hilfe mit CRUX SOCGM-18L benötigen, stellen Sie unten eine Frage und andere Benutzer werden Ihnen antworten
Bedienungsanleitung Nicht kategorisiert CRUX

17 Januar 2026
16 Januar 2026
14 Januar 2026
8 Oktober 2025
19 September 2025
14 September 2025
8 August 2025
8 August 2025
8 August 2025
8 August 2025
Bedienungsanleitung Nicht kategorisiert
Neueste Bedienungsanleitung für -Kategorien-
3 April 2026
3 April 2026
3 April 2026
3 April 2026
3 April 2026
3 April 2026
3 April 2026
3 April 2026
3 April 2026
3 April 2026