CRUX VRFBM-77i Bedienungsanleitung
CRUX Nicht kategorisiert VRFBM-77i
Lies die bedienungsanleitung für CRUX VRFBM-77i (11 Seiten) kostenlos online; sie gehört zur Kategorie Nicht kategorisiert. Dieses Handbuch wurde von 21 Personen als hilfreich bewertet und erhielt im Schnitt 4.4 Sterne aus 2 Bewertungen. Hast du eine Frage zu CRUX VRFBM-77i oder möchtest du andere Nutzer dieses Produkts befragen? Stelle eine Frage
Seite 1/11
BMW
2015 – 2016 i3*
With OE type Dynamic Parking Guide Lines
On-screen display and setup
2 trigger outputs (+12V max. 1A), separately adjustable switching events (CAN, ACC, rear-view camera,
reverse gear)
Rear-view camera input
Front camera input
Front camera input can also be used as an Auxiliary Video Input
Automatic switching to rear-view camera input on engagement of reverse gear from all operation modes
Forced rear-view camera option (only on vehicles with PDC button)
Manual return from rear-view and front camera (cancellation of automatic switching)
Picture-in-picture mode combining after-market rear-view and front camera picture(s) with factory parking
sensor graphics
Compatible with all factory video accessories (e.g. rear-view camera, DVD-changer, etc.)
Plug & Play installation
For the BMW i3 with navigation system or radio and 6.5”, 7”, 8.8” or 10.25” monitor with 4+2pin HSD2
LVDS connector
The interface is installed under the glove compartment and the radio headunit is located under the rear
seat.
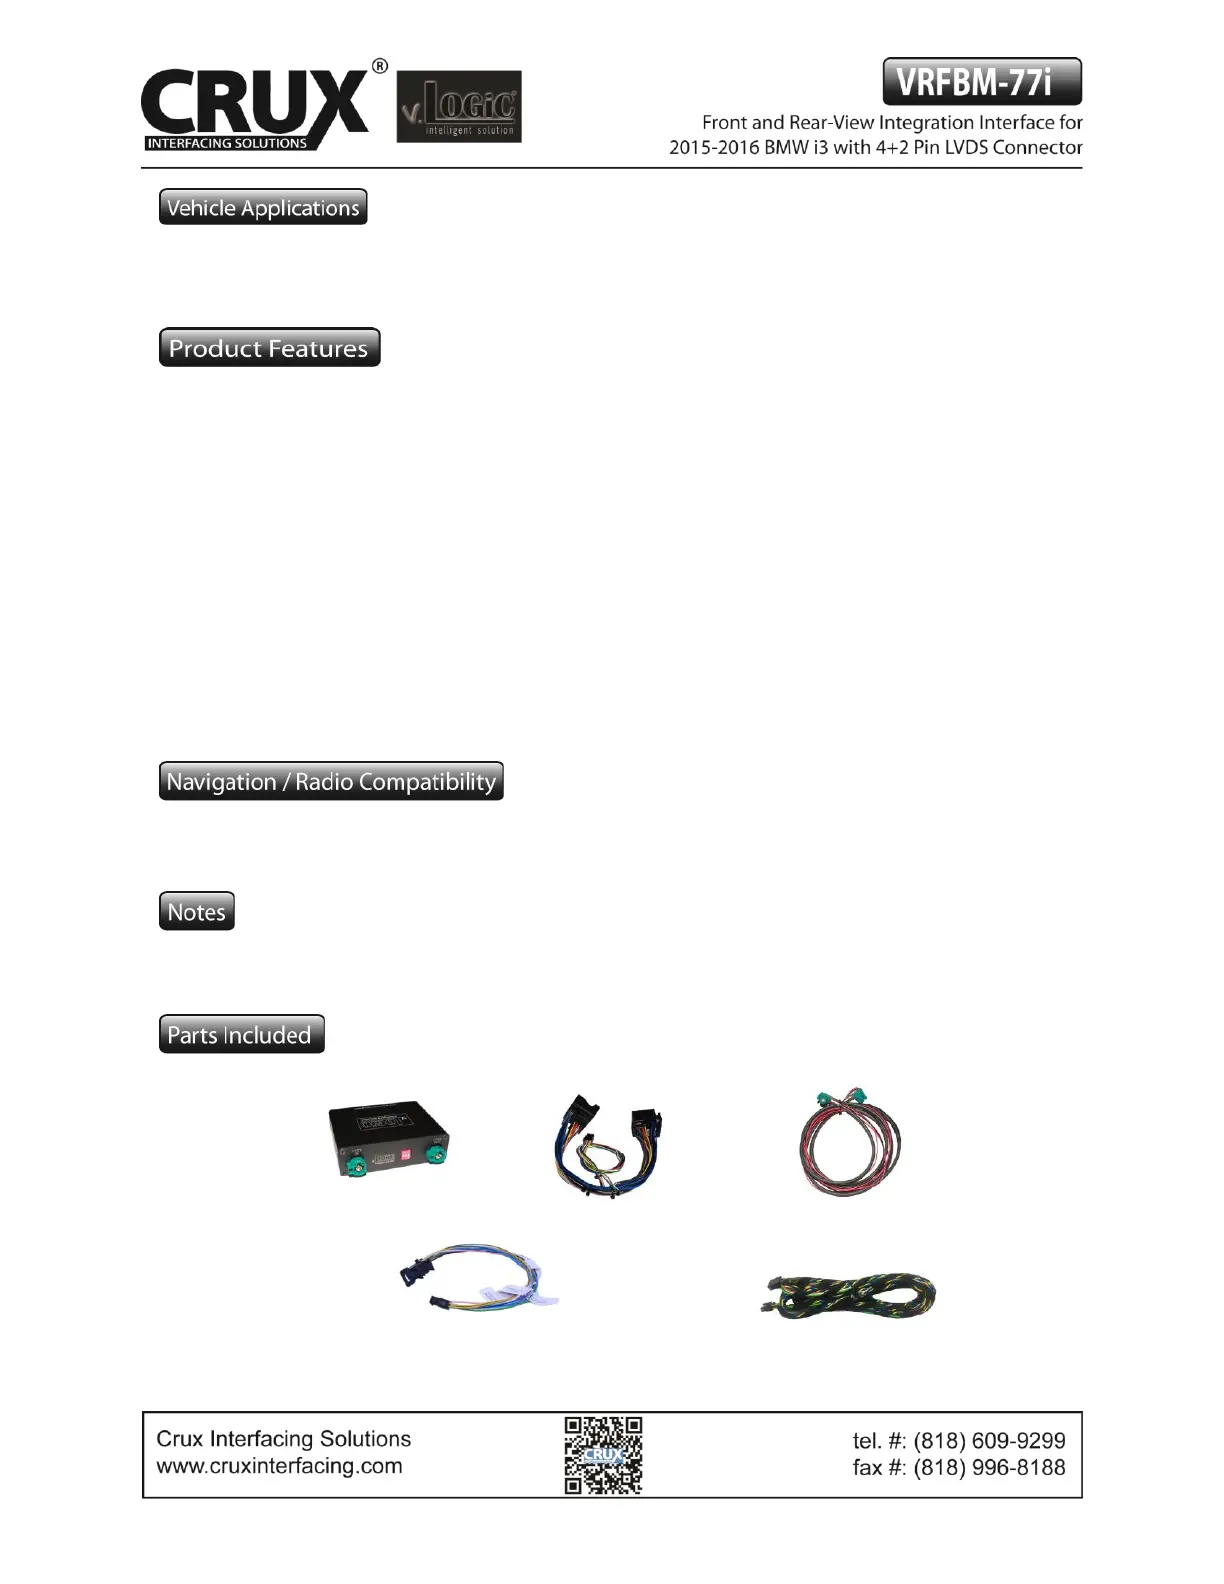
BM-77i Module
BM-77i Harness
4+2 PIN HSD2 LVDS Cable
Power/CAN Harness
i3-HAR
1 / 11
Rev.112816
Produktspezifikationen
| Marke: | CRUX |
| Kategorie: | Nicht kategorisiert |
| Modell: | VRFBM-77i |
Brauchst du Hilfe?
Wenn Sie Hilfe mit CRUX VRFBM-77i benötigen, stellen Sie unten eine Frage und andere Benutzer werden Ihnen antworten
Bedienungsanleitung Nicht kategorisiert CRUX

17 Januar 2026
16 Januar 2026
14 Januar 2026
8 Oktober 2025
19 September 2025
14 September 2025
8 August 2025
8 August 2025
8 August 2025
8 August 2025
Bedienungsanleitung Nicht kategorisiert
Neueste Bedienungsanleitung für -Kategorien-
3 April 2026
3 April 2026
3 April 2026
3 April 2026
3 April 2026
3 April 2026
3 April 2026
3 April 2026
3 April 2026
3 April 2026