CRUX WVITY-01 Bedienungsanleitung
CRUX Nicht kategorisiert WVITY-01
Lies die bedienungsanleitung für CRUX WVITY-01 (6 Seiten) kostenlos online; sie gehört zur Kategorie Nicht kategorisiert. Dieses Handbuch wurde von 19 Personen als hilfreich bewertet und erhielt im Schnitt 4.8 Sterne aus 2 Bewertungen. Hast du eine Frage zu CRUX WVITY-01 oder möchtest du andere Nutzer dieses Produkts befragen? Stelle eine Frage
Seite 1/6
R
INTERFACING SOLUTIONS
A/V
SERIES
Crux Interfacing Solutions • Chatsworth, CA 91311
phone: (818) 609-9299 • fax: (818) 996-8188 • www.cruxinterfacing.com
rev.031221
WVITY-01
Wi Connectivity Integration
for Select Lexus, Scion and Toyota Vehicles
1 of 6
- Enables wireless (Wi-Fi) Audio/Video mirroring from mobile devices to the OEM screen.
- Provides an audio/video input which can also be used to add a camera.
- Includes a USB input to play audio and video les.
- Provides a virtual remote control via a smartphone wi connection.
- Dual band (5GHz and 2.4GHz) Wi capability for clear connection.
- Includes HMDI output for high quality video.
- Works with Facetime, Maps, Skype, YouTube, and other apps.
PRODUCT FEATURES:
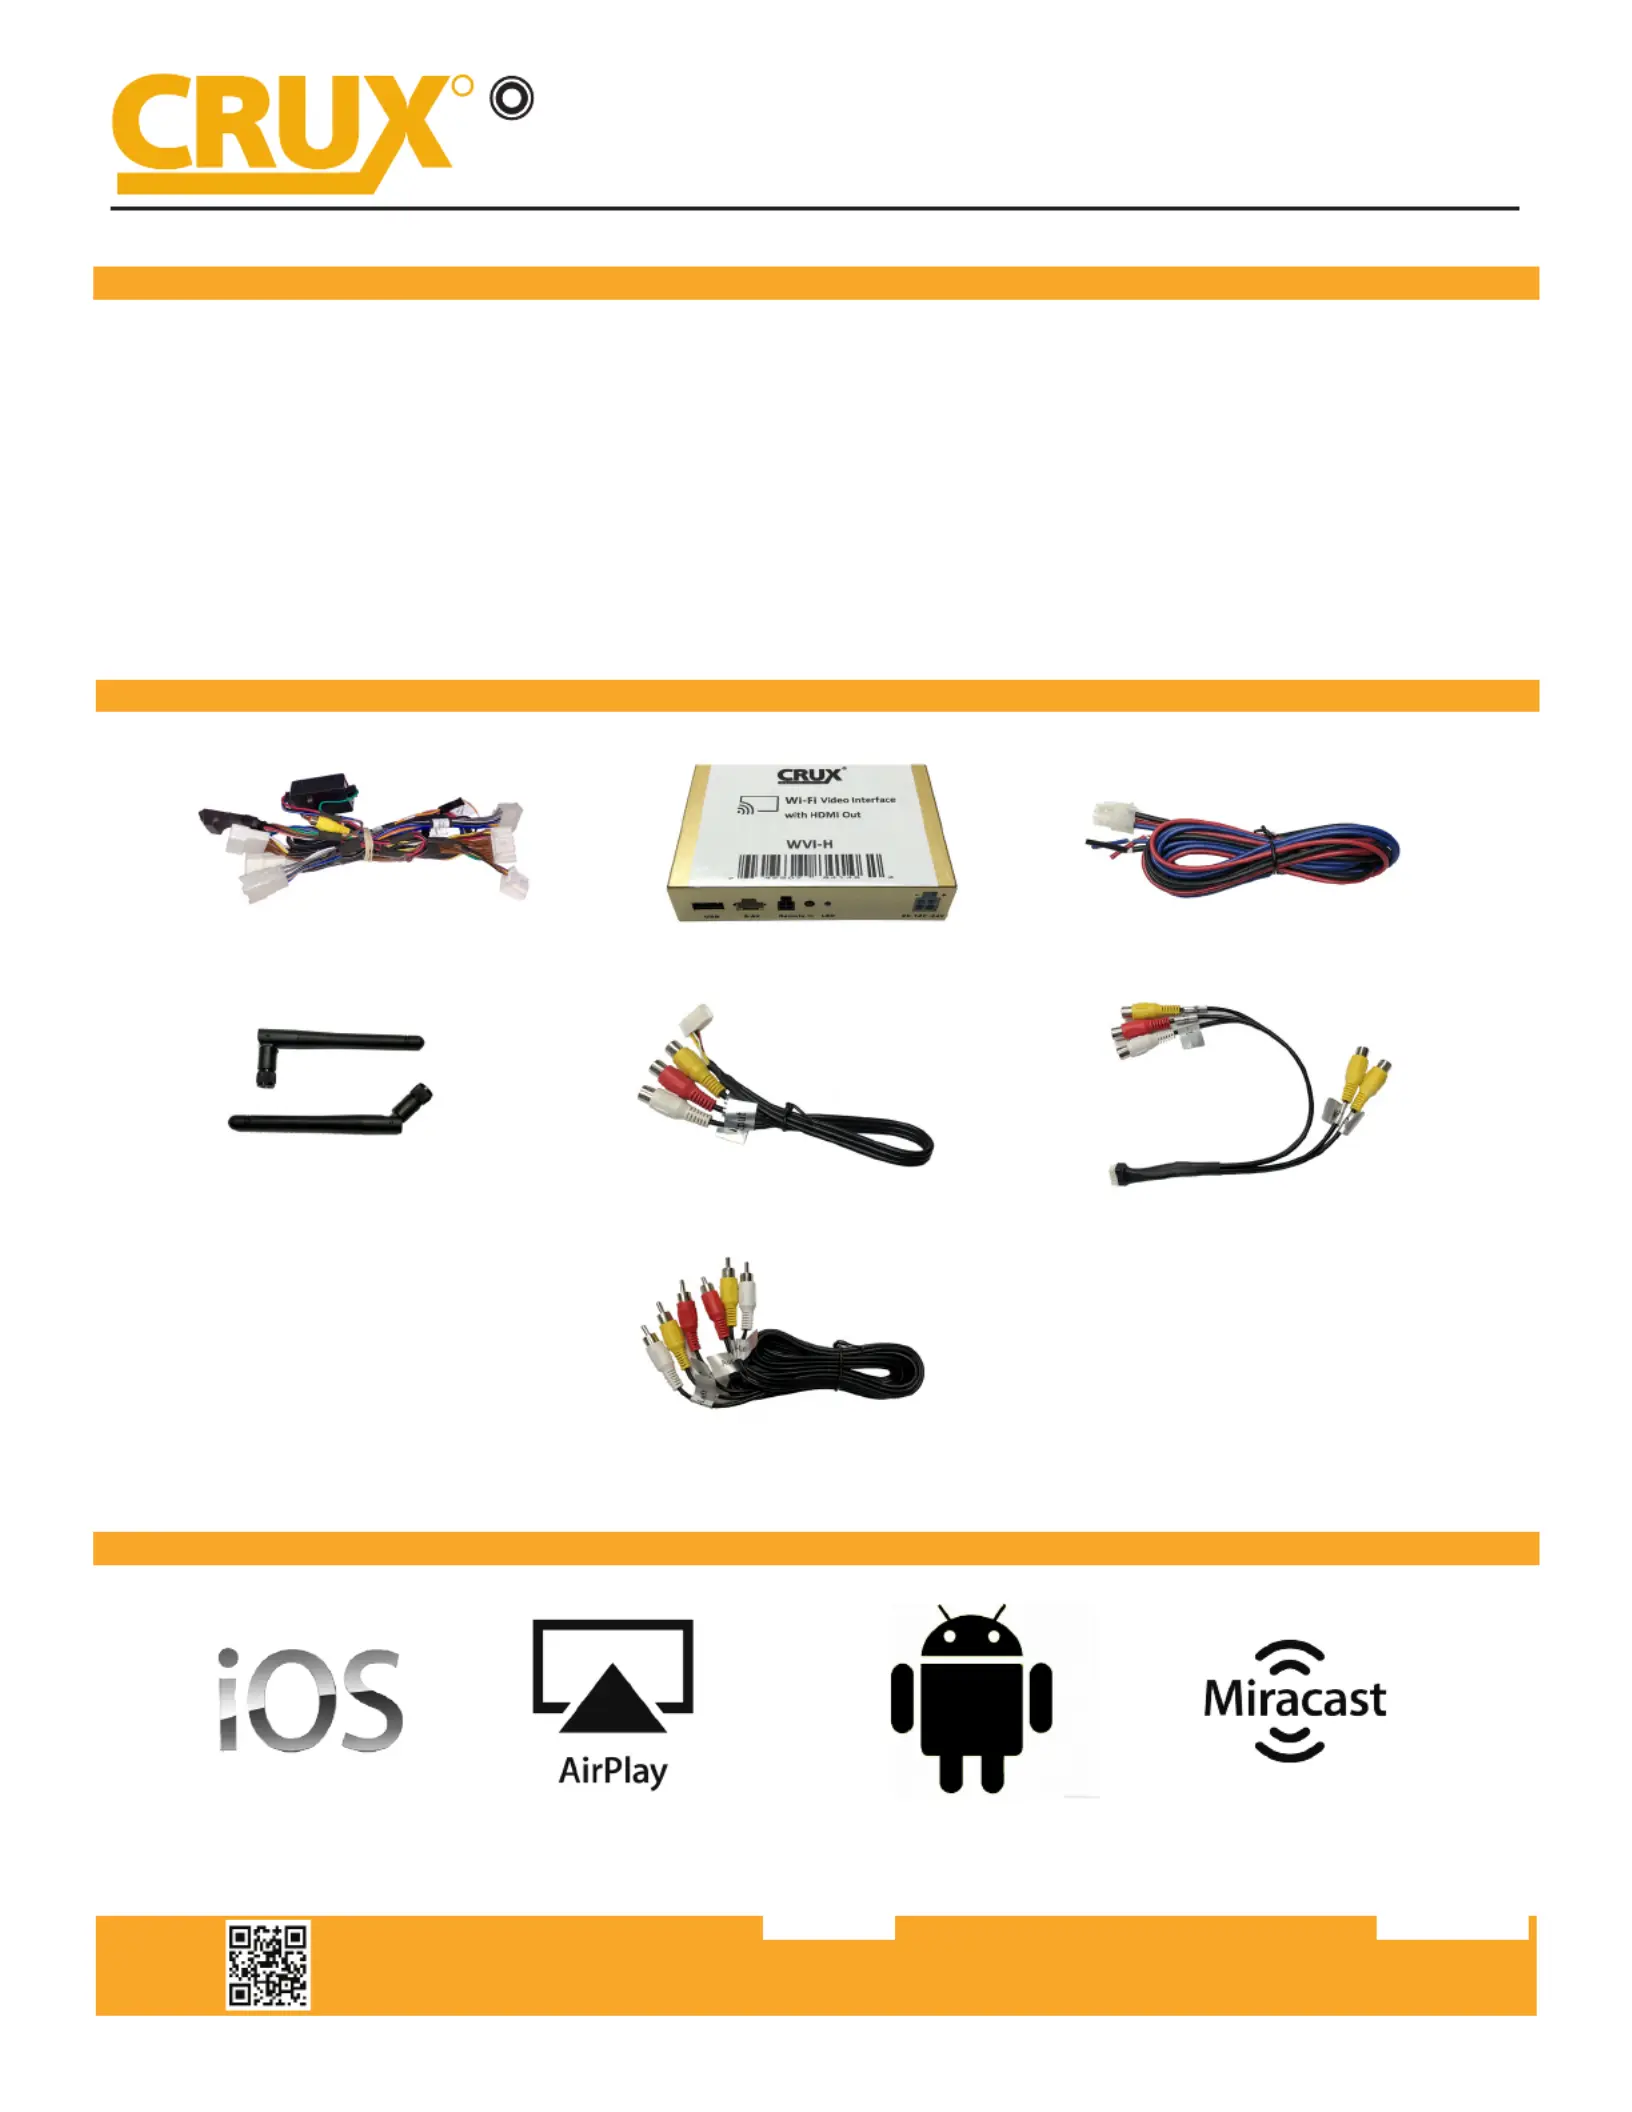
PARTS INCLUDED:
WORKS WITH:
WVITY-01 Vehicle HarnessWVI-H ModulePower Harness
Dual AntennasWiFi AV Out HarnessAV In / Video Out Harness
IR Extension
iOS 7 and NewerOS 4.2 and Newer
Produktspezifikationen
| Marke: | CRUX |
| Kategorie: | Nicht kategorisiert |
| Modell: | WVITY-01 |
Brauchst du Hilfe?
Wenn Sie Hilfe mit CRUX WVITY-01 benötigen, stellen Sie unten eine Frage und andere Benutzer werden Ihnen antworten
Bedienungsanleitung Nicht kategorisiert CRUX

17 Januar 2026
16 Januar 2026
14 Januar 2026
8 Oktober 2025
19 September 2025
14 September 2025
8 August 2025
8 August 2025
8 August 2025
8 August 2025
Bedienungsanleitung Nicht kategorisiert
Neueste Bedienungsanleitung für -Kategorien-
3 April 2026
3 April 2026
3 April 2026
3 April 2026
3 April 2026
3 April 2026
3 April 2026
3 April 2026
3 April 2026
3 April 2026