Panduit DP4300H/E Bedienungsanleitung
Lies die bedienungsanleitung für Panduit DP4300H/E (2 Seiten) kostenlos online; sie gehört zur Kategorie Drucker. Dieses Handbuch wurde von 44 Personen als hilfreich bewertet und erhielt im Schnitt 4.7 Sterne aus 5 Bewertungen. Hast du eine Frage zu Panduit DP4300H/E oder möchtest du andere Nutzer dieses Produkts befragen? Stelle eine Frage
Seite 1/2
Page 1 of 2
DP4300H
DP4600H
DP4300H/E
DP4600H/E
DP4X00H-QSG-EN
Rev.: 08-09-2024
© Panduit Corp. 2024
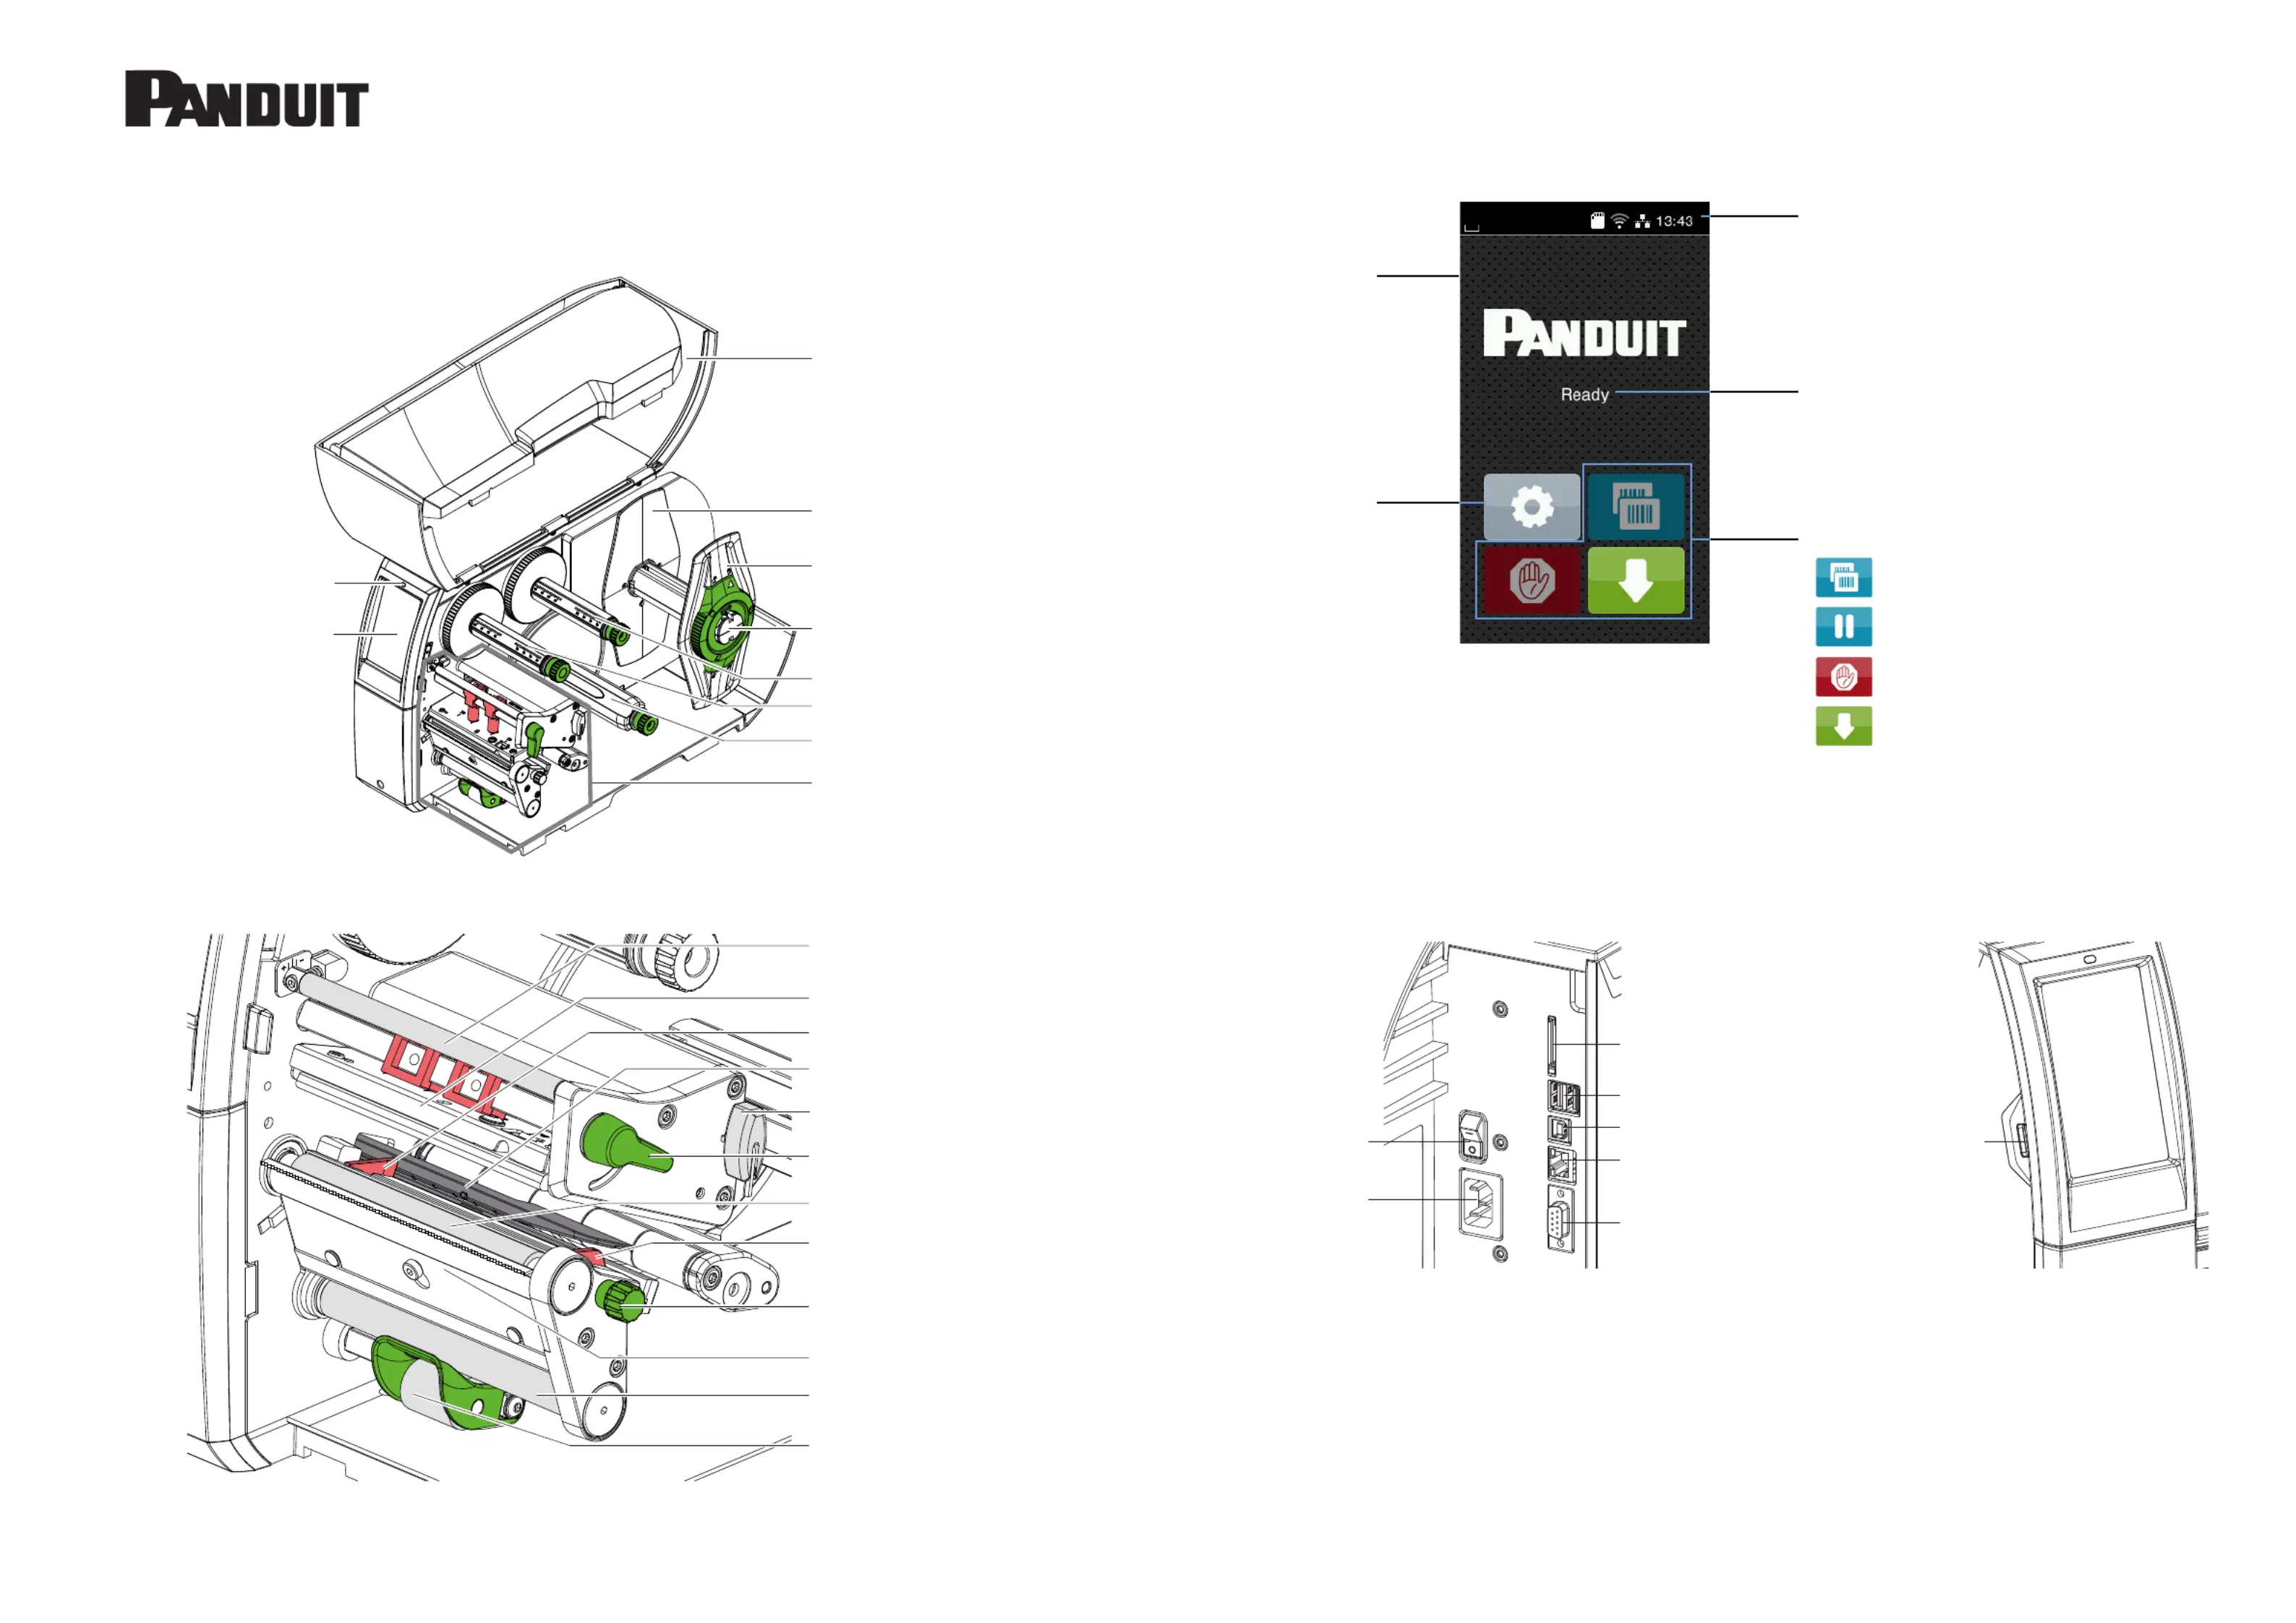
Ribbon deection
Printhead retainer with printhead
Label guide
Label sensor
Allen key
Printhead locking lever
Print roller
Label guide
Knob for adjusting label guides
Tear-o plate
Rewind assist roller
Locking system
USB-A port
Slot for SD card
2 USB-A ports
USB-B port
Ethernet 10/100 Base-T
Serial RS-232 port
Power switch
Power connection jack
LED "Power on"
Touchscreen display
Cover
Margin stop, inside
Margin stop, outside
Roll retainer
Ribbon supply hub
Ribbon take-up hub
Print mechanism
Internal rewinder
Printer Overview
USB-A ports can be used for:
•Keyboard
•Scanner
•USB memory stick
•USB WiFi stick
•Service key
Function Buttons:
Repeat the last printed label
Interrupt / Continue the print job
Short touch: Cancel the current print job
Long touch: Cancel all print jobs
Feed a blank label
Menu Button
Printer status
Widgets:
•Connections
•Memory media
•Time
•Active apps
Touch screen
Display when starting
Produktspezifikationen
| Marke: | Panduit |
| Kategorie: | Drucker |
| Modell: | DP4300H/E |
Brauchst du Hilfe?
Wenn Sie Hilfe mit Panduit DP4300H/E benötigen, stellen Sie unten eine Frage und andere Benutzer werden Ihnen antworten
Bedienungsanleitung Drucker Panduit

24 Juli 2025
24 Juli 2025
24 Juli 2025
24 Juli 2025
24 Juli 2025
22 August 2024
15 August 2024
10 August 2024
9 August 2024
8 August 2024
Bedienungsanleitung Drucker
Neueste Bedienungsanleitung für -Kategorien-
31 März 2026
30 März 2026
30 März 2026
29 März 2026
25 März 2026
23 März 2026
16 März 2026
16 März 2026
15 März 2026
15 März 2026