Proaim P-OHLR-01 Bedienungsanleitung
Lies die bedienungsanleitung für Proaim P-OHLR-01 (4 Seiten) kostenlos online; sie gehört zur Kategorie Stativ. Dieses Handbuch wurde von 18 Personen als hilfreich bewertet und erhielt im Schnitt 4.6 Sterne aus 8 Bewertungen. Hast du eine Frage zu Proaim P-OHLR-01 oder möchtest du andere Nutzer dieses Produkts befragen? Stelle eine Frage
Seite 1/4
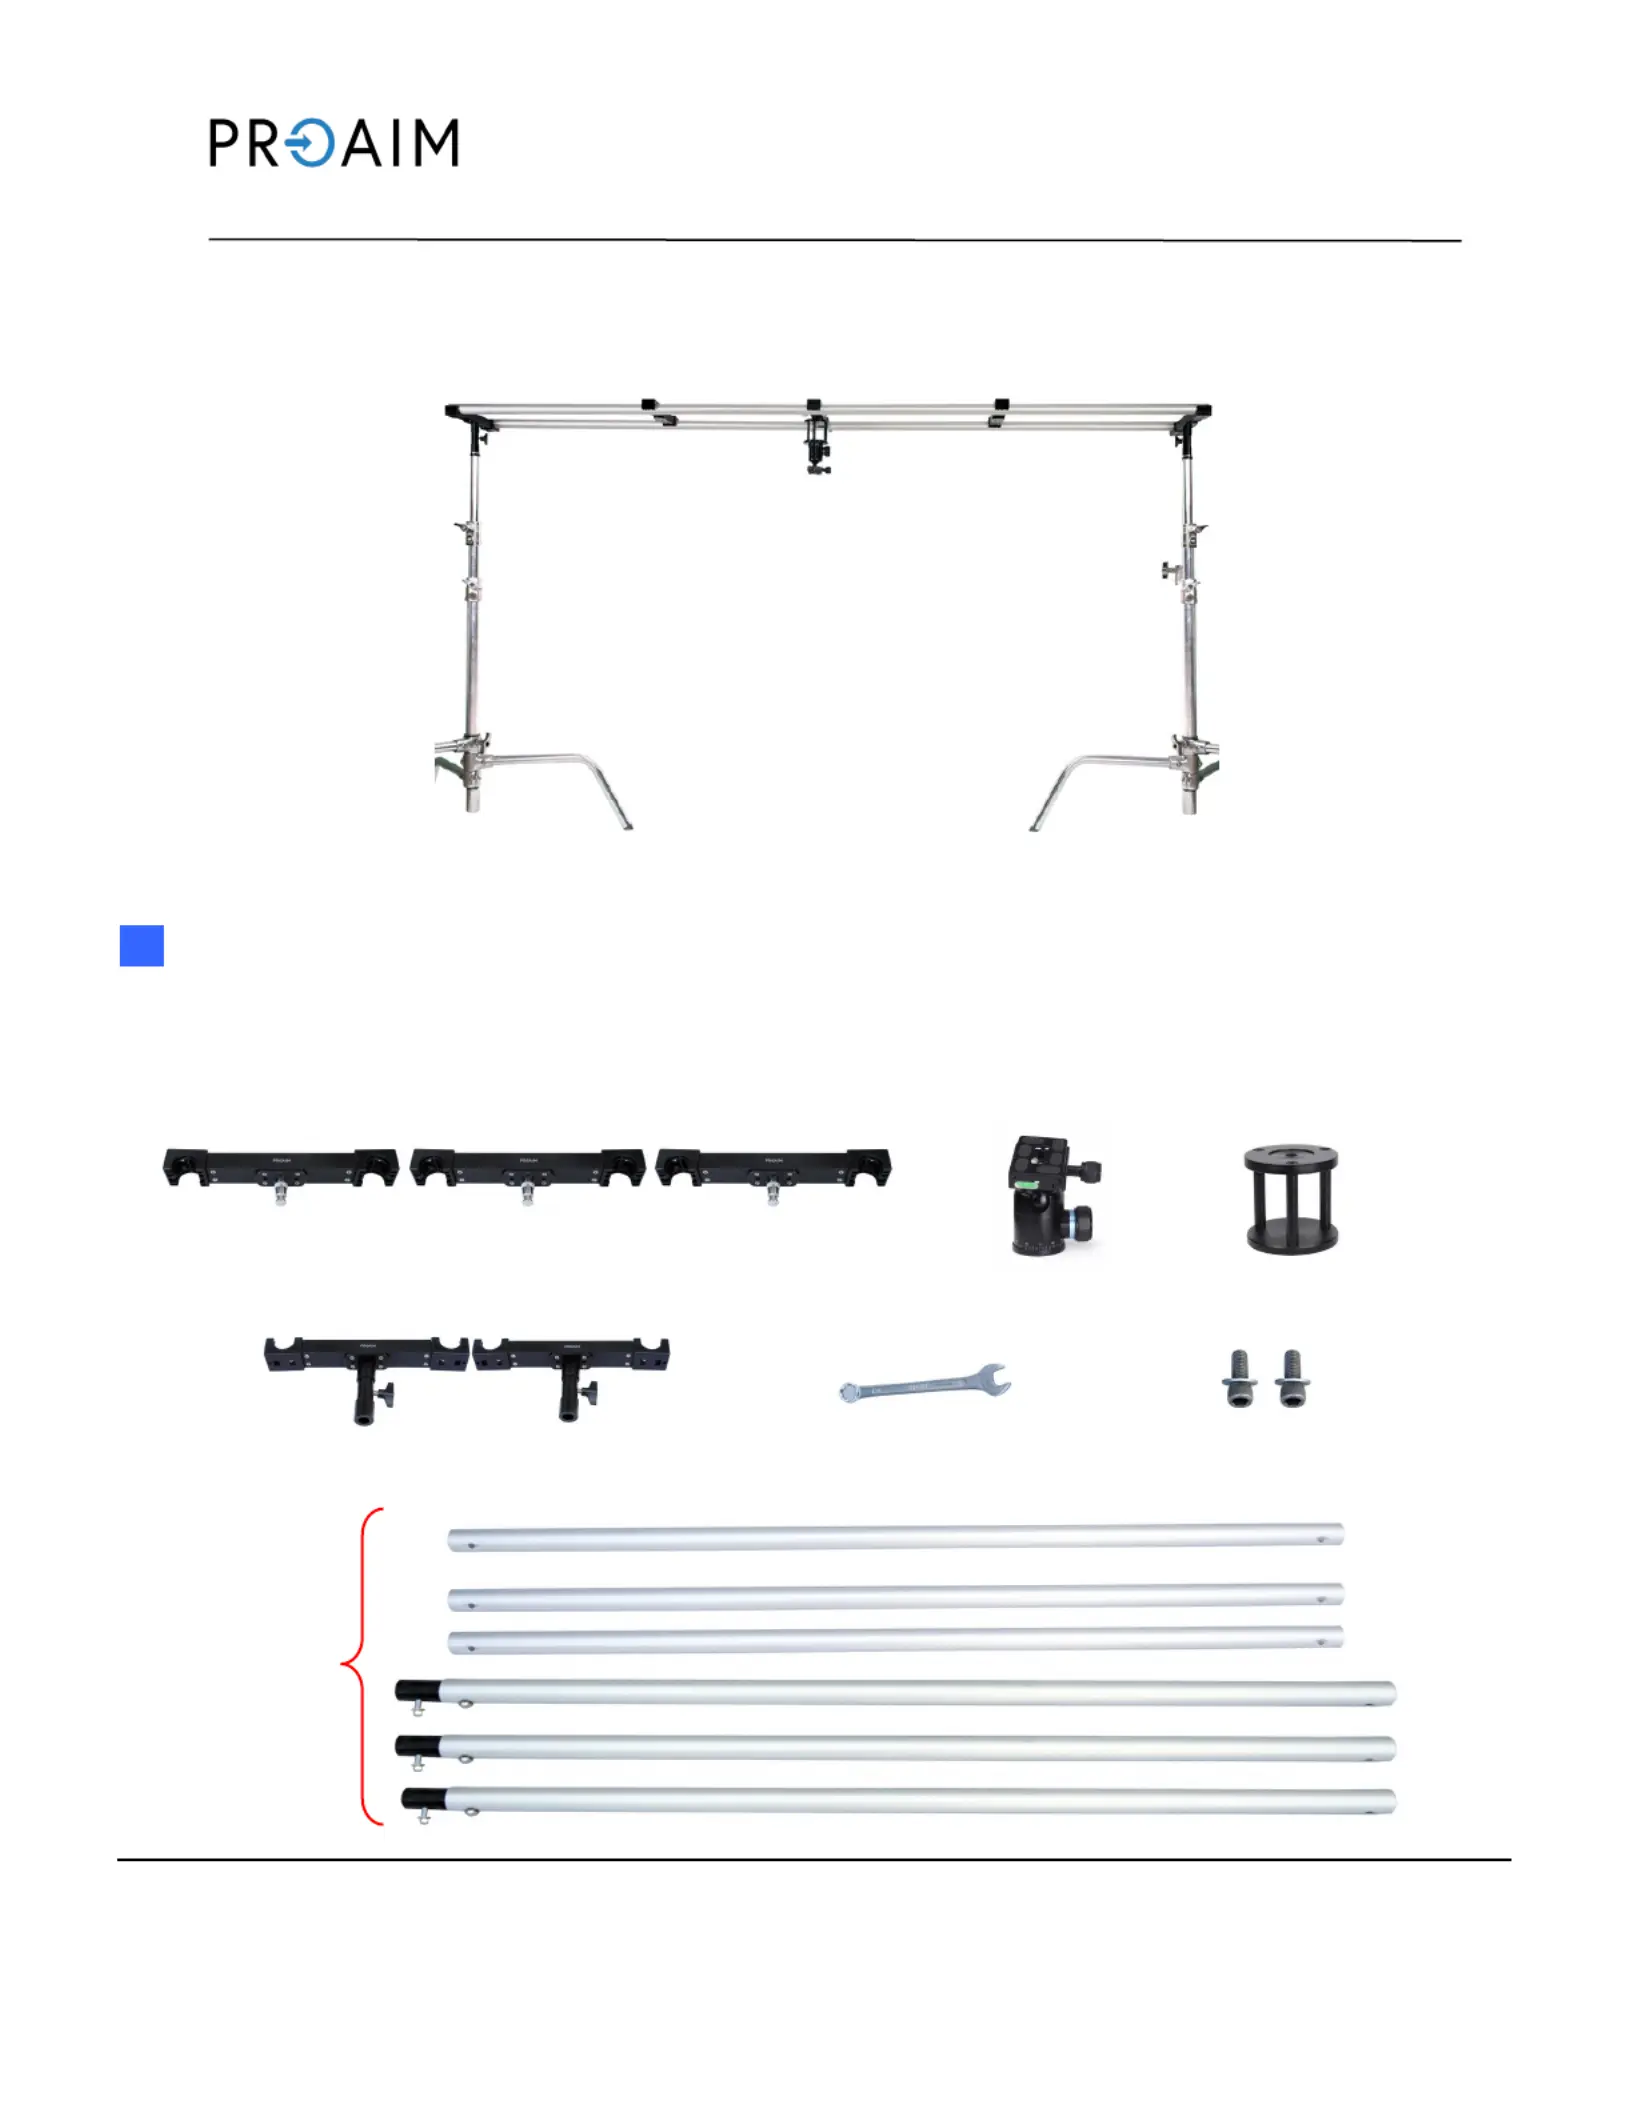
Whats In The Box’
Please inspect the contents of your shipped package to ensure you have received everything that
is listed below.
All rights reserved.
No part of this document may be reproduced, stored in a retrieval system, or transmied by any form or by any means,
electronic, mechanical, photocopying, recording, or otherwise, except as may be expressly permied by the applicable copyright -
statutes or in wring by the Publisher.
Overhead Camera / Light Modular Studio Rig
OHLR(P--01)
Assembly Manual
3 x Accessory Spacers
Ball Head
3” Riser
End Spacers with Stand Post Adapters
Wrench 1/4"20 and 3/8"16 Screws --
4 Each Secon
Produktspezifikationen
| Marke: | Proaim |
| Kategorie: | Stativ |
| Modell: | P-OHLR-01 |
Brauchst du Hilfe?
Wenn Sie Hilfe mit Proaim P-OHLR-01 benötigen, stellen Sie unten eine Frage und andere Benutzer werden Ihnen antworten
Bedienungsanleitung Stativ Proaim

21 März 2026
1 Oktober 2025
8 August 2025
8 August 2025
8 August 2025
8 August 2025
9 Juni 2025
8 Juni 2025
8 Juni 2025
8 Juni 2025
Bedienungsanleitung Stativ
Neueste Bedienungsanleitung für -Kategorien-
1 April 2026
29 März 2026
28 März 2026
27 März 2026
26 März 2026
26 März 2026
26 März 2026
26 März 2026
24 März 2026
24 März 2026