TP-Link Archer BE450 Bedienungsanleitung
Lies die bedienungsanleitung für TP-Link Archer BE450 (2 Seiten) kostenlos online; sie gehört zur Kategorie Router. Dieses Handbuch wurde von 12 Personen als hilfreich bewertet und erhielt im Schnitt 4.0 Sterne aus 4 Bewertungen. Hast du eine Frage zu TP-Link Archer BE450 oder möchtest du andere Nutzer dieses Produkts befragen? Stelle eine Frage
Seite 1/2
1. Connect your device to the router wirelessly or with an
Ethernet cable.
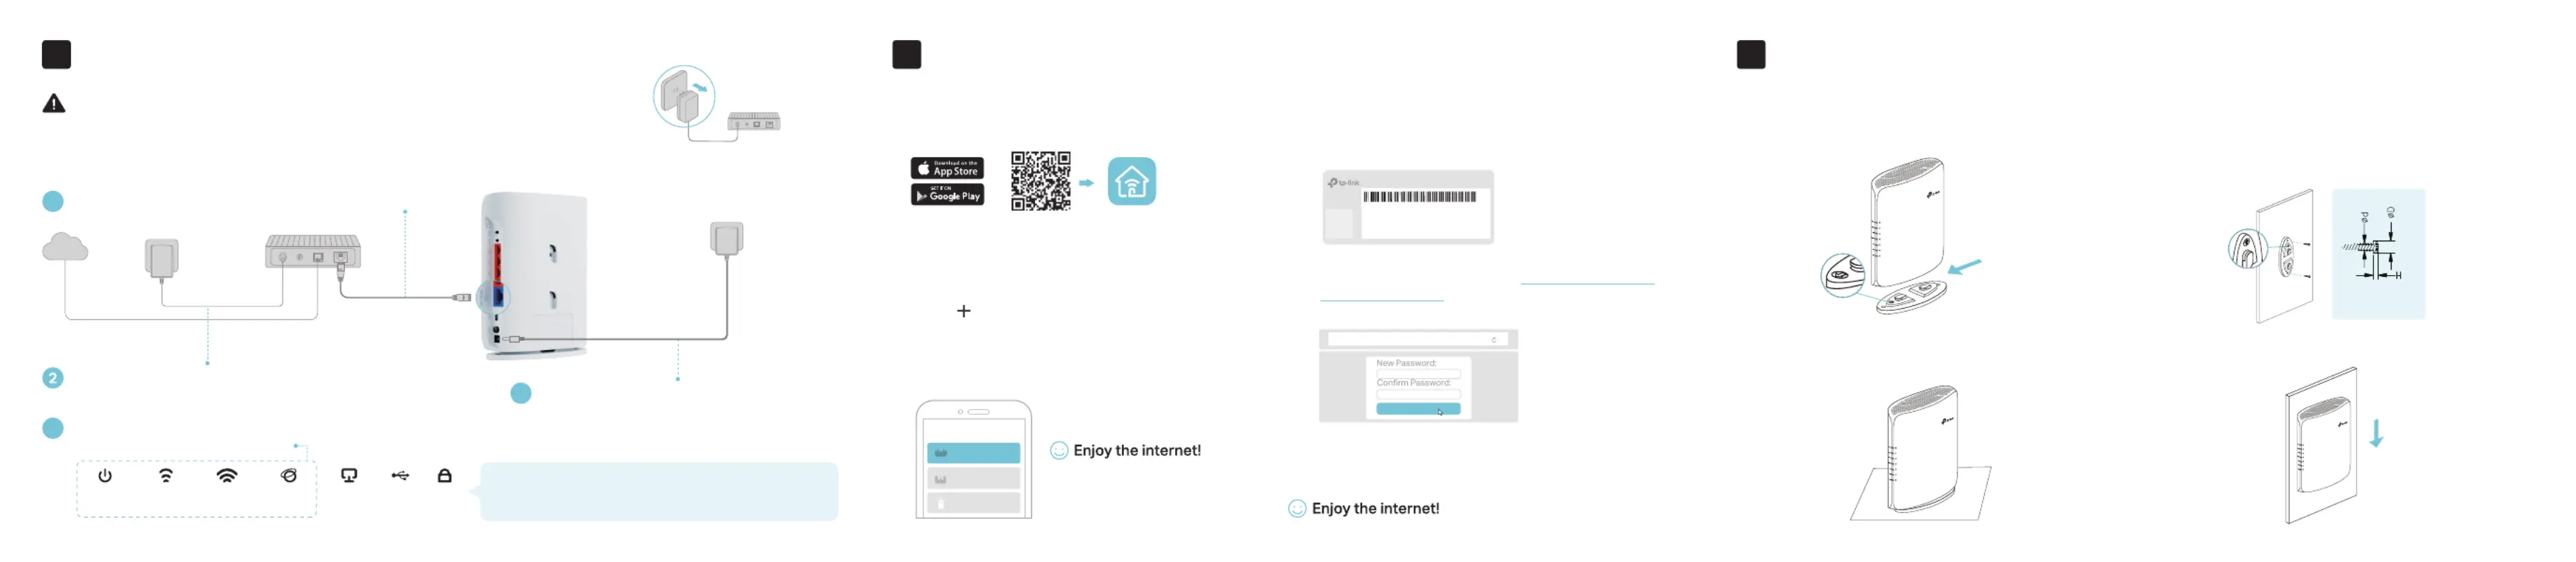
Method TWO: Via a Web Browser
2. Launch a web wser and enterbrohttp://tplinkwifi.net
or in the address bar. Create a http://192.168.0.1
password to log in.
3. Follow the step-by-step instructions to set up the internet
connection and register for the TP-Link Cloud service.
Let’s Get Started
http://tplinkwi.net
Note: If the login window
does not appear, please
refer to Q2 of Need Help?
in this guide.
Method ONE: Via the TP-Link Tether App
1. Download the Tether app.
Scan for Tether
Tether
or
2. Open the Tether app and log in with your TP-Link ID.
Note: If you don’t have an account, create one first.
The default wireless network
names (SSIDs) and password
are printed on the label at the
back of the router.
Wireless Password/PIN:XXXXXXXX
SSID:TP-Link_XXXX
SSID:TP-Link_XXXX_5G
Set Up the Network
2
Connect the Hardware
13
Mount the Router
Connect the powered-offmodem to the router’s
10 Gbps WAN/LAN port with an Ethernet cable.
1
Power on the modem, and then wait about
2 minutes for it to restart.
Modem
Unplug the power
If your internet comes from an Ethernet outlet instead of a DSL / Cable / Satellite modem, connect the router’s
10 Gbps WAN/LAN portto it, and then follow steps 3 and 4 to complete the hardware connection.
*Images may dier from
your actual products.
Internet
3
Connect the power adapter to the router.
Then press the
Power button
to turn on
the router.
To enjoy a more complete
service from TP-Link, bind
your TP-Link ID to the router.
Choose Your Device Type
Gaming Router
Range Extender
Wireless Router
3. Tap the button in the Tether app, select Wireless
Router. Follow the steps to complete the setup and
connect to the internet.
Note: Due to Tether app updates, your actual user interface
and pathway may differ from those depicted here.
• Unplug the power to turn o your modem, if any, and remove the backup battery if it has one.
• Keep the router vertical while working. Refer to Q6 of Need Help? to place the router for optimal
Wi-Fi performance.
Note: If the 2.4GHz LED and 5GHz LED are off, press and
hold the Wi-Fi button on the back for more than 2 seconds,
then release the button. Both the LEDs should turn solid on.
4
Verify that the hardware connection is correct
by checking the following LEDs.
Power
Solid On
Internet
Solid On
2.4GHz
Solid On
5GHz
Solid On
EthernetUSBWPS
Option TWO: Wall MountingOption ONE: Desktop Mounting
1. Mount the bracket on the wall in the correct direction with two
screws (not provided).
1. Attach the router on the bracket as shown below,
and slide to lock into the bracket.
2. Attach the router on the bracket as shown below, and slide
to lock into the bracket.
2. Place the router vertically on a flat surface
(such as a desktop or shelf) that is out of
children’s reach.
Note: The length of the screw needs to be at least 20 mm to withstand
the weight of the product.
4.67mm<D<8mm
d<4mm
H<3mm
Screw Specifications:
Produktspezifikationen
| Marke: | TP-Link |
| Kategorie: | Router |
| Modell: | Archer BE450 |
Brauchst du Hilfe?
Wenn Sie Hilfe mit TP-Link Archer BE450 benötigen, stellen Sie unten eine Frage und andere Benutzer werden Ihnen antworten
Bedienungsanleitung Router TP-Link

28 Januar 2026
25 Januar 2026
24 September 2025
21 September 2025
14 September 2025
4 September 2025
30 August 2025
30 August 2025
30 August 2025
28 August 2025
Bedienungsanleitung Router
Neueste Bedienungsanleitung für -Kategorien-
18 Februar 2026
11 Februar 2026
9 Februar 2026
2 Februar 2026
29 Januar 2026
24 Januar 2026
24 Januar 2026
13 Januar 2026
11 Januar 2026
10 Januar 2026