Hinkley Lighting 1542BZ Bedienungsanleitung
Hinkley Lighting Beleuchtung 1542BZ
Lies die bedienungsanleitung für Hinkley Lighting 1542BZ (3 Seiten) kostenlos online; sie gehört zur Kategorie Beleuchtung. Dieses Handbuch wurde von 29 Personen als hilfreich bewertet und erhielt im Schnitt 4.7 Sterne aus 4 Bewertungen. Hast du eine Frage zu Hinkley Lighting 1542BZ oder möchtest du andere Nutzer dieses Produkts befragen? Stelle eine Frage
Seite 1/3
152B4Z
1546BZ
Drawing 1
Drawing 2
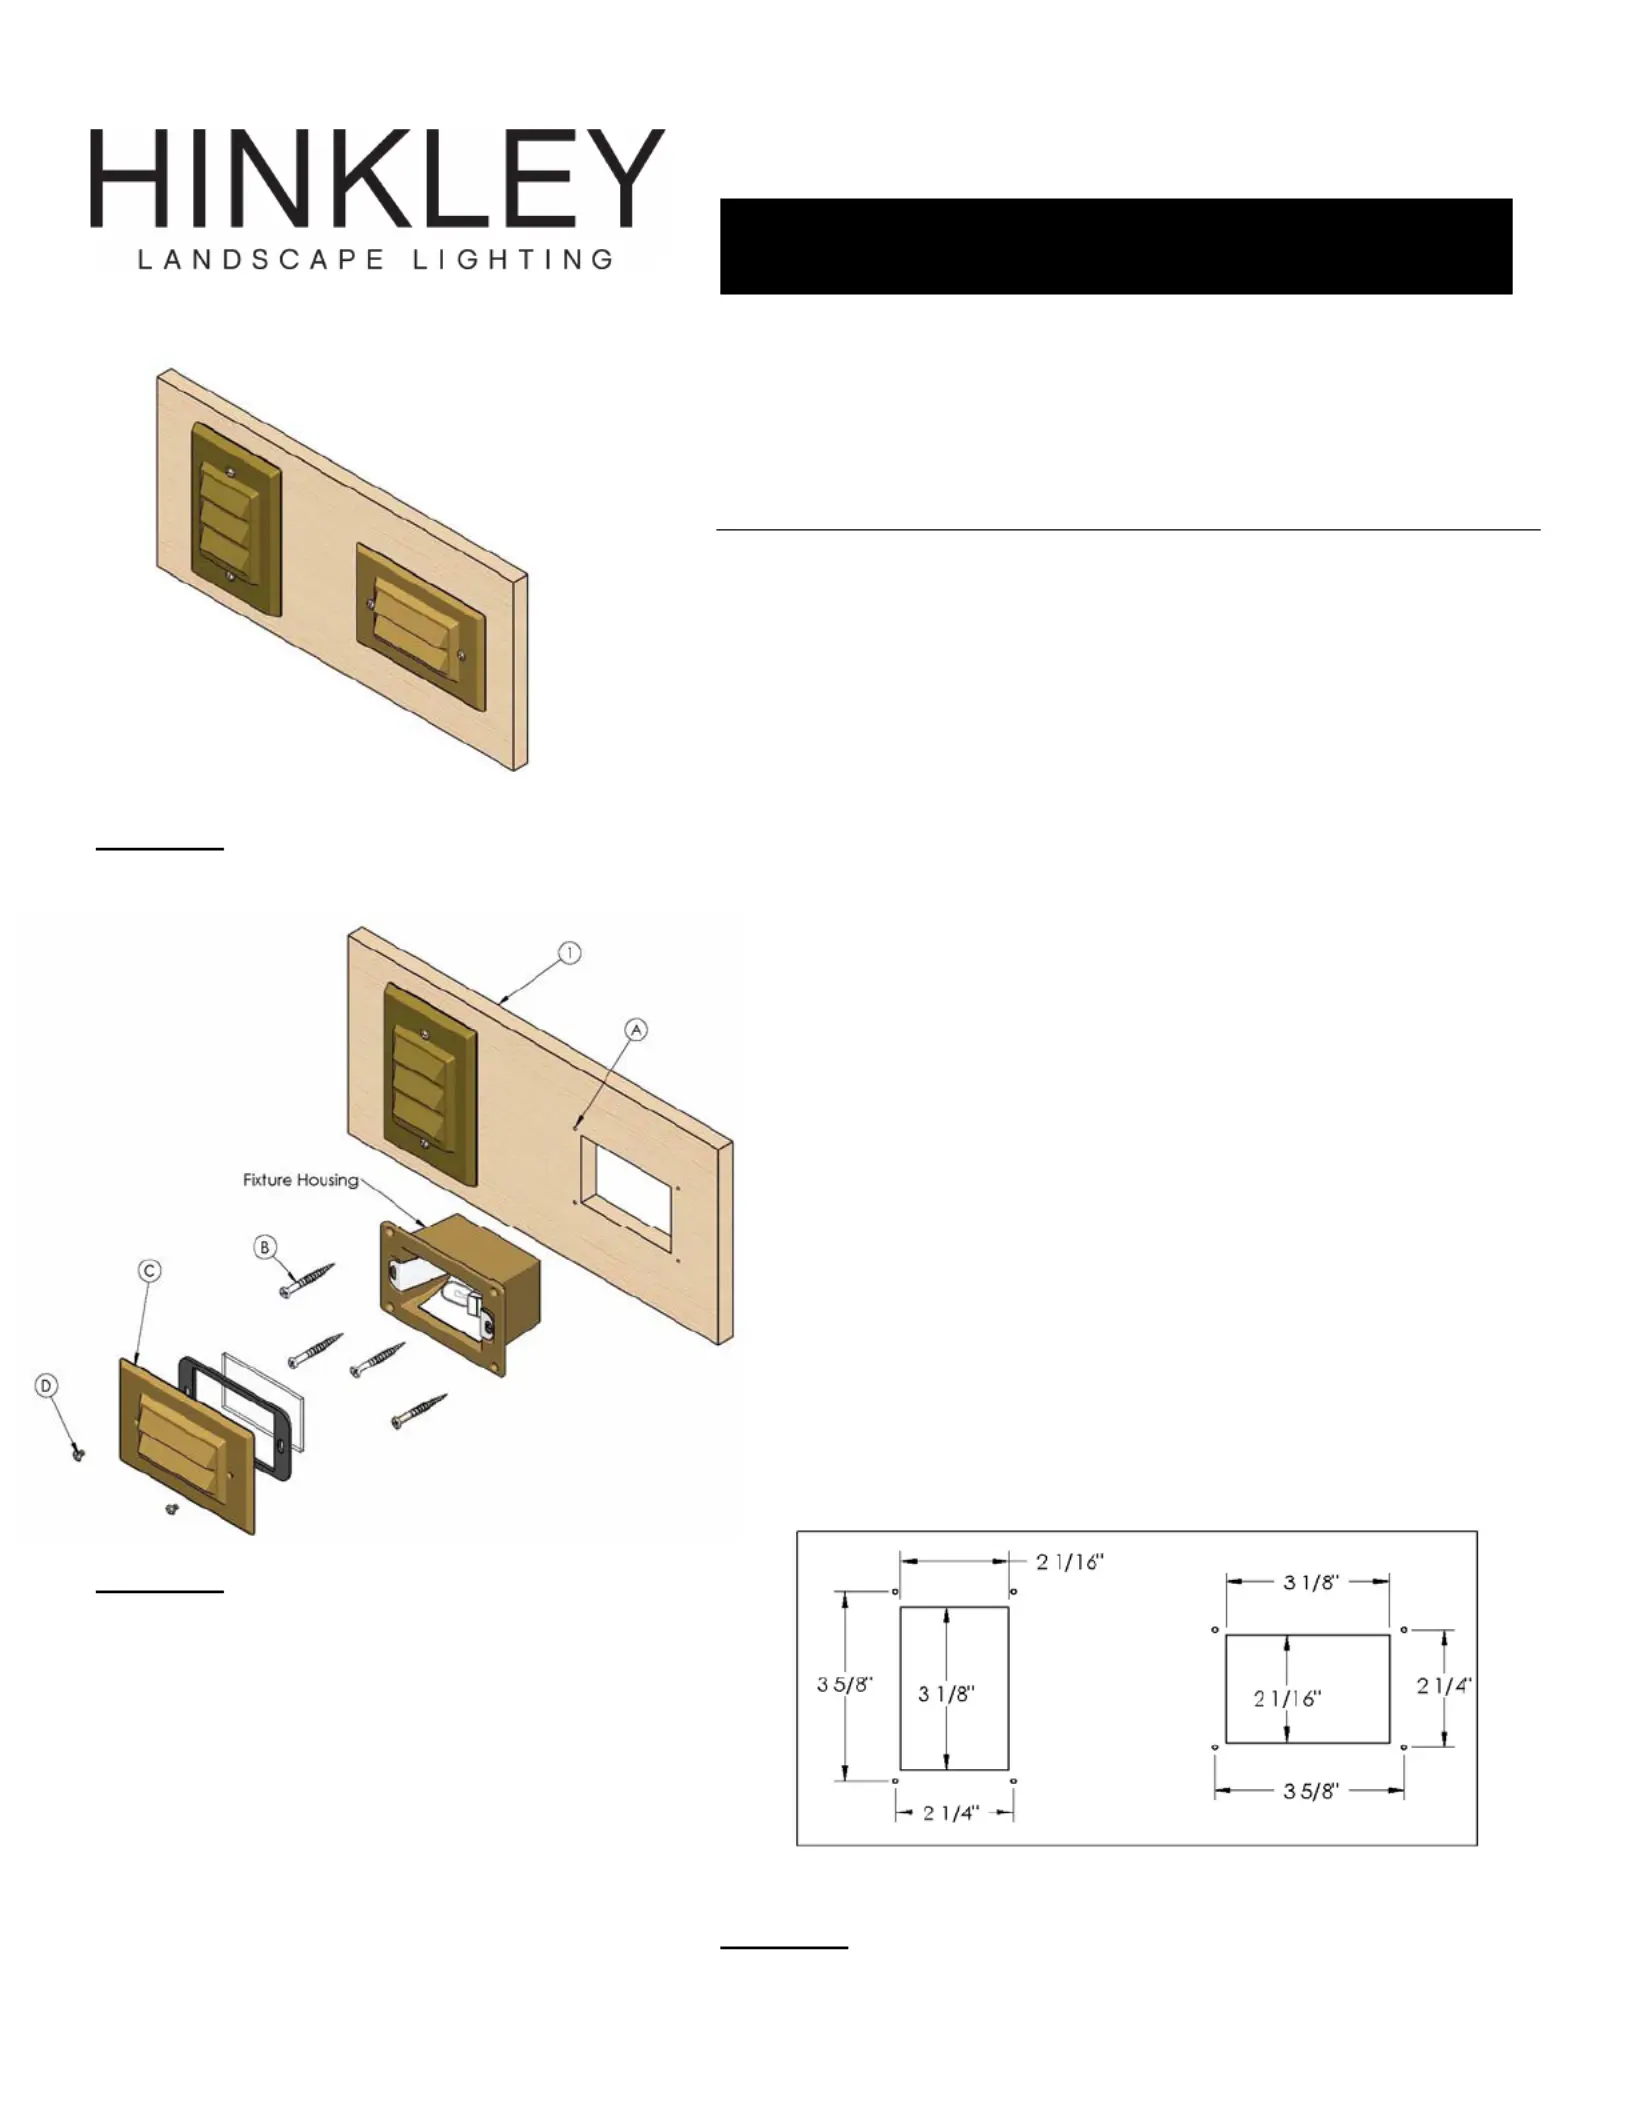
Family: 12v Series Deck LightItem No. 1542BZ/1546BZ
1.Locateandattatoareatobeill ) drilling template (page 2ch dred (1).
Drillfouringenononpla #39es pilot hol (A) accord to dimsis temte.
2.Cut3-1/8”ng2-1/16”decenerngorureoung a lo x wi t opien f fixt hsi.
Referncee (not to scale). Draw 3ing
3. E a wiring let ad to NEC tc c. nsurelliscompedccoringelecrialodeMake
appopronupreingecraedorriate wire cnections to sply wi us conntors t f
thedesiedtion. r loca
4.Slifixtusembtoenngndattchusifour de re asly in opi a a ng No8 x 1”
long w rews(B)oodsc(not provided).
5.Youstallhempinure may now in t la to fixt.
6. Attach fixture face u us the ped (C)tohosingingsupliNo8-32 Philips
hews )eascrd (Dd with fture. proviedix
Hole orientat in mti surface ionounng
for 1542B Z for 1546BZ
Drawing 3(not to scale)
Mounting Instructions
Produktspezifikationen
| Marke: | Hinkley Lighting |
| Kategorie: | Beleuchtung |
| Modell: | 1542BZ |
Brauchst du Hilfe?
Wenn Sie Hilfe mit Hinkley Lighting 1542BZ benötigen, stellen Sie unten eine Frage und andere Benutzer werden Ihnen antworten
Bedienungsanleitung Beleuchtung Hinkley Lighting

13 Februar 2026
8 Februar 2026
6 Februar 2026
5 Februar 2026
5 Februar 2026
29 Juli 2025
28 Juli 2025
28 Juli 2025
28 Juli 2025
Bedienungsanleitung Beleuchtung
Neueste Bedienungsanleitung für -Kategorien-
1 April 2026
1 April 2026
1 April 2026
1 April 2026
1 April 2026
1 April 2026
1 April 2026
1 April 2026
1 April 2026
1 April 2026