Kuzco Copenhagen EP48232 Bedienungsanleitung
Kuzco Beleuchtung Copenhagen EP48232
Lies die bedienungsanleitung für Kuzco Copenhagen EP48232 (1 Seiten) kostenlos online; sie gehört zur Kategorie Beleuchtung. Dieses Handbuch wurde von 2 Personen als hilfreich bewertet und erhielt im Schnitt 4.0 Sterne aus 5 Bewertungen. Hast du eine Frage zu Kuzco Copenhagen EP48232 oder möchtest du andere Nutzer dieses Produkts befragen? Stelle eine Frage
Seite 1/1
19054 28th Avenue Surrey, BC Canada V3S 6M3
T: 604 538 7162 TF: 1-855 85 KUZCO F: 604 538 7196
W: kuzcolighting.com
20160414
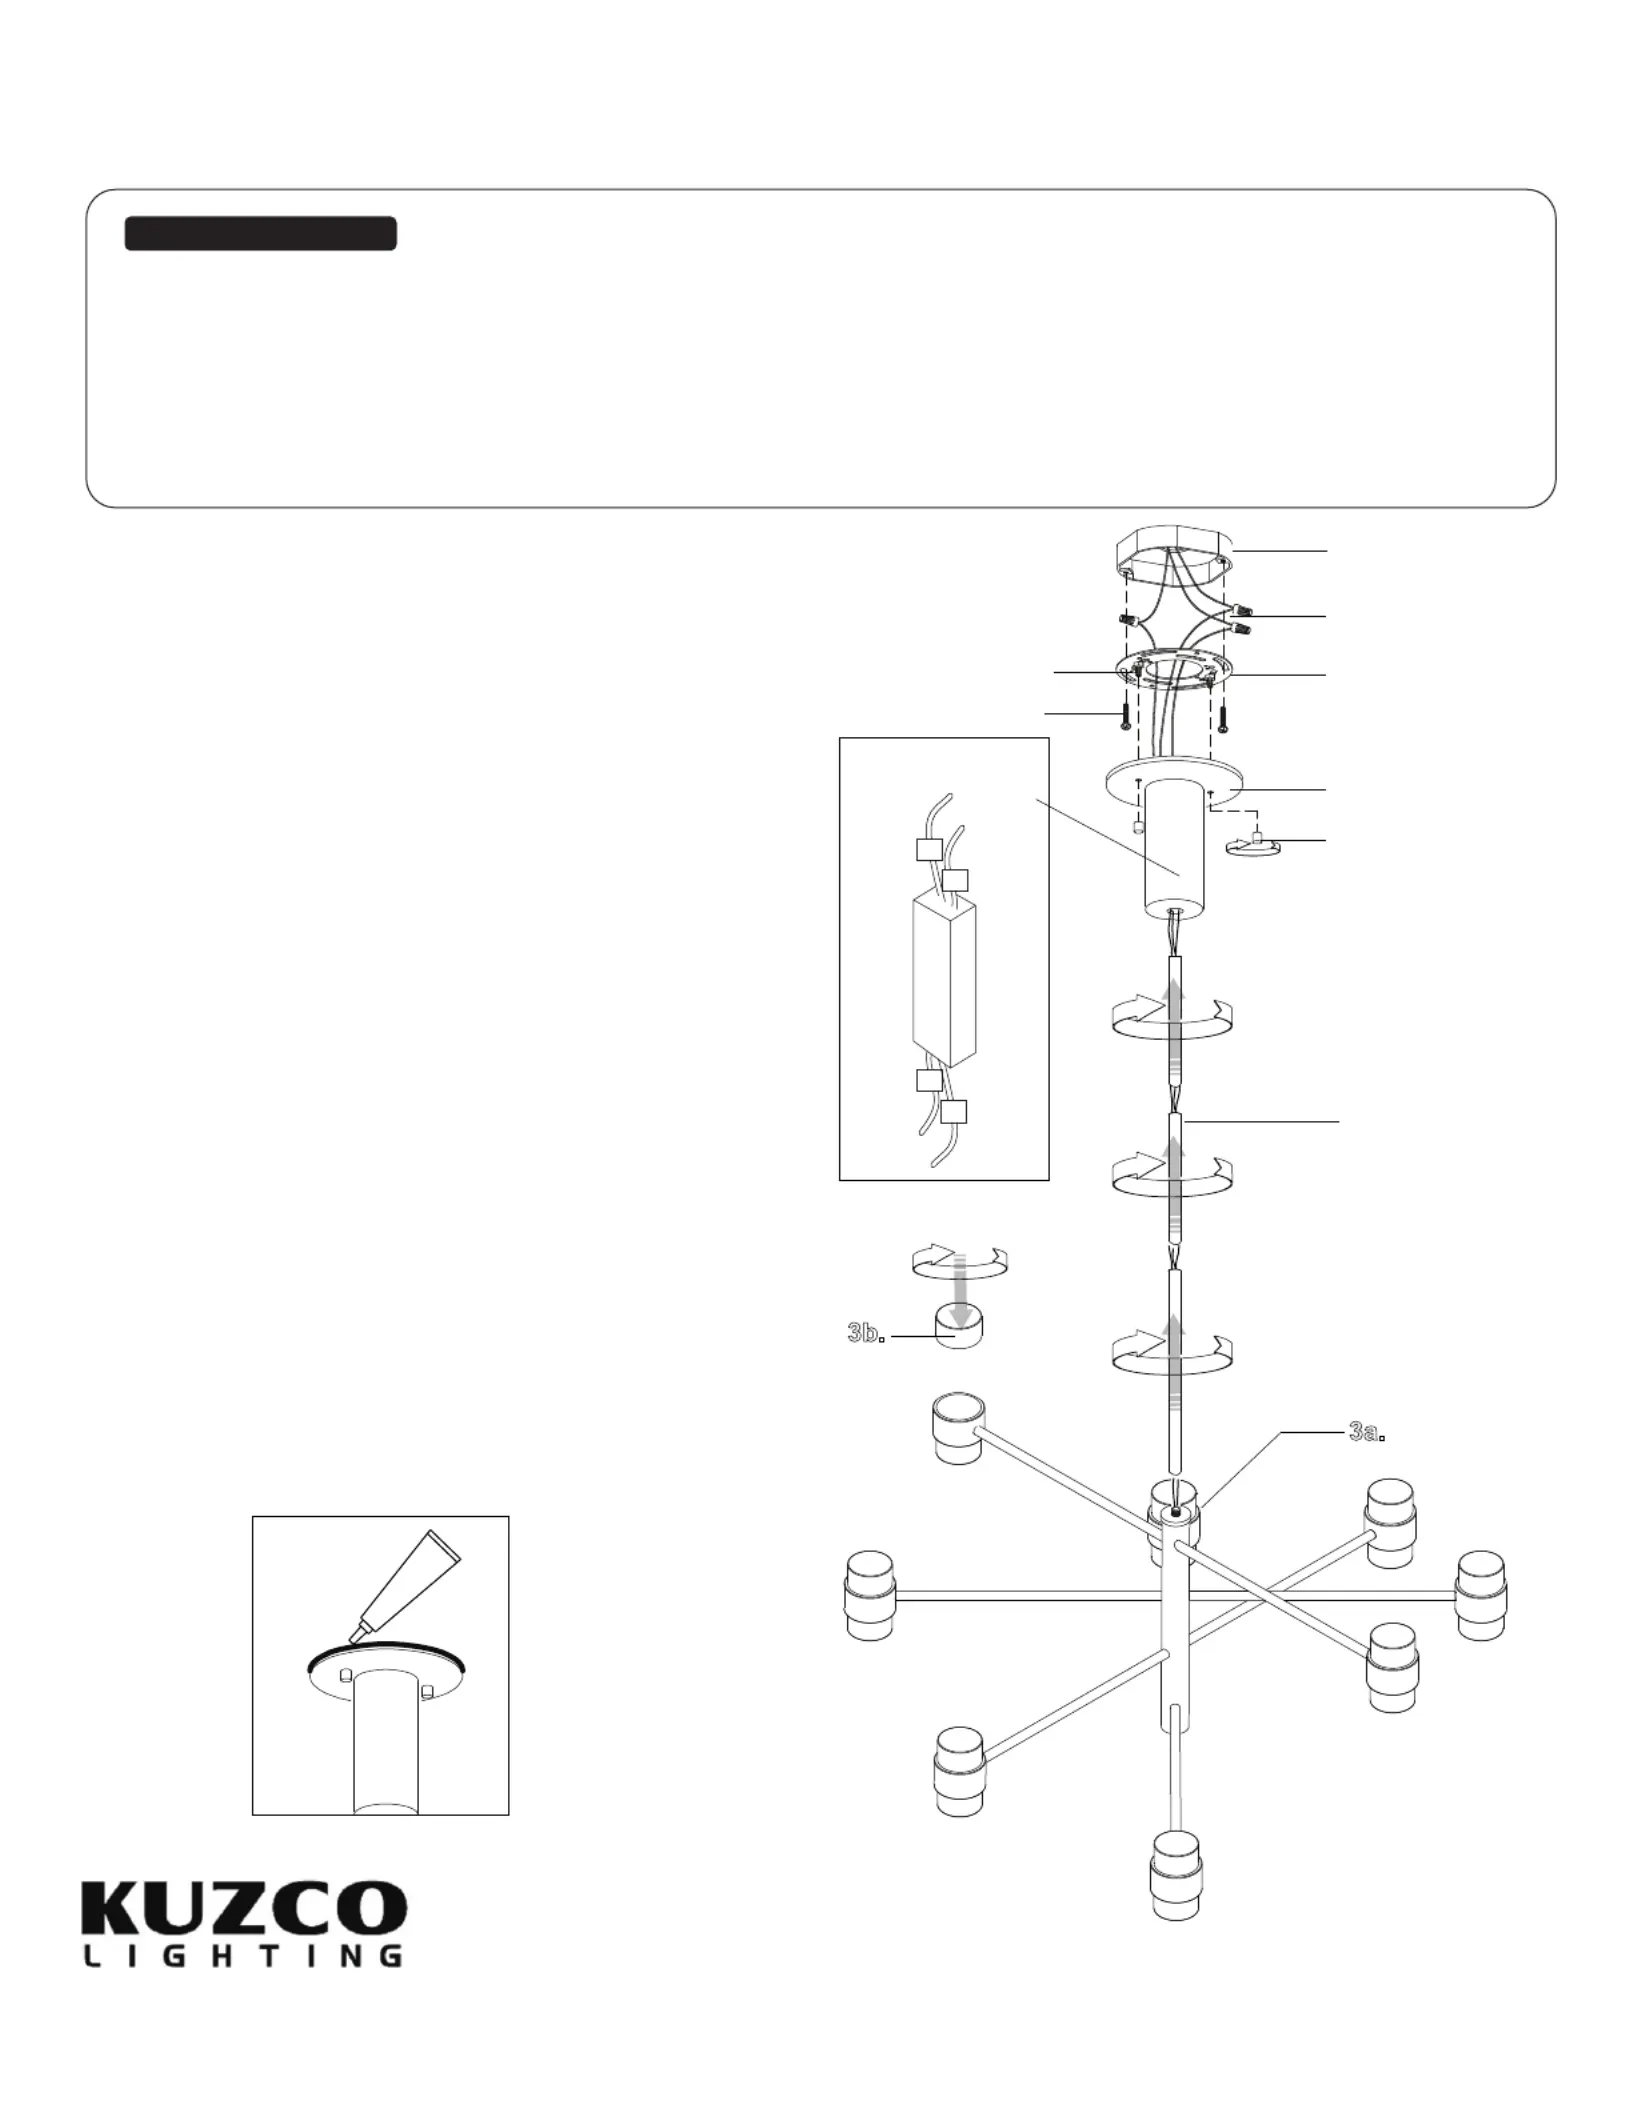
2a.
You have now completed the installation of your fixture,
enjoy.
You are now ready to mount the canopy to the (2a)
mounting plate connect all wires correctly G (1c). First
ground to ground, N neutral wire (white to white), L live
wire (black to black) with provided marettes from the (1b)
hardware package. Align the holes in the canopy (2a) to
the threaded screws hanging downward from the (1d)
mounting plate . Push the canopy up towards the (1c)(2a)
ceiling so the two screws clears through the hole in (1d)
the canopy . You can now screw on the decorative (2a)
nuts (2b) onto the threaded studs.
1a.
1b.
2b.
1e.
3a.
1c.
1d.
Remove the fixture from its original packaging. Remove the
mounting plate from within the canopy by remov(1c)(2a)-
ing the decorative nuts . Secure the mounting plate (2b)
(1c)(1a) to the junction box with the screws (1e) provided
in the hardware package.
INSTALLATION SHEET
EP48232
LED Exterior Pendants
START FROM HERE
•
Make sure power is completely off at the fuse box.
•
Have your fixture installed by a qualified licensed electrician
•
Prepare everything in a clear area.
•
Wear gloves at all times during this installation.
•
Read instructions carefully before you start assembly.
•
Keep this instruction sheet for future reference.
Technical Support: 1-877-452-6858
1.
3.
Please Note:
•All Kuzco LED fixtures come with pre-wired LED module(s).
• Unless instructed to do so, please do not touch any part of the LED module(s) as any
unnecessary contact with the module could cause permanent damage.
• For dimming, an ELV (Electronic Low Voltage) type of dimmer is required.
2c.
Attach the rods to the pendant by threading in (2c)(3a)
clockwise until it is secured. Connect the rods and pendant
to the canopy by threading clockwise. (If the input wires
from the driver are too long, please cut accordingly as
an option). Connect the live (black) and neutal (white)
wires onto the DC Driver Connect all (See Illustration 2).
the glass to the pendant by threading in clockwise. (3b)(3a)
(Do not over tighten.)
2.
Illustration 1
3b.
V+
V-
To prevent moisture from entering the outlet box and
causing a short, seal around the top perimeter between
the fixture and the surface with weather resistant caulking
(See Illustration 1).
4.
Caulking
5.
+
-
DC
Driver
Illustration 2
+
-
+
-
V+
V-
Produktspezifikationen
| Marke: | Kuzco |
| Kategorie: | Beleuchtung |
| Modell: | Copenhagen EP48232 |
Brauchst du Hilfe?
Wenn Sie Hilfe mit Kuzco Copenhagen EP48232 benötigen, stellen Sie unten eine Frage und andere Benutzer werden Ihnen antworten
Bedienungsanleitung Beleuchtung Kuzco

20 Februar 2026
20 Februar 2026
20 Februar 2026
20 Februar 2026
20 Februar 2026
19 Februar 2026
19 Februar 2026
19 Februar 2026
19 Februar 2026
19 Februar 2026
Bedienungsanleitung Beleuchtung
Neueste Bedienungsanleitung für -Kategorien-
20 Februar 2026
20 Februar 2026
19 Februar 2026
19 Februar 2026
19 Februar 2026
19 Februar 2026
19 Februar 2026
19 Februar 2026
19 Februar 2026
19 Februar 2026