Optex WXS-AM Bedienungsanleitung
Optex
Bewegungsmelder
WXS-AM
Lies die bedienungsanleitung für Optex WXS-AM (12 Seiten) kostenlos online; sie gehört zur Kategorie Bewegungsmelder. Dieses Handbuch wurde von 8 Personen als hilfreich bewertet und erhielt im Schnitt 3.8 Sterne aus 4.5 Bewertungen. Hast du eine Frage zu Optex WXS-AM oder möchtest du andere Nutzer dieses Produkts befragen? Stelle eine Frage
Seite 1/12

Caution
EN
Manufacturer’s statement
2
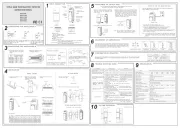
INSTALLATION INSTRUCTIONS
No.59-2820-0 1906-07
Quick Reference
Introduction
1
FR
Introduction
DE
Einleitung
IT
Introduzione
ES
Introducción
PT
Introdução
NL
Inleiding
FR
Déclaration du fabricant
DE
Herstellererklärung
IT
Dichiarazione del costruttore
ES
Declaración del fabricante
PT
Declaração do fabricante
NL
Mededeling van de fabrikant
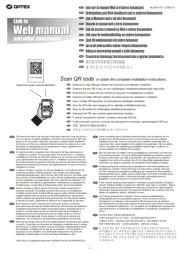
Full information, with multilanguage, available in;
http://navi.optex.net/manual/50276
• This “Quick Reference” is the part of the entire installation
instructions that guides the installation procedures for installers.
Get the full information with multi-language of the installation
instructions in the web site.
If you need a guide to the operation of the whole system,
please consult your installer of the entire system.
•
•
• Cette “Quick Reference” est la partie des instructions
d’installation entières qui guide les procédures d’installati
on pour
les installateurs.
• Obtenez les informations complètes avec multi-langue des
instructions d’installation dans le site Web.
• Si vous avez besoin d’un guide pour le fonctionnement du
système dans son ensemble, s’il vous plaît consulter votre
installateur de l’ensemble du système.
• Dieses “Quick Reference” ist der Teil der gesamten
Installationsanweisungen, die die Installationsverfahren für
Installateure führt.
• Holen Sie sich die vollständige Information mit mehrsprachiger
der I
nstallationshinweise in der Website.
• Wenn Sie einen Leitfaden für den Betrieb des Systems als
Ganzes benötigen, wenden Sie sich bitte an Ihren Installateur
des gesamten Systems.
• Questa “Guida rapida” è la parte di tutto il istruzioni di
installazione che guida le procedure di installazione per gli
installatori.
• Ottenere le informazioni complete con il multi-linguaggio delle
istruzioni di installazione nel sito web.
• Se occorre una guida per il funzionamento del sistema nel suo
complesso, cons
ultare l’installatore dell’intero sistema.
• Este “Referencia rápida” es la parte de la totalidad de las
instrucciones de instalación que guía los procedimientos de
instalación para los instaladores.
• Obtener la información completa con multi-idioma de las
instrucciones de instalación en el sitio web.
• Si necesita una guía para el funcionamiento del sistema en su
conjunto, por favor consulte a su instalador de todo el sistema.
• Este “Referência Rápida” é parte de toda as instruções de
instala
ção que orienta os procedimentos de instalação para os
instaladores.
• Obter as informações completas com multi-idioma das
instruções de instalação no web site.
• Se você precisa de um guia para a operação do sistema como
um todo, por favor consulte o seu instalador de todo o sistema.
• Deze “Snelle referentie” maakt deel uit van de totale
installatieaanwijzingen die de installateur door de
installatieprocedures leiden.
• Krijg de volledige meertalige informatie van de
installatieaanwijzingen van de websi
te.
• Als u richtlijnen nodig hebt over de werking van het gehele
systeem, raadpleeg dan de installateur van het gehele systeem.
EN
IT
ES
PT
NL
FR
DE
2.0 m
(6′8″)
0.8 - 1.2 m
(2′7″-4′)
Parallel
Tilt
FR
Avertissement
DE
Warnung
IT
Avvertenza
ES
Aviso
PT
Aviso
NL
Waarschuwing
EN
Prohibition
FR
Interdiction
DE
Verbot
IT
Divieto
ES
Prohibición
PT
Proibição
NL
Verbod
Recommendation
Recommandation
Empfehlung
Raccomandazione
Recomendación
Recomendação
Aanbeveling
FR
Attention
DE
Vorsicht
IT
Attenzione
ES
Precaución
PT
Cuidado
NL
Voorzichtig
WXS-AM: Standard anti-masking model
WXS-DAM-X5: +Microwave detection (10.525 GHz)
180 degree PANORAMIC OUTDOOR DETECTOR
180 degree PANORAMIC OUTDOOR DETECTOR
WX Shield series
WX Shield series
WIRED MODEL
High mount
Low mount
<WXS-DAM only>
Do not overlap the detection area of
each when two or more WXS-DAMs
are installed close together.
Warning

2
Installation
3
<Accessories>
FR
Accessoires
DE
Zubehör
IT
Accessori
ES
Accesorios
PT
Acessórios
NL
Accessoires
FR
Installation
DE
Installation
IT
Installazione
ES
Instalación
PT
Instalação
NL
Installatie
FR
DE
IT
Descrizione delle parti
ES PT
NL
Cover unit
FR
Unité de couverture
DE
Abdeckungseinheit
IT
Unità di copertura
ES
Unidad de cubierta
PT
Unidade de tampa
NL
Afdekkingseenheid
Base unit
FR
Unité de base
DE
Grundeinheit
IT
Unità base
ES
Unidad base
PT
Unidade base
NL
Basiseenheid
<Options>
FR
Options
DE
Optionen
IT
Opzioni
ES
Opciones
PT
Opçóes
NL
Opties
Mounting screw (4 × 20 mm) x 2
FR
Vis de montage
DE
Befestigungsschraube
IT
Viti di montaggio
ES
Tornillo de montaje
PT
Parafuso de montagem
NL
Bevestigingsschroef
3-2. Before mounting
FR
Avant l’montage
DE
Vor der montage
IT
Prima del’ montaggio
ES
Antes de la montaje
PT
Antes da montagem
NL
Voor de montage
1
4
3
2
3-3. Mounting
FR
Montage
DE
Montage
IT
Montaggio
ES
Montaje
PT
Montagem
NL
Bevestiging
Wall mount
FR
Montage mural
DE
Wandmontage
IT
Montaje a parete
ES
Montagem en pared
PT
Montagem na parede
NL
Wandmontage
Plug-in EOL [PEU]
FR
Brancher sur EOL
DE
Abschlusswiederstand
IT
Fine linea (EOL) a innesto
ES
Plug-in EOL
PT
Plug-in EOL
NL
Insteek-EVL
Unlock
Back box [WXI-BB]
FR
Arrière du boiter
DE
Back-Box
IT
Scatola posteriore
ES
Caja trasera
PT
Caixa posterior
NL
Achterkant van de kast
Pole mount plate [PMP-01]
FR
Plaque de montage sur poteau
DE
Pfosten Montageplatte
IT
Base di montaggio su palo
ES
Soporte de montaje en poste
PT
Placa de montagem para poste
NL
Paal montageplaat
Main unit
FR
Unité principale
DE
Haupteinheit
IT
Unità principale
ES
Unidad principal
PT
Unidade principal
NL
Hoofdeenheid
Lock screw (3 × 12 mm) x 1
Vis de blocage
DE
Verriegelungsschraube
IT
Vite di bloccaggio
ES
Tornillo de bloqueo
PT
Parafuso de tipo trava
NL
Borgschroef
Area masking plate [MKP-01]
(For exceeded areas beyond the accessories)
FR
Plaque de masquage
DE
Flächenmaskierungsplatte
IT
Piastra per mascheratura di area
ES
Placa de enmascaramiento de área
PT
Placa de mascaramento para a área
NL
Area masking plate
FR
FR
DE
IT
ES
PT
NL
3-1. Parts identifications
Identification des pieces Teile-identifikatioon
Identificación de los partes
Identificaão de peças Identificatie onderdelen
FR
Remove the lock screw if it is used.
Retirez la vis de blocage si elle est utilisée.
Entfernen Sie die Sicherungsschraube, falls verwendet.
Rimuovere la vite di bloccaggio se utilizzata.
Retire el tornillo de seguridad si se usa.
Remova o parafuso de travamento se está sendo usado.
Verwijder de borgschroef indien gebruikt.
NOTE
FR
DE
IT
ES
PT
NL
EN
Area masking plate [MKP-01] x 5
FR
Plaque de masquage
DE
Flächenmaskierungsplatte
IT
Piastra per mascheratura di area
ES
Placa de enmascaramiento de área
PT
Placa de máscara de área
NL
Area masking plate
Blue
Les éléments clés pour les réglages sont colorés en bleu.
Wichtige Teile für Einstellungen sind blau markiert.
Le parti chiave per le impostazioni sono colorate in blu.
Las partes clave para la configuración están coloreadas en azul.
As partes principais das configurações são coloridas em azul.
De belangrijkste onderdelen voor de instellingen zijn blauw gekleurd.
Key parts for settings are colored in blue.
FR
DE
IT
ES
PT
NL
Blue
Blue
3
Remove a spacer made of paper.
Do not touch the MW sensor unit.
Blue
Low mount
High mount
9.0 m fixed
(30’ )
2.0 m fixed
(6’ 7”)
NOTE
Select either "Low" or "High" for mounting before starting.
Sélectionnez "Low" ou "High" pour le montage avant de commencer.
Wählen Sie entweder "Low" oder "High" für die Montage vor dem Start.
Selezionare "Low" o "High" per il montaggio prima dell'avvio.
Seleccione "Low" o "High" para el montaje antes de comenzar.
Selecione "Low" ou "High" para montar antes de iniciar.
Selecteer "Low" of "High" om te monteren voordat u begint.
FR
DE
IT
ES
PT
NL
EN
Detection area
Mounting height
2.5 to 12 m
(8’ to 40’ )
0.8 to 1.2 m
(2’ 7” to 4’ )
Rear side
Blue
Produktspezifikationen
| Marke: | Optex |
| Kategorie: | Bewegungsmelder |
| Modell: | WXS-AM |
Brauchst du Hilfe?
Wenn Sie Hilfe mit Optex WXS-AM benötigen, stellen Sie unten eine Frage und andere Benutzer werden Ihnen antworten
Bedienungsanleitung Bewegungsmelder Optex
3 August 2025
3 August 2025
25 Juni 2025
24 Juni 2025
24 Juni 2025
13 Juni 2025
12 Juni 2025
12 Juni 2025
12 Juni 2025
12 Juni 2025
Bedienungsanleitung Bewegungsmelder
- Gewiss
- Chuango
- Honeywell
- Ledvance
- Wentronic
- Niko
- Acme
- Marmitek
- Homematic IP
- Somfy
- Hager
- Velleman
- Berker
- EtiamPro
- Legrand
Neueste Bedienungsanleitung für -Kategorien-
6 August 2025
6 August 2025
3 August 2025
3 August 2025
3 August 2025
2 August 2025
2 August 2025
2 August 2025

31 Juli 2025
24 Juli 2025