PAC CP1-FRD2 Bedienungsanleitung
PAC Nicht kategorisiert CP1-FRD2
Lies die bedienungsanleitung für PAC CP1-FRD2 (3 Seiten) kostenlos online; sie gehört zur Kategorie Nicht kategorisiert. Dieses Handbuch wurde von 32 Personen als hilfreich bewertet und erhielt im Schnitt 4.1 Sterne aus 7 Bewertungen. Hast du eine Frage zu PAC CP1-FRD2 oder möchtest du andere Nutzer dieses Produkts befragen? Stelle eine Frage
Seite 1/3
© 2023 AAMP Global. All rights reserved. PAC is a Power Brand of AAMP Global.
PAC-Audio.com
C
Page 1
Rev: V1
Date: 021323
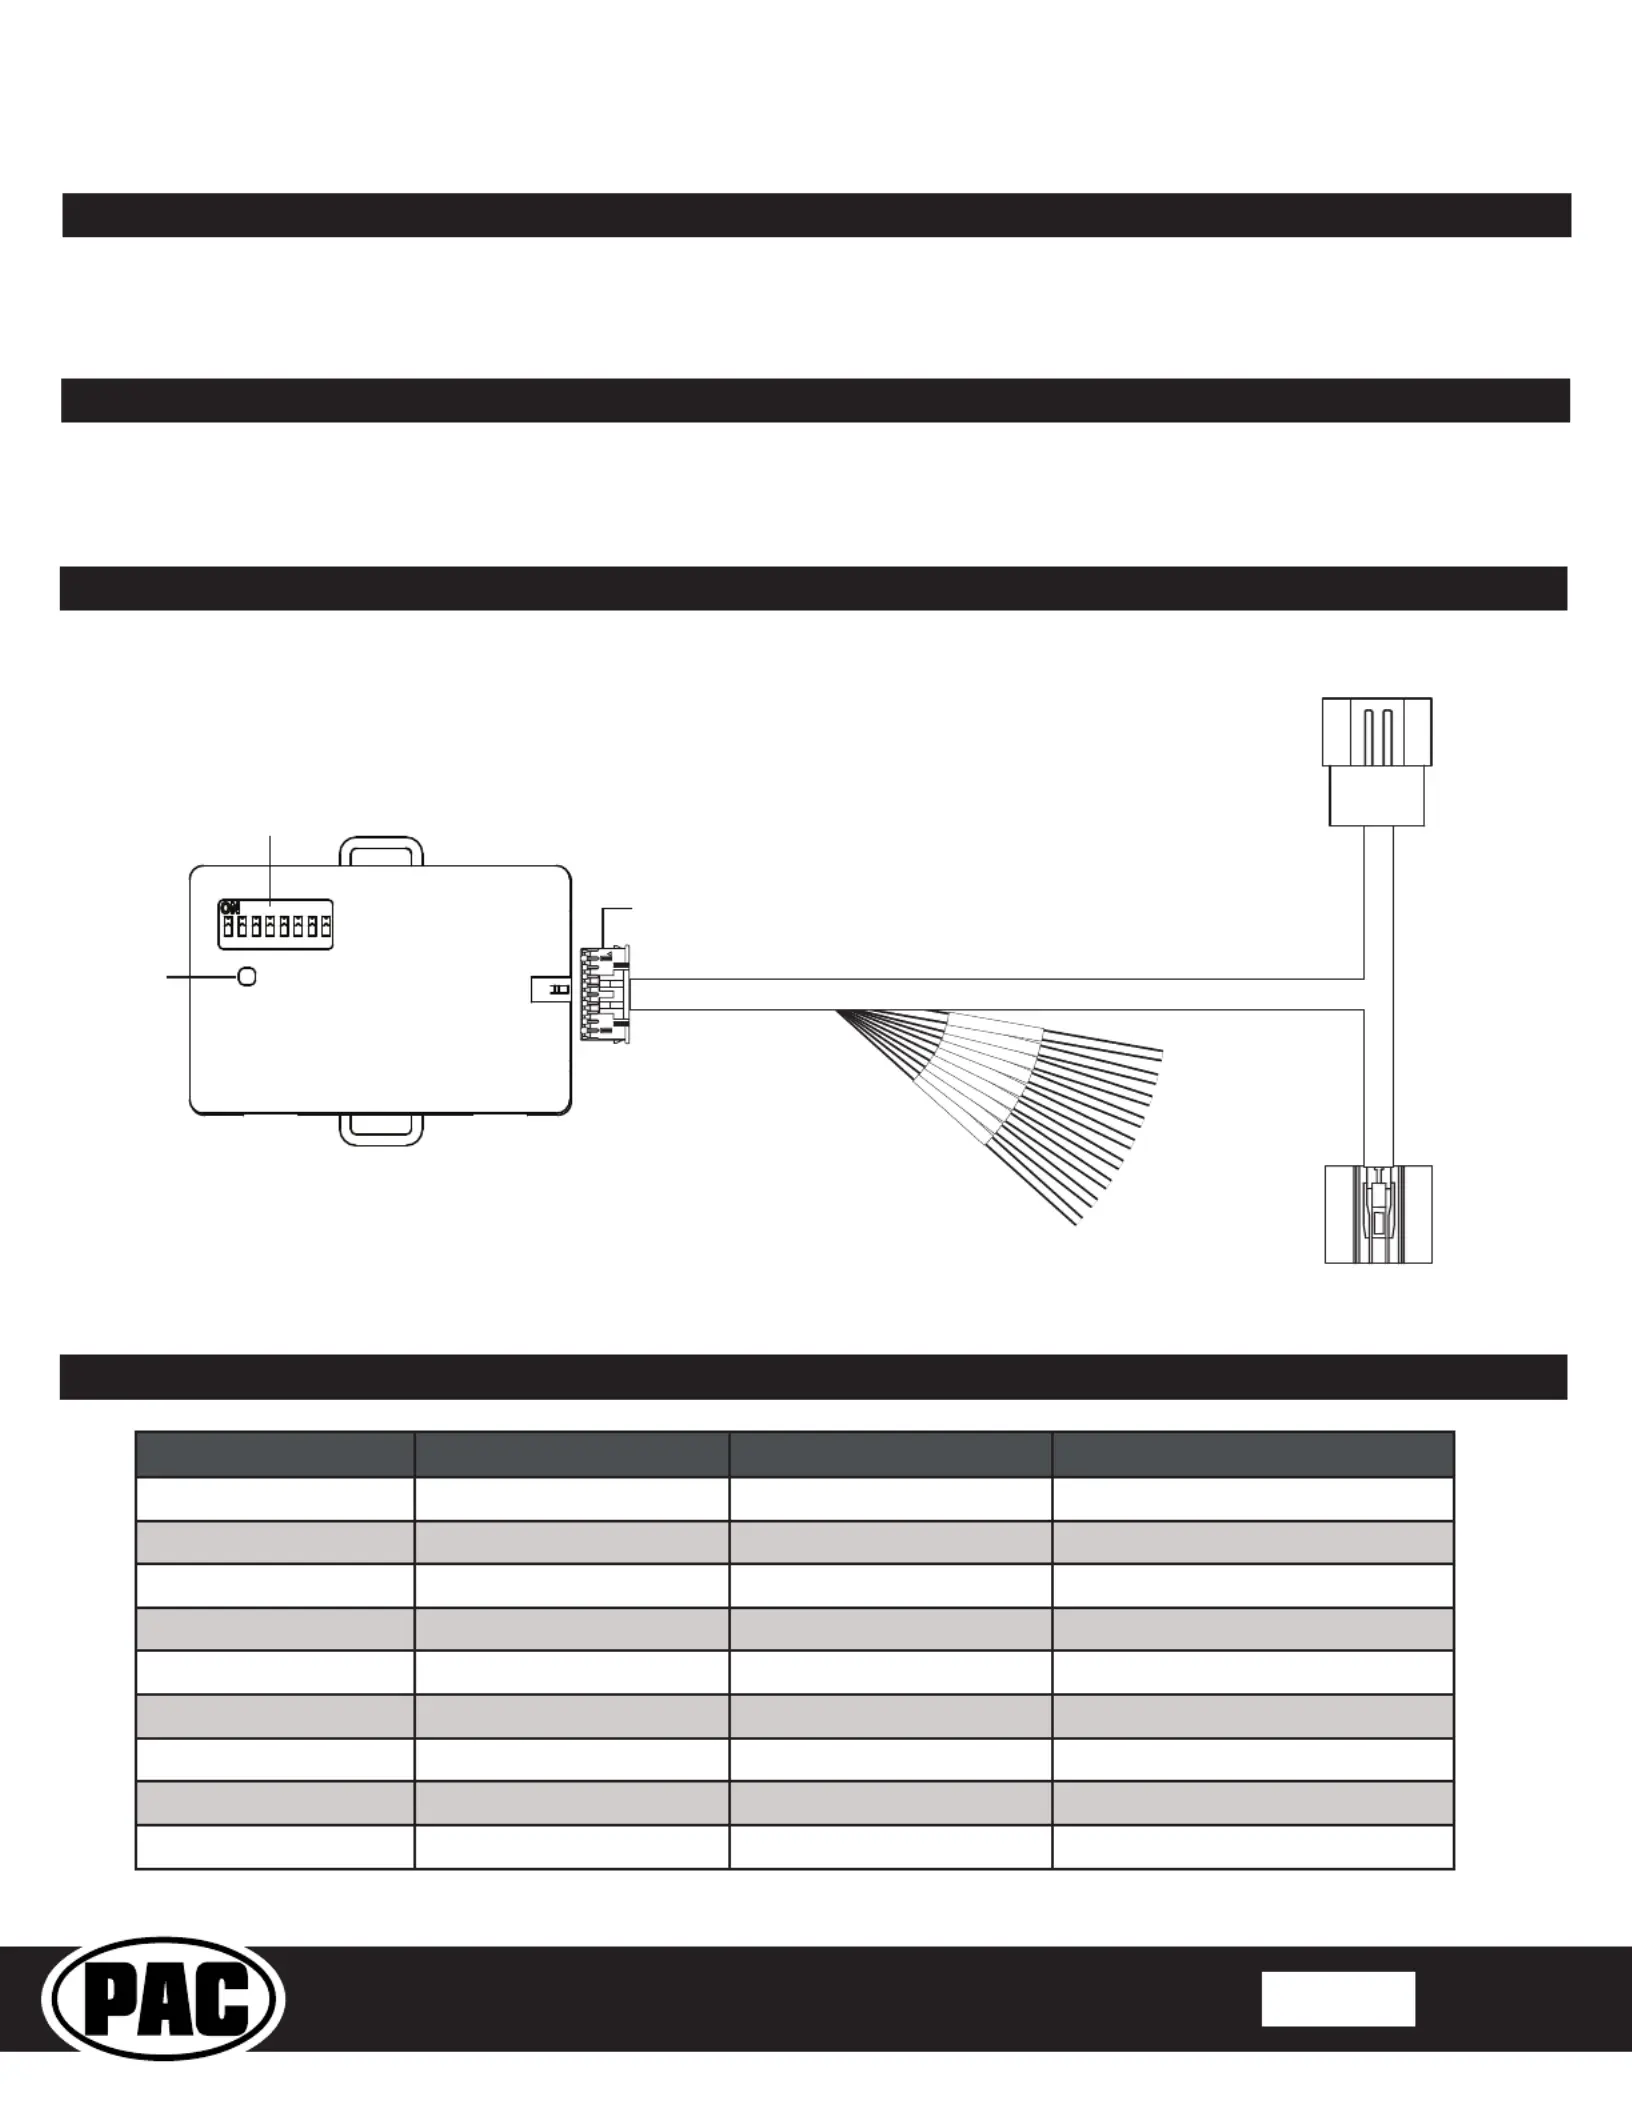
CANPRO Harness
for Select Ford Vehicles
CP1- FRD2
Output 8 Pos. 250mA
Output 7 Pos. 250mA
Output 6 Pos. 250mA
Output 5 Pos. 250mA
Output 4 Pos. 250mA
Output 3 Speed Pulse
Output2 Pos. 250mA
Output1 Pos. 250mA
Output 9 Neg. 250mA
The CP1-FRD2 is a factory matched plug & play harness for use with the CANPRO CP1-S CAN-Bus Interface Module for
select Ford Model applications that use a 24pin data harness for connection at the Gateway Module. The harness and
module allow a simple and safe way to access vehicle information, status and triggers from the CAN-Bus for a wide
range of aftermarket uses such as radar detectors, camera activation, sound system upgrades, lighting and more!
Introduction and Features
Important Notes
1. Any unused outputs should be insulated to prevent shorting.
2. The outputs of the CANPRO are low current (250mA) and require the use of a separate relay if additional current is required.
3. The vehicle should be in a resting state prior to opening connection to the 24pin Gateway data harness. See Installation note
for further information.
Wiring Connection Chart
Outputs
To Vehicle's
Gateway Module
To Factory
Harness
Description
Description
Description
DescriptionDescriptionPolarity
Polarity
Polarity
PolarityPolarityWire Color
Wire Color
Wire Color
Wire ColorWire Color
Output 1Accessory+ Positive (250mA)White-Red
Output 2Illumination+ Positive (250mA)Blue
Output 3Speed PulsePulseGreen-Black
Output 4
Reverse+ Positive (250mA)Violet-Black
Output 5Ignition*+ Positive (250mA)Yellow-Black
Output 6Left Turn Signal+ Positive (250mA)Red-Black
Output 7
Right Turn Signal+ Positive (250mA)Gray-Red
Output 8
High Beam+ Positive (250mA)Blue-Black
Output 9
Parking Brake- Negative (250mA)Brown-Black
Output Wires
1-9
DIP Switches
16pin
Interface
Connector
Status
LED
CANPRO CP1-S
* In Electric Vehicles, Output 5 provides a positive output when the vehicle is in a “Ready to Drive” state.
Produktspezifikationen
| Marke: | PAC |
| Kategorie: | Nicht kategorisiert |
| Modell: | CP1-FRD2 |
Brauchst du Hilfe?
Wenn Sie Hilfe mit PAC CP1-FRD2 benötigen, stellen Sie unten eine Frage und andere Benutzer werden Ihnen antworten
Bedienungsanleitung Nicht kategorisiert PAC

10 August 2025
9 August 2025
9 August 2025
9 August 2025
9 August 2025
11 Juli 2025
11 Juli 2025
11 Juli 2025
10 Juli 2025
10 Juli 2025
Bedienungsanleitung Nicht kategorisiert
Neueste Bedienungsanleitung für -Kategorien-
3 April 2026
3 April 2026
3 April 2026
3 April 2026
3 April 2026
3 April 2026
3 April 2026
3 April 2026
3 April 2026
3 April 2026