American Audio Image 250 Bedienungsanleitung
American Audio
Nicht kategorisiert
Image 250
Lies die bedienungsanleitung für American Audio Image 250 (4 Seiten) kostenlos online; sie gehört zur Kategorie Nicht kategorisiert. Dieses Handbuch wurde von 3 Personen als hilfreich bewertet und erhielt im Schnitt 4.7 Sterne aus 2 Bewertungen. Hast du eine Frage zu American Audio Image 250 oder möchtest du andere Nutzer dieses Produkts befragen? Stelle eine Frage
Seite 1/4

User Instructions
American DJ
4295 Charter Street
Los Angeles Ca. 90058
www.americandj.com
Customer Support:
American DJ provides a toll free customer support line, to provide set ®
up help and to answer any question should you encounter problems
during your set up or initial operation. You may also visit us on the web
at www.americandj.com for any comments or suggestions. For service
related issue please contact American DJ . Service Hours are Monday ®
through Friday 9:00 a.m. to 5:00 p.m. Pacic Standard Time.
Voice: (800) 322-6337
Fax: (323) 582-2610
E-mail: support@americandj.com
To purchase parts online visit http://parts.americandj.com
Warning! To prevent or reduce the risk of electrical shock or re, do
not expose this unit to rain or moisture.
Caution! There are no user serviceable parts inside this unit. Do not
attempt any repairs yourself, doing so will void your manufactures war-
ranty. In the unlikely event your unit may require service please contact
American DJ.
PLEASE recycle the shipping carton when ever possible.
Safety Issues: This unit may blow a fuse if the maximum allotted
load of 5 amps is reached. If the fuse needs replacement, always
replace the fuse with same exact type that was remove, unless oth-
erwise instructed by an authorized American DJ service technician. ®
Use of a different type fuse from that which is recommended may
cause fire or electric shock and will void the manufactures warranty.
Image 250™ Unpacking
© ®American DJ Supply - www.americandj.com - Image 250™ Instruction Manual Page 2
Image 250™ Introduction
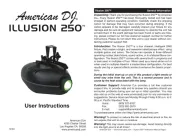
Thank you for purchasing the Image 250™ by American DJ®. Every
Image 250™ has been thoroughly tested and has been shipped in
perfect operating condition. Carefully check the shipping carton for
damage that may have occurred during shipping. If the carton appears
to be damaged, carefully inspect your unit for any damage and be sure
all equipment necessary to operate the system has arrived intact. In
the event damage has been found or parts are missing, please contact
our toll free customer support number for further instructions. Please
do not return the unit to your dealer without rst contacting customer
support.
Rev. 10/07

Introduction: Thank you for purchasing the Image 250™ by American
DJ . For your convenience the Image 250™ has been lamped and is ®
ready to be used, there is no assembly necessary. There are 7 gobos,
1 instlalled, and 6 seperate. This unit includes a hanging bracket and
may be hung or set on a flat surface. For best results, use a fog or
haze machine to enhance the beam output. Please read the following
instructions before installing or operating your new Image 250.™
Operating Instructions: Plug the unit in to a matching power outlet
or into a power pack. Light output will be immediate when the unit is
powered on. You can reverse the wheel using the switch in back.You
can also adjust the speed by turning the knob located on the rear of
the unit.
Mounting: When used with included mounting bracket, this unit may
be mounted in any safe position or set on a flat stable surface.
Caution! Be sure not to obstruct cooling vents and keep this unit in a
well ventilated area. Never open the unit while in use. Avoid touching
the lamps, the lamp will get extremely hot under normal usage and
may cause serious injury.
Image 250™ Operation
Please carefully read and understand the instructions in this manual
thoroughly before attempting to operate this unit. These instructions
contain important safety information regarding the use and mainte-
nance of this unit. Please keep this manual with the unit, for future
reference.
Image 250™ General Instructions
Image 250™ Precautions
• Keep the outside of this device dry at all times. Do not spill water
or other liquids into or on to your unit. To prevent re or shock
hazard, do not expose this product to rain or moisture.
• Be sure to save the packing carton in the event you may have to
return the unit for service.
• This unit is designed for interior use only. Do not use this unit out
doors. Use of product outdoors will void the warranty.
• Be sure that the local power outlet match that of the required vol-
tage for your unit.
• Do not attempt to operate this unit if the power cord has been
frayed or broken.
• Always route your power cord out of the way of foot trafc.
• Do not attempt to remove or break off the ground prong from the
electrical cord. This prong is used to reduce the risk of electrical
shock and re in the rare case of an internal short.
• Disconnect the unit’s main power when left unused for long peri-
ods of time.
• Always be sure to mount this unit in an area that will allow proper
ventilation. Allow about 6” (15cm) between this device and a wall.
• Never block the ventilation holes.
• Do not attempt to operate this unit, if it becomes damaged in any
way.
• Never operate this unit when it’s cover is removed.
• This unit is for adult use only. Keep out of the reach of children.
Due to fog residue, smoke, and dust cleaning the internal and exter-
nal optical lenses must be carried out periodically to optimize light
output.
1. Use normal glass cleaner and a soft cloth to wipe down the out-
side casing.
2. Use a brush to wipe down the fan grill.
3. Clean the external optics with glass cleaner and a soft cloth every
20 days.
4. Clean the internal optics with glass cleaner and a soft cloth every
30-60 days.
5. Always be sure to dry all parts completely before plugging your
unit back in.
Cleaning frequency depends on the environment in which the fixture
operates (I.E. smoke, fog residue, dust, dew).
Image 250™ Cleaning
© ®American DJ Supply - www.americandj.com - Image 250™ Instruction Manual Page 4© ®American DJ Supply - www.americandj.com - Image 250™ Instruction Manual Page 3

© ®American DJ Supply - www.americandj.com - Image 250™ Instruction Manual Page 5
Image 250™ Warranty Registration
The Image 250™ carries a 1 year limited warranty. We recommend
you fill out the enclosed warranty card to validate your purchase. All
returned service items whether under warranty or not, must be freight
pre-paid and accompany a return authorization (R.A.) number. If the
unit is under warranty, you must provide a copy of your proof of pur-
chase invoice. Please contact American DJ customer support for a ®
R.A. number.
© ®American DJ Supply - www.americandj.com - Image 250™ Instruction Manual Page 6
Image 250™ Breaker Reset
Image 250™ Lamp Replacement
Lamp Replacement: Caution! Never open the unit while in use.
Always disconnect the main power before attempting to replace the
lamps. Allow the unit ample time to cool before replacing lamps
1. Be sure to follow the proper procedures when handling halogen
bulbs.
2. Locate the lamp cover on the bottom of unit. Remove the two
thumb screw that hold lamp cover in place.
3. Remove the lamp cover to expose the lamp/socket assembly.
4. Gently remove and discard the bad lamp.
5. Insert the new lamp in the lamp/socket assembly.
6. Reassemble in reverse order.
Remember to always replace with the exact same type lamp and
fuse, unless otherwise specified by an authorized American DJ ®
service technician.
Breaker Reset: This unit is equipped with a safety breaker. This
breaker is designed to close the power circuit in the event of an inter-
nal short, reducing the risk of electric shock and fire. To reset the
breaker, push the breaker button in until you hear it pop back in to
place. If the breaker continues to pop, stop using the unit and con-
tact customer support the unit may require service.
This unit comes with a 53.5mm interchangable gobo. 6 dfferent
gobos are also included. Changing the gobo is a easy proce-
dure. Follow the instructions below.
Caution! Never open the unit when in use. Always disconnect
the main power before attempting to change the gobo.
Caution! Make sure you have given the unit enough time to cool
off, before doing this!
1. Unscrew the thumb screw located at the bottom rear of
the unit in front of the lamp comver. Slide the gobo holder
out of the unit.
2. Using a phillips screwdriver loosen the two top screws and
remove the bottom middle screw. You can now slide the
gobo out and slide another gobo into its place.
3. Change the gobo, and reassemble the unit.
Image 250™ Changing the Gobo
Image 250™ Halogen Lamp Warning
This fixture is fitted with halogen lamps which are highly suscep-
tible to damage if improperly handled. Never touch lamp with your
bare fingers as the oil from your hands will shorten lamp life. Also,
never move the fixture until the lamps have had ample time to cool.
Remember, lamps are not covered under warranty conditions.
Produktspezifikationen
| Marke: | American Audio |
| Kategorie: | Nicht kategorisiert |
| Modell: | Image 250 |
Brauchst du Hilfe?
Wenn Sie Hilfe mit American Audio Image 250 benötigen, stellen Sie unten eine Frage und andere Benutzer werden Ihnen antworten
Bedienungsanleitung Nicht kategorisiert American Audio
14 August 2025
14 August 2025
14 August 2025

14 August 2025
14 August 2025

14 August 2025
14 August 2025
14 August 2025

14 August 2025
14 August 2025
Bedienungsanleitung Nicht kategorisiert
- Chamberlain
- T WaveTree
- Browning
- Vello
- QUIO
- Morley
- Lantronix
- Pressalit
- FENECON
- ELTA Music
- Sightron
- Discover
- Movies To Go
- NUVO
- Ilford
Neueste Bedienungsanleitung für -Kategorien-
14 August 2025
14 August 2025

14 August 2025
14 August 2025

14 August 2025
14 August 2025
14 August 2025
14 August 2025

14 August 2025

14 August 2025