MeldaProduction MDrumLeveler Bedienungsanleitung


Lies die bedienungsanleitung für MeldaProduction MDrumLeveler (119 Seiten) kostenlos online; sie gehört zur Kategorie audio-software. Dieses Handbuch wurde von 2 Personen als hilfreich bewertet und erhielt im Schnitt 4.4 Sterne aus 1.5 Bewertungen. Hast du eine Frage zu MeldaProduction MDrumLeveler oder möchtest du andere Nutzer dieses Produkts befragen? Stelle eine Frage

Seite 1/119
MDrumLeveler
MDrumLeveler is a unique dynamics processor specifically designed for percussive materials, primarily drums, but it can be used on any
rhythmical audio. Similarly to compressor and expanders it manipulates level, but it works in quite a different manner. Traditional dynamic
processors detect levels of input samples and transform them depending on the transformation curve. This means that the gain is changing
on every sample. This can be very well used to shape the sound itself, but it is hard to make it transparent if, for example, you want to level
drum hits.
MDrumLeveler on the other hand analyzes the incoming audio and detects events (drum hits for example) in it. It then detects the level of
each event and transforms it in some way. The typical use is to even out drum hits. No drummer's performance is perfect, each hit has a
different velocity, and differences in levels are even exaggerated by the recording equipment. But there is a very high standard for
perfection in performances for most modern styles. Vocalists regularly use automatic tuner, drummers have MDrumLeveler now.
Basics of MDrumLeveler
MDrumLeveler is very easy to use, however for some specific materials, especially those with lots of leakage ("bleed") between drums the
work can get problematic. But it's different from what you know about compressors for example, so we need to start from the basics.
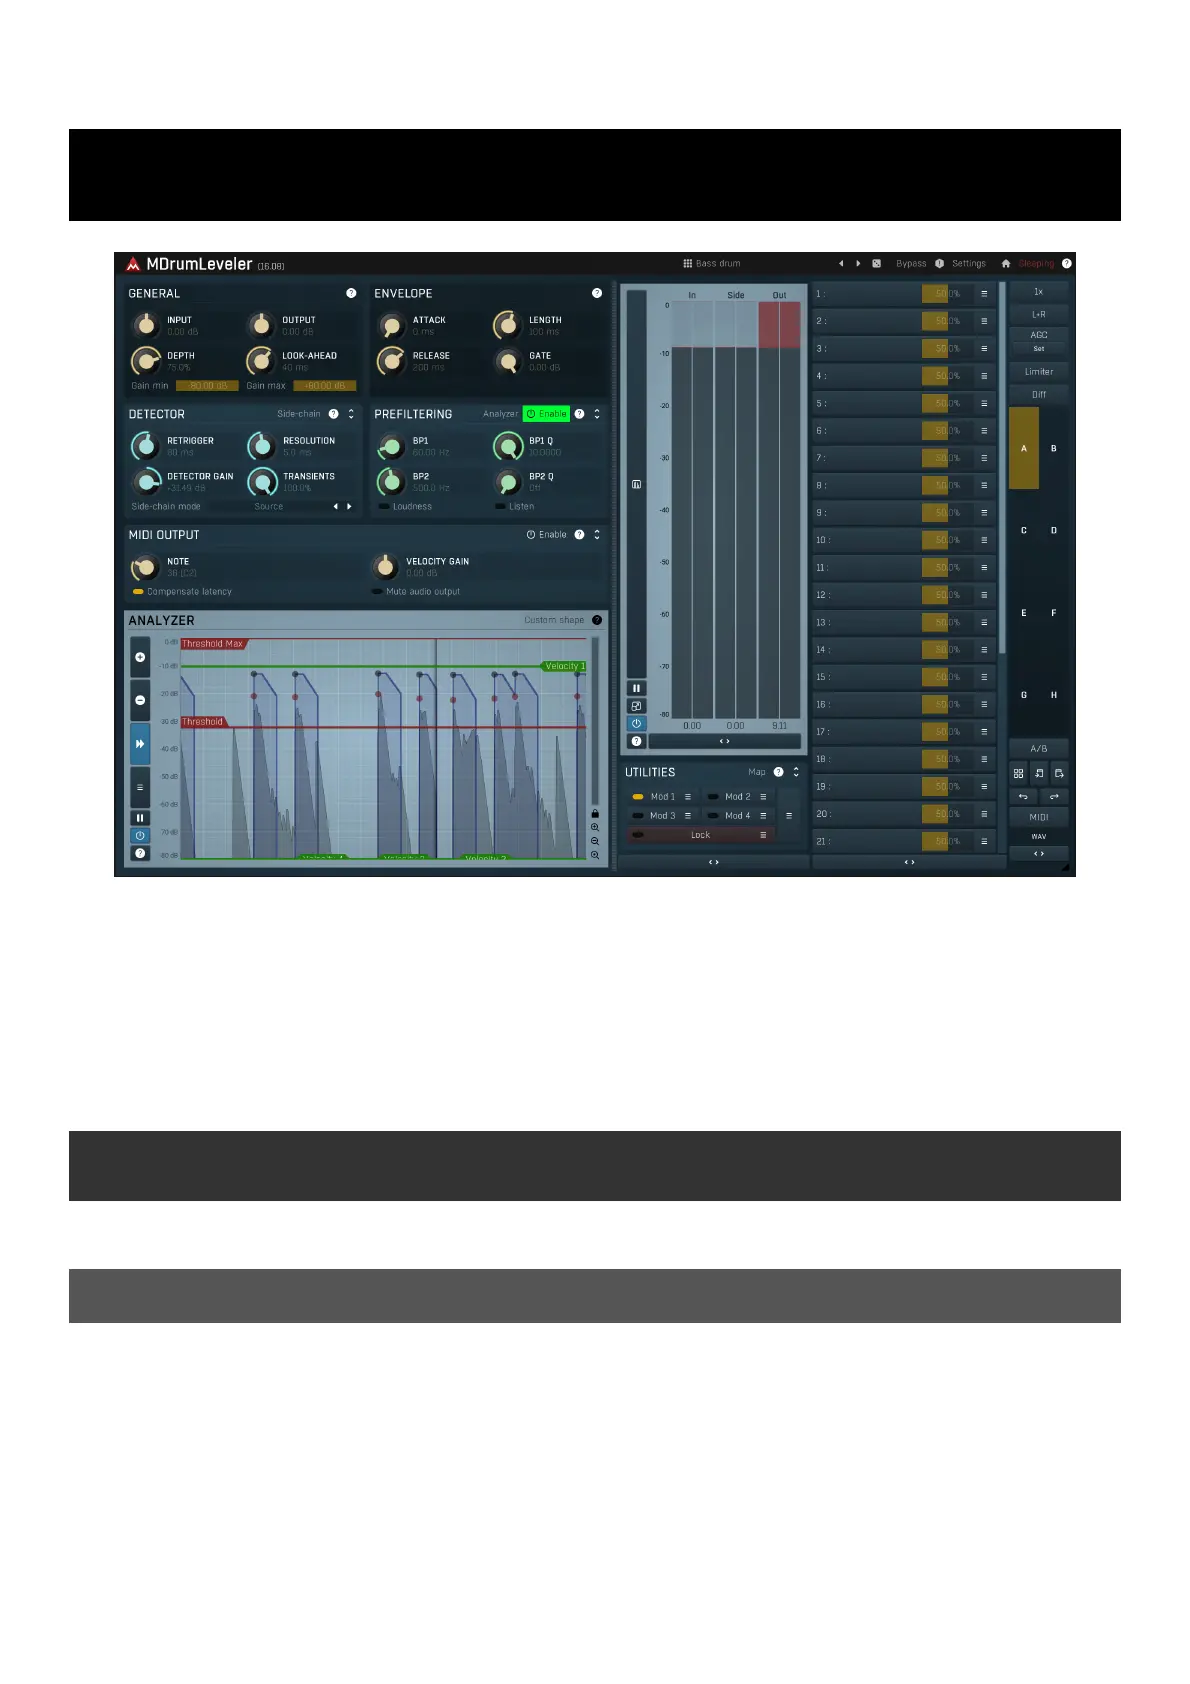
Event detection
Most of the settings can be made within the MDrumLeveler's analyzer. The first stage of the processing is event detection. An event can be
anything from a drum hit to a guitar strum. The detector is pre-processing the signal to to make it easier to distinguish these events. The
"detector signal" is displayed as a black graph in the analyzer and usually has the typical shape of a series of hills, each of which can be an
event.
Your first task is to set the red Threshold marker. Any hill reaching above the threshold will be considered an event. There is also a
Threshold Max marker, which controls the maximum level (height of the hill), but you'll rarely need this one.
Please note that the following assumes that the factory default colours are used for the graphs; they can all be changed, saved as presets
etc.
For every event the plugin draw 2 dots, a red one and a black one. The Red dot indicates the original (input) event level and the Black dot
is the calculated output event level. Note that these levels are not related to the black graph at all. The detector signal (black graph) is used
only for event detection and calculation of the event levels is a very different story. You don't need to think about it much, just don't be
concerned that the levels of dots and the black graph don't match.
The plugin tries to put output events at the levels indicated by the green Velocity markers and this is your second important thing to
setup. In most cases you'll be fine with just 1 velocity marker, the rest of them left in the bottom making them disabled. If the Depth is
100%, then each black dot (output event level) will be placed exactly at a velocity marker, so you could say that "every hit will have the
exact same velocity". That may result in quite a robotic performance, but since the level is not at all the only property of a drum hit, it can
actually sound quite natural, just "played by a perfect drummer". The lower the Depth, the less change towards the velocity marker is made,
the black dots will be somewhere between the red dots (original level) and the velocity marker (perfect level).
If there is just one velocity marker, the "perfect" level is obviously defined by this marker. But what if there is more than one? Then the
selected marker is the closest one above the event's red dot, or just the highest one if there are no more markers above it. But why would
you even use multiple markers? For example the lower marker can be for ghost notes and the higher marker for accented notes.
What happens to the events
So now you have the events detected using the threshold markers, the event levels are computed and the output levels are correctly
selected using the velocity markers. What happens to the events then? Gain, that's all, like with all dynamic processors. But the important
thing is that the gain is constant for the length of the event, so that there is no coloration of the events like it would be with compressors for
example. The drum hits will sound the same as before, just with different level. If you want it to be transparent of course.
For each detected event an attack-length-release envelope is started. Attack is usually 0ms, because the plugin smartly detects the
beginning of each event, so that there is no need for a fade-in. Length controls the time the gain stays the same and should cover the
main body of the drum hit. Finally the Release stage brings the gain back to normal. Use these parameters to shape the sound. If you want
it to be transparent, use longer Length and Release.
There's one more interesting parameter - Gate. This controls the "normal" gain applied between the events. This provides an exceptionally
accurate and smart gate you can use to remove the ambience and leakage from other microphones for example. And for this you may
actually not use any velocity markers, so that the plugin will only be a gate and won't change the levels of the events at all.
The typical scenario
You simply want to improve the performance by making the hits similar in level and remove the leakage from other instruments, so you
have the "pure" track. That's necessary for modern tight mixes and very hard to accomplish with standard tools such as compressors and
gates. So here's the plan:
1. Insert the plugin on the track you are processing.
2. Set the threshold marker so that only the events you want to process are detected. If you are not sure, set Gate to -40dB, so that the
plugin kills everything except for the detected events.
3. Fix the envelope parameters if needed. First set Gate to -40dB, so the settings are easier to hear. In most cases the defaults should
work just fine, but for example hi-hat may need shorter Length or Release or both, otherwise bleed from other drums will start kicking in
after the hit. Conversely toms may need longer Length or Release or both, otherwise the plugin may kill the hits before they actually end
and that may sound unnatural. Set the Gate back to 0dB when finished.
4. Set the velocity marker(s) and Depth. This depends on what you want, but let's start with the simple scenario when the drummer's
performance is not to be very dynamic, which is a typical case for contemporary music. So set Depth to 100% for starters and just use one
velocity layer and place it about at the highest red dot level. Then if you move it up, the plugin starts working kind of like an expander
highlighting the events against the background noise and leakage (that's usually desired). Conversely when you put it lower, it will start
compressing the loud events. Feel free to play with the velocity layers, there is no good or bad setting. When finished, set the Depth so that
it sounds good and still natural (if you aim for a natural sound of course).
5. Set the Gate. The events should now be processed well, so it's just a question of what to do with the ambience and leakage between
the them. For acoustic music you may need to keep it at 0dB, as the ambience is part of these styles. For contemporary music you may
need as clean and tight sound as possible, so just move the Gate down until it sounds the way you want. Typically -6dB to -10dB seems
fine.
Targeting the processor to specific drum hits
When your drum kit is well recorded without much leakage, the job is easy. But recording drums is generally the most problematic exactly
because it is never perfect. And to make the plugin work well, you need to make it detect the right hits. So let's go through some typical
scenarios.
Bass drum
Bass drum is usually easy enough. A microphone is placed from the back (not the beater), usually inside. That avoids most leakage. If there
is some, use a band-pass filter in the (Prefiltering panel) with some pretty low frequency, say 50Hz and rather a low Q. Most other
drums are not emitting anything below 100Hz, so this should do the trick just fine. If you need it, you can use a higher Q, but it may
resonate too slowly, so the detector signal may be too lazy. Therefore always try to use lower Q if possible.
If you used some nonstandard approach or used several microphones, e.g. one from the front, which can pick-up a lot of snare sound,
make at least one of the microphones work well and use this side-chain trick for those which cannot be fixed : All of the microphones are
recording the same performance, so first use MAutoAlign to get them in phase (you should do that anyway) and then send the "good"


Produktspezifikationen

Marke: MeldaProduction
Kategorie: audio-software
Modell: MDrumLeveler

Brauchst du Hilfe?

Wenn Sie Hilfe mit MeldaProduction MDrumLeveler benötigen, stellen Sie unten eine Frage und andere Benutzer werden Ihnen antworten


Bedienungsanleitung audio-software MeldaProduction

Bedienungsanleitung audio-software

Neueste Bedienungsanleitung für -Kategorien-