MeldaProduction MDynamicEQ Bedienungsanleitung
MeldaProduction audio-software MDynamicEQ
Lies die bedienungsanleitung für MeldaProduction MDynamicEQ (32 Seiten) kostenlos online; sie gehört zur Kategorie audio-software. Dieses Handbuch wurde von 23 Personen als hilfreich bewertet und erhielt im Schnitt 4.6 Sterne aus 8 Bewertungen. Hast du eine Frage zu MeldaProduction MDynamicEQ oder möchtest du andere Nutzer dieses Produkts befragen? Stelle eine Frage
Seite 1/32
MDynamicEq
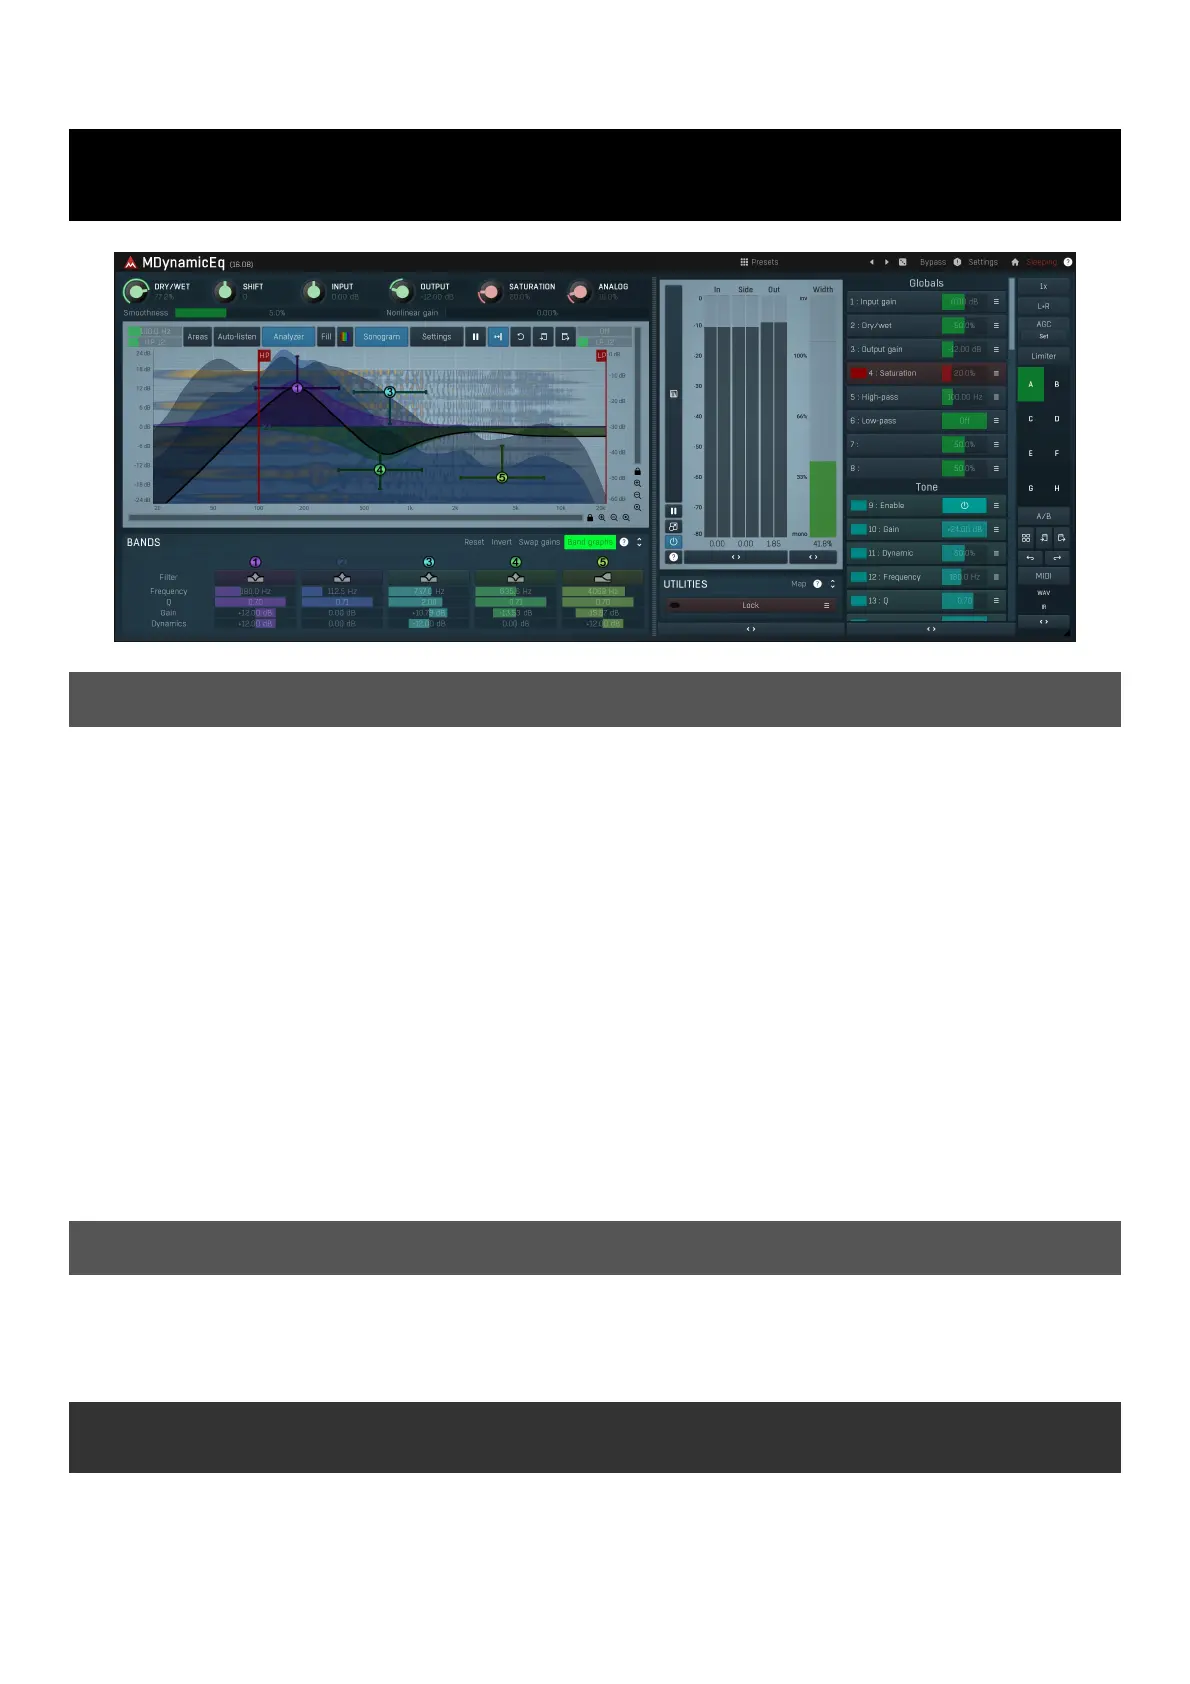
Overview
Dynamics processors, such as compressors and expanders, dynamically manipulate the overall level of the audio material. Equalizers change
the spectral character of the audio, statically. Multiband processors, such as MDynamicsMB, can do both, but they are often complex tools
and can be potentially destructive if not used properly. MDynamicEq and MAutoDynamicEQ plugins represent a revolutionary bridge between
both worlds. They manipulate the spectral character, and also react to input levels. Both plugins are very similar, but MAutoDynamicEq has
some additional functionality. If a feature is different or not available in MDynamicEq, it will be noted within the description.
At first glance MAutoDynamicEq looks similar to our other parametric equalizers. However each band also has dynamic settings, often
named dynamic gain as the main parameter is controlled by the vertical bar. Double-click on the bar to set it to its default 0dB value, which
makes the band work as a normal static equalization band. Dragging the bar will change its value and the band will now start changing
according to input levels.
By specifying a negative dynamic gain, for example -6dB, the band starts moving downwards. The higher the input level is, the lower the
dynamic gain will be, but it will never exceed -6dB. Therefore this works like a compressor, but affecting only the part of the spectrum
controlled by the band.
By selecting a positive dynamic gain, for example +6dB, the band starts moving upwards. The higher the input level is, the higher the
dynamic gain will be, but it will never exceed +6dB. Therefore this works like an expander, but affecting only the part of the spectrum
controlled by the band.
Another way to think about this is: a very low input level will be equalized by the Gain value for the band; a very high input level will be
equalized by the (Gain + Dynamics Gain) value; and all levels in between.
The Band Settings
Each equalization band has a separate level processor, so this plugin is effectively many separate dynamic processors! The frequently-used
settings are displayed / changeable in the equalization graph area on in the band list. If you do not see them, expand the Bands panel. All
the settings for the band are on the Band Settings window, which is displayed by right clicking the band number on the equalization graph or
in the band list.
Now, how is the level measured?
You can select the source to measure, the band signal or a side-chain, it can be filtered by the band filter or a configurable band-pass filter
first, the responsiveness can be tailored by an envelope follower and it can be adjusted by a transformation curve.
Looking at the Dynamics panel: A side-chain input can be used with the band; just click the side-chain button to enable it.
Each band can react either to the input signal as set, or to a filtered signal (filtered by the same filter and settings as selected for the band).
For example, if a low-shelf filter is used, that filter affects the low frequencies. It's a reasonable assumption (and it is set by default), that
Produktspezifikationen
| Marke: | MeldaProduction |
| Kategorie: | audio-software |
| Modell: | MDynamicEQ |
Brauchst du Hilfe?
Wenn Sie Hilfe mit MeldaProduction MDynamicEQ benötigen, stellen Sie unten eine Frage und andere Benutzer werden Ihnen antworten
Bedienungsanleitung audio-software MeldaProduction

25 August 2025
24 August 2025
24 August 2025
24 August 2025
24 August 2025
24 August 2025
24 August 2025
24 August 2025
24 August 2025
24 August 2025
Bedienungsanleitung audio-software
Neueste Bedienungsanleitung für -Kategorien-
25 März 2026
24 März 2026
24 März 2026
23 März 2026
23 März 2026
23 März 2026
23 März 2026